To enable Single Sign-On (SSO) using an organization-managed Identity Provider (IdP) in a Vue instance, first create a web server OpenID Connect (OIDC) application. The steps below outline how to configure this in Azure Entra ID and Okta.
After completing the setup, contact the assigned Customer Success Advisor (CSA) to schedule a switch-over call. This ensures a smooth transition with minimal disruption to end users.
Azure Entra ID
1. Create the Application
To enable Azure AD authentication, create an Enterprise Application:
Navigate to the Azure Portal and go to Enterprise Applications.
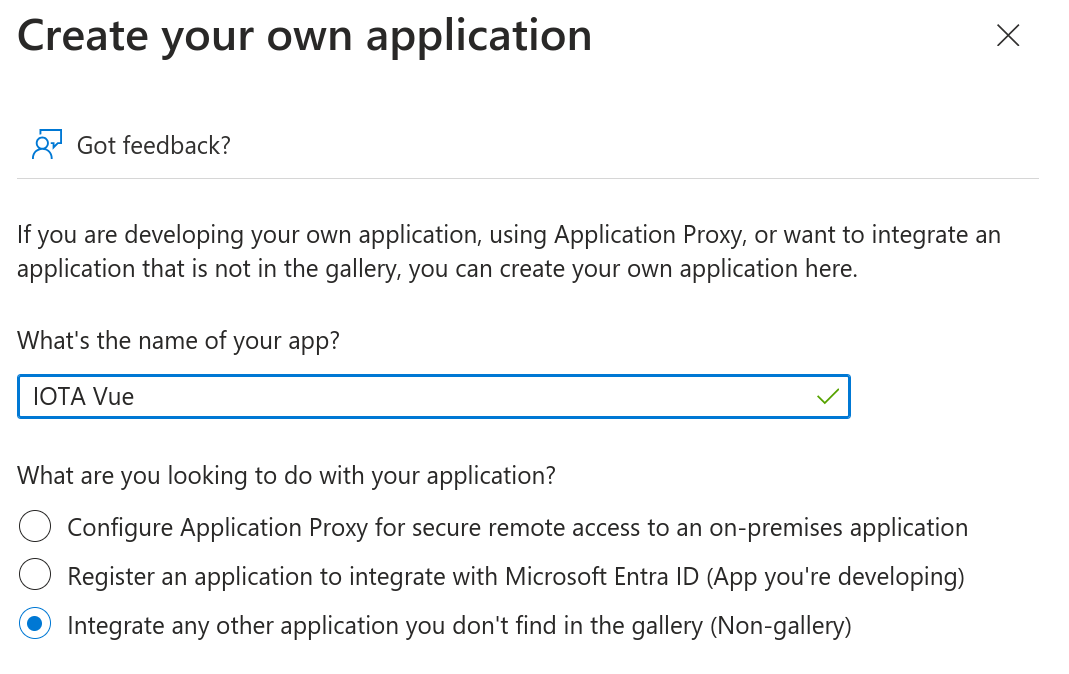
Select + New application → + Create your own application.
Enter a name for the application and select Integrate any other application you don’t find in the gallery.
Create an Application After the application is created, go to Properties and follow the Application registration link.
In the Overview section, copy the following values:
- Application (client) ID
- Directory (tenant) ID
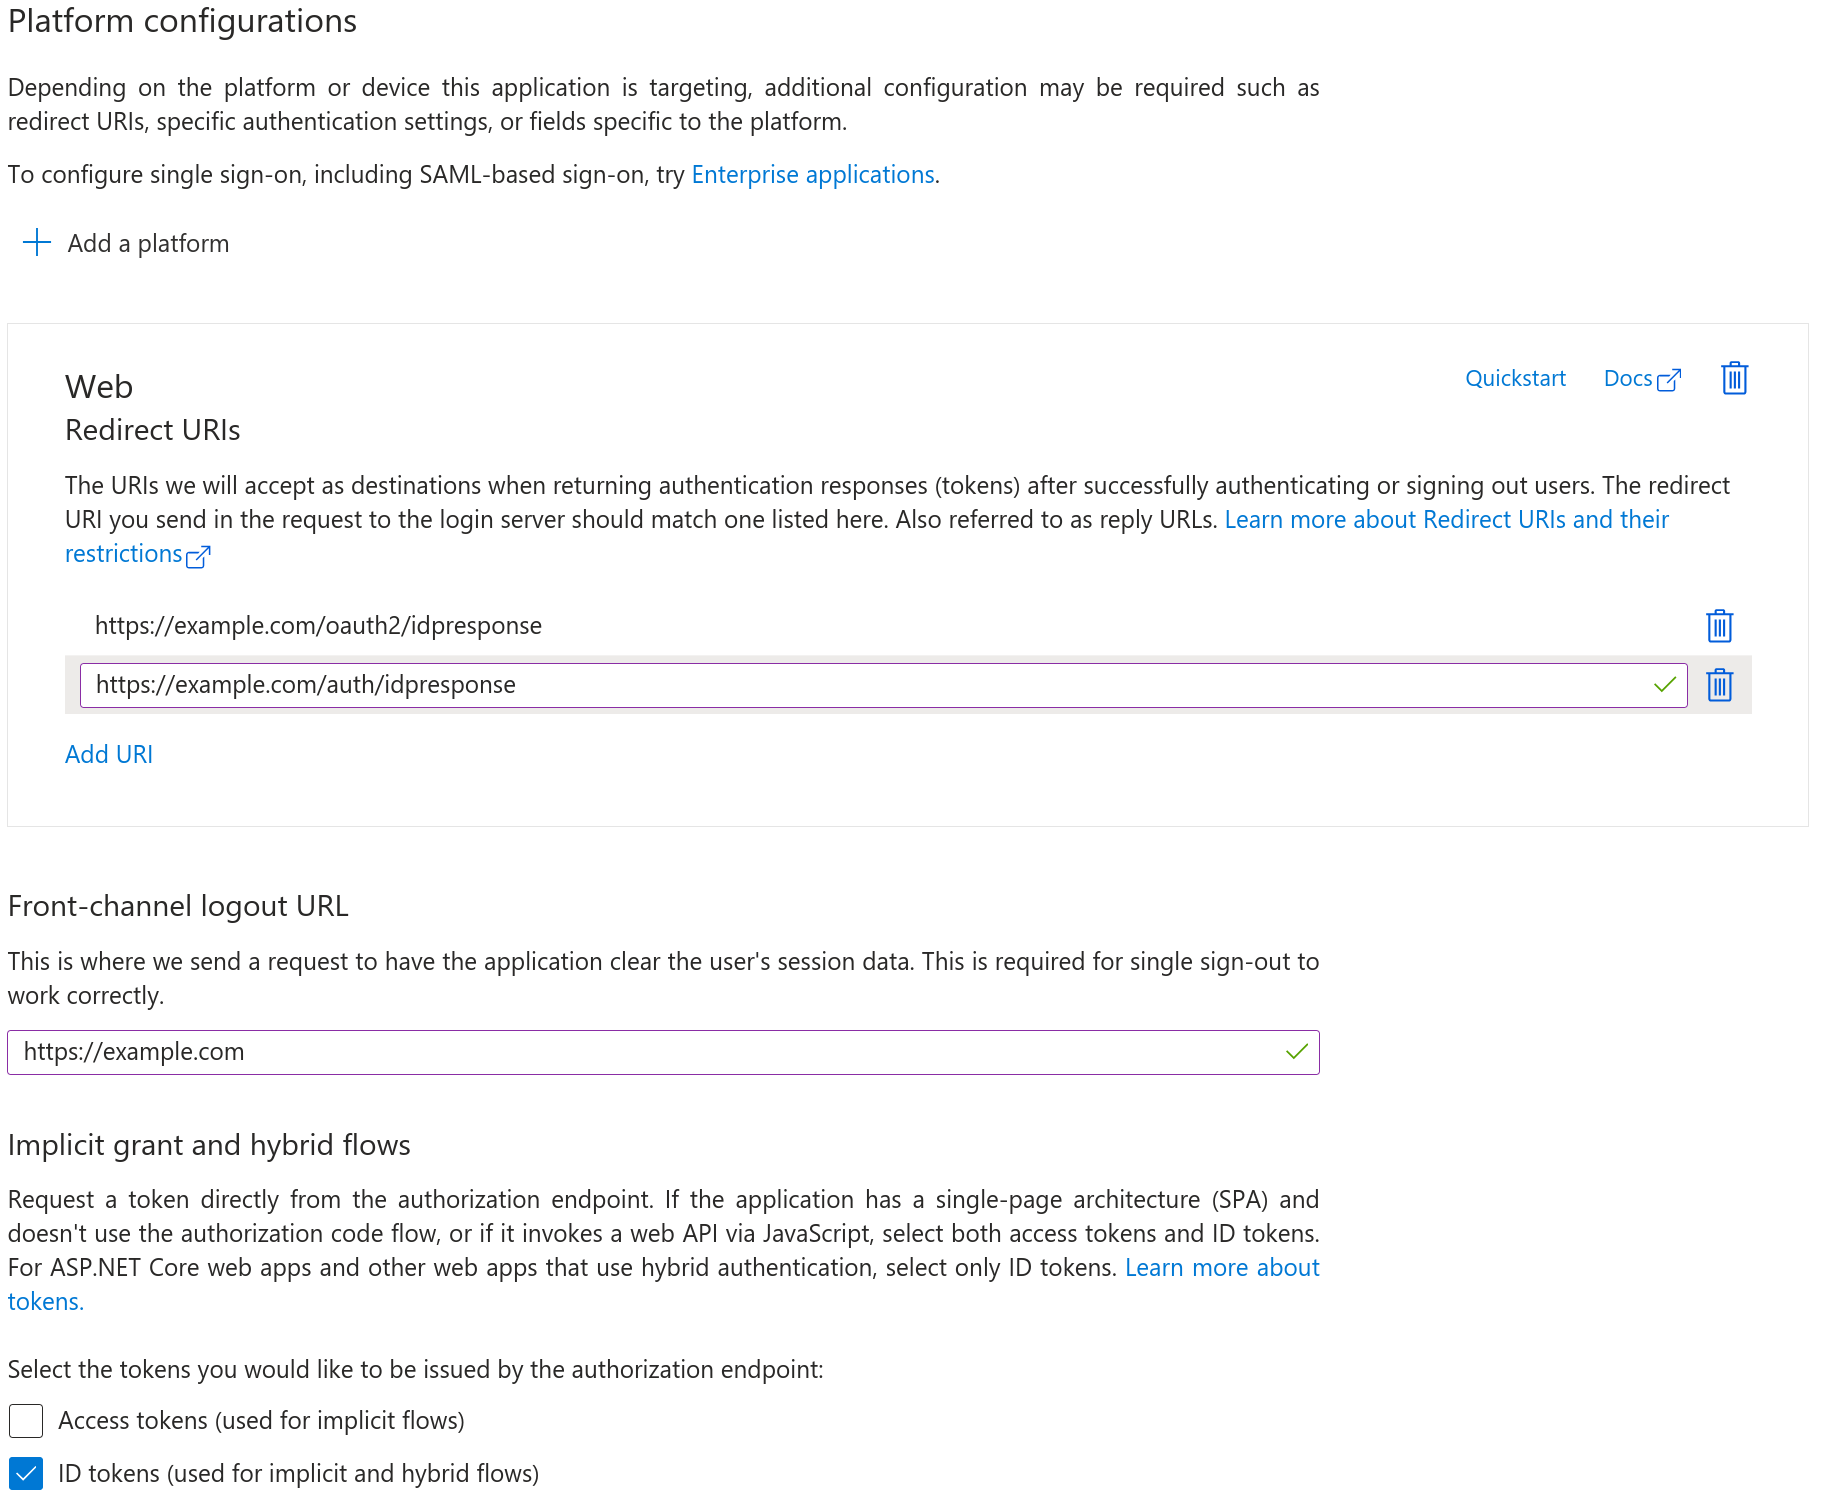
2. Configure Redirect URIs
Select Authentication in the left-hand menu.
Click + Add a platform and choose Web.
In the Redirect URI field, enter:
https://<your-instance-domain>/auth/idpresponseAfter saving, select Add URI and enter a second URI:
https://<your-instance-domain>/oauth2/idpresponseIf unsure, the IOTA team can provide the exact redirect URIs to use.
Configure Web Application
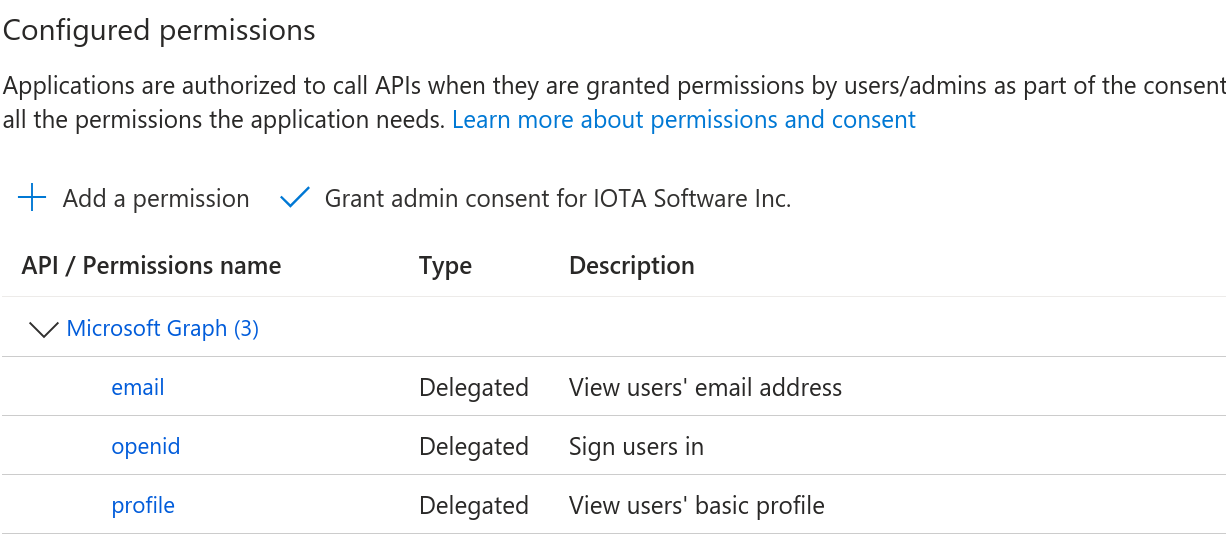
3. Configure API Permissions and Token Claims
Navigate to API permissions and ensure the following scopes are granted:
openidemailprofile
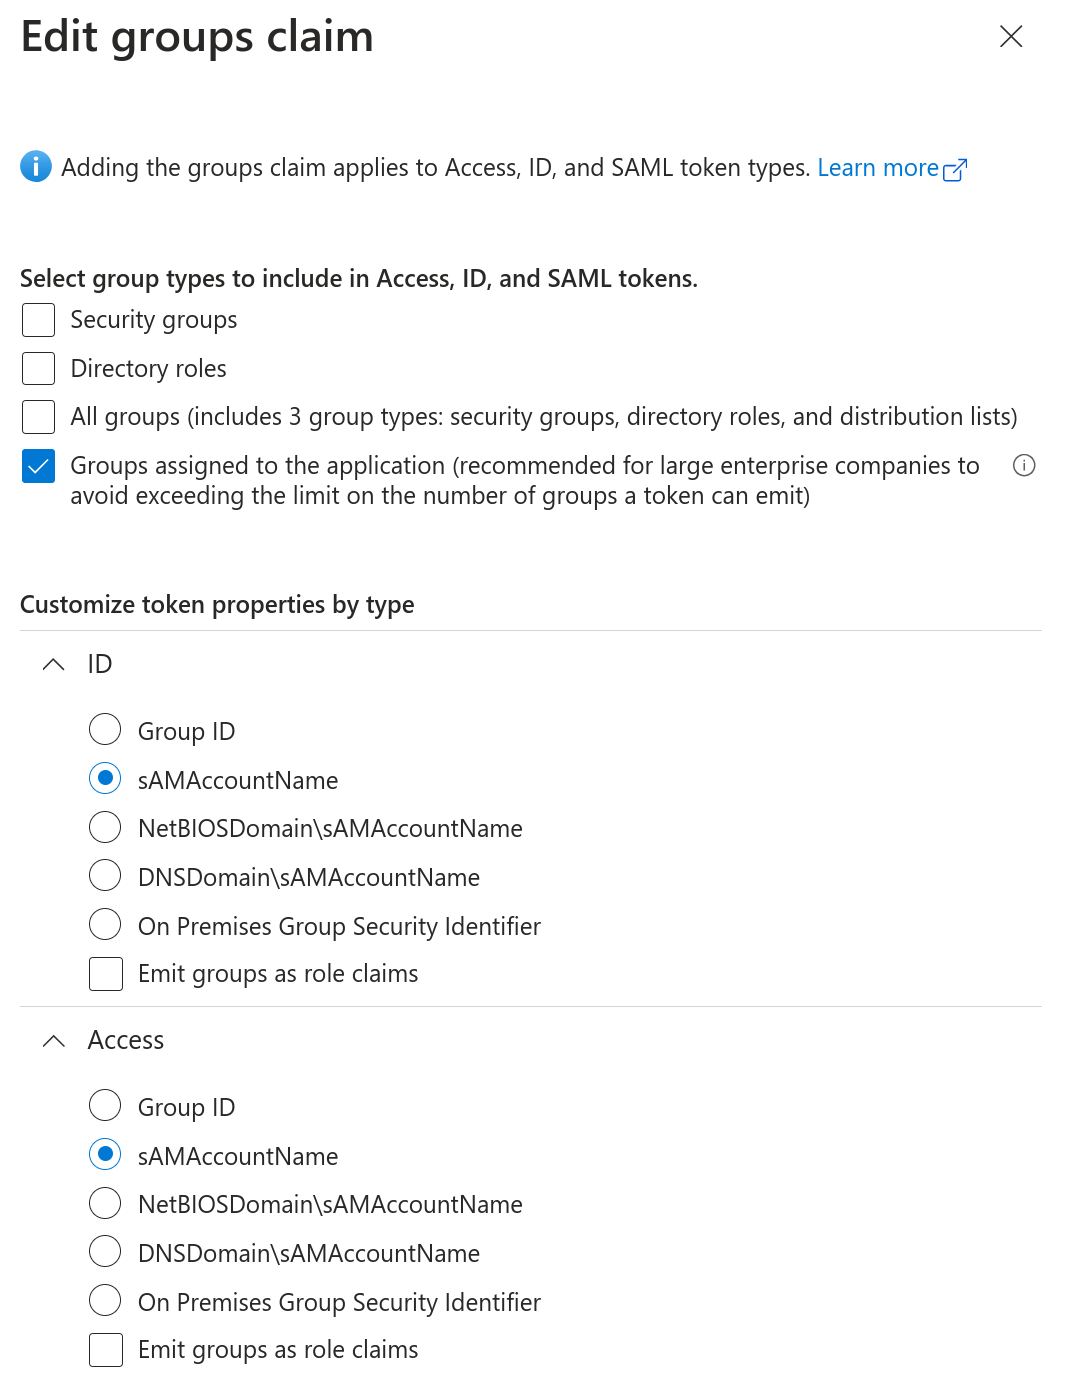
API Permission scopes (Optional) To include Azure group membership in the token:
- Go to Token configuration and select + Add groups claim.
- Under Select group types, choose Groups assigned to the application.
- In the Customize token properties by type section, select sAMAccountName for both ID and Access tokens.
This ensures group names appear in a readable format across tokens.
Add groups claim Go to Certificates & secrets.
- Select + New client secret
- Save the generated value securely
These credentials will be used to complete the IdP connection during the switch-over process.
Okta
1. Create the App Integration
To enable Okta authentication:
In the Okta Admin Console, go to Applications and select Create App Integration.
Choose:
- OIDC - OpenID Connect
- Web Application
Enter a name for the application.
Use the default Grant type configuration.
In the Sign-in redirect URIs section, enter the following:
https://<your-instance-domain>/auth/idpresponsehttps://<your-instance-domain>/oauth2/idpresponse
If unsure, the IOTA team can provide the exact redirect URIs to use.
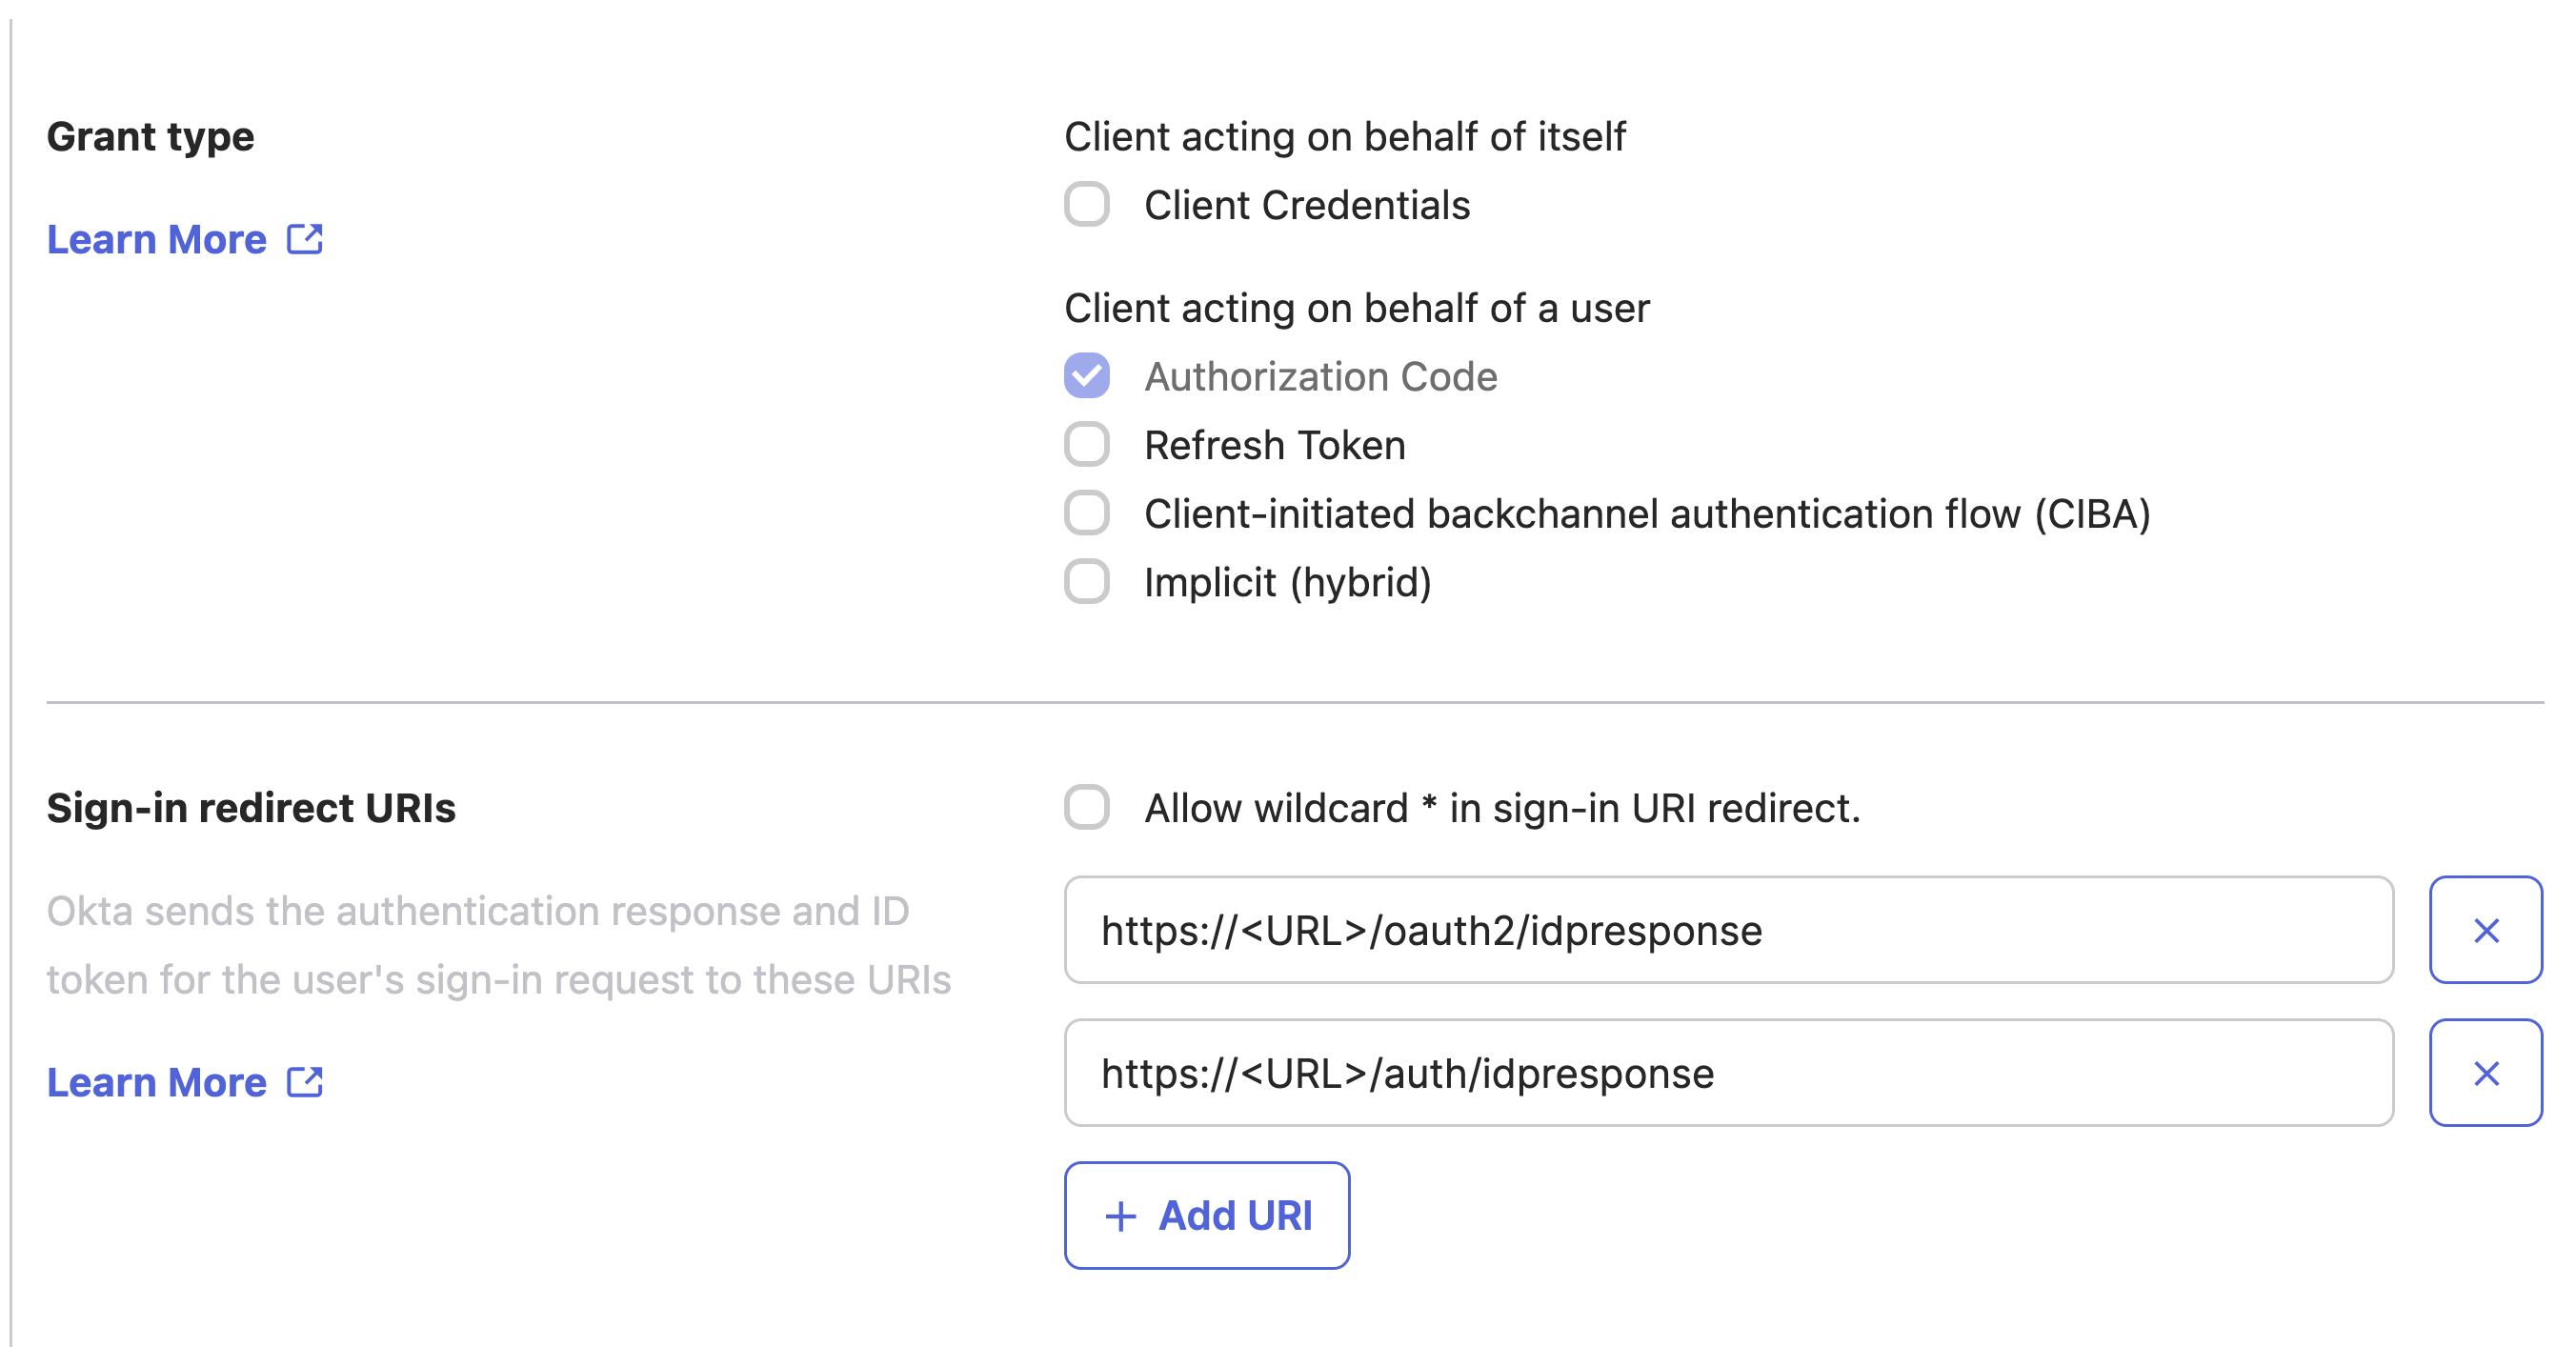
Grant Types 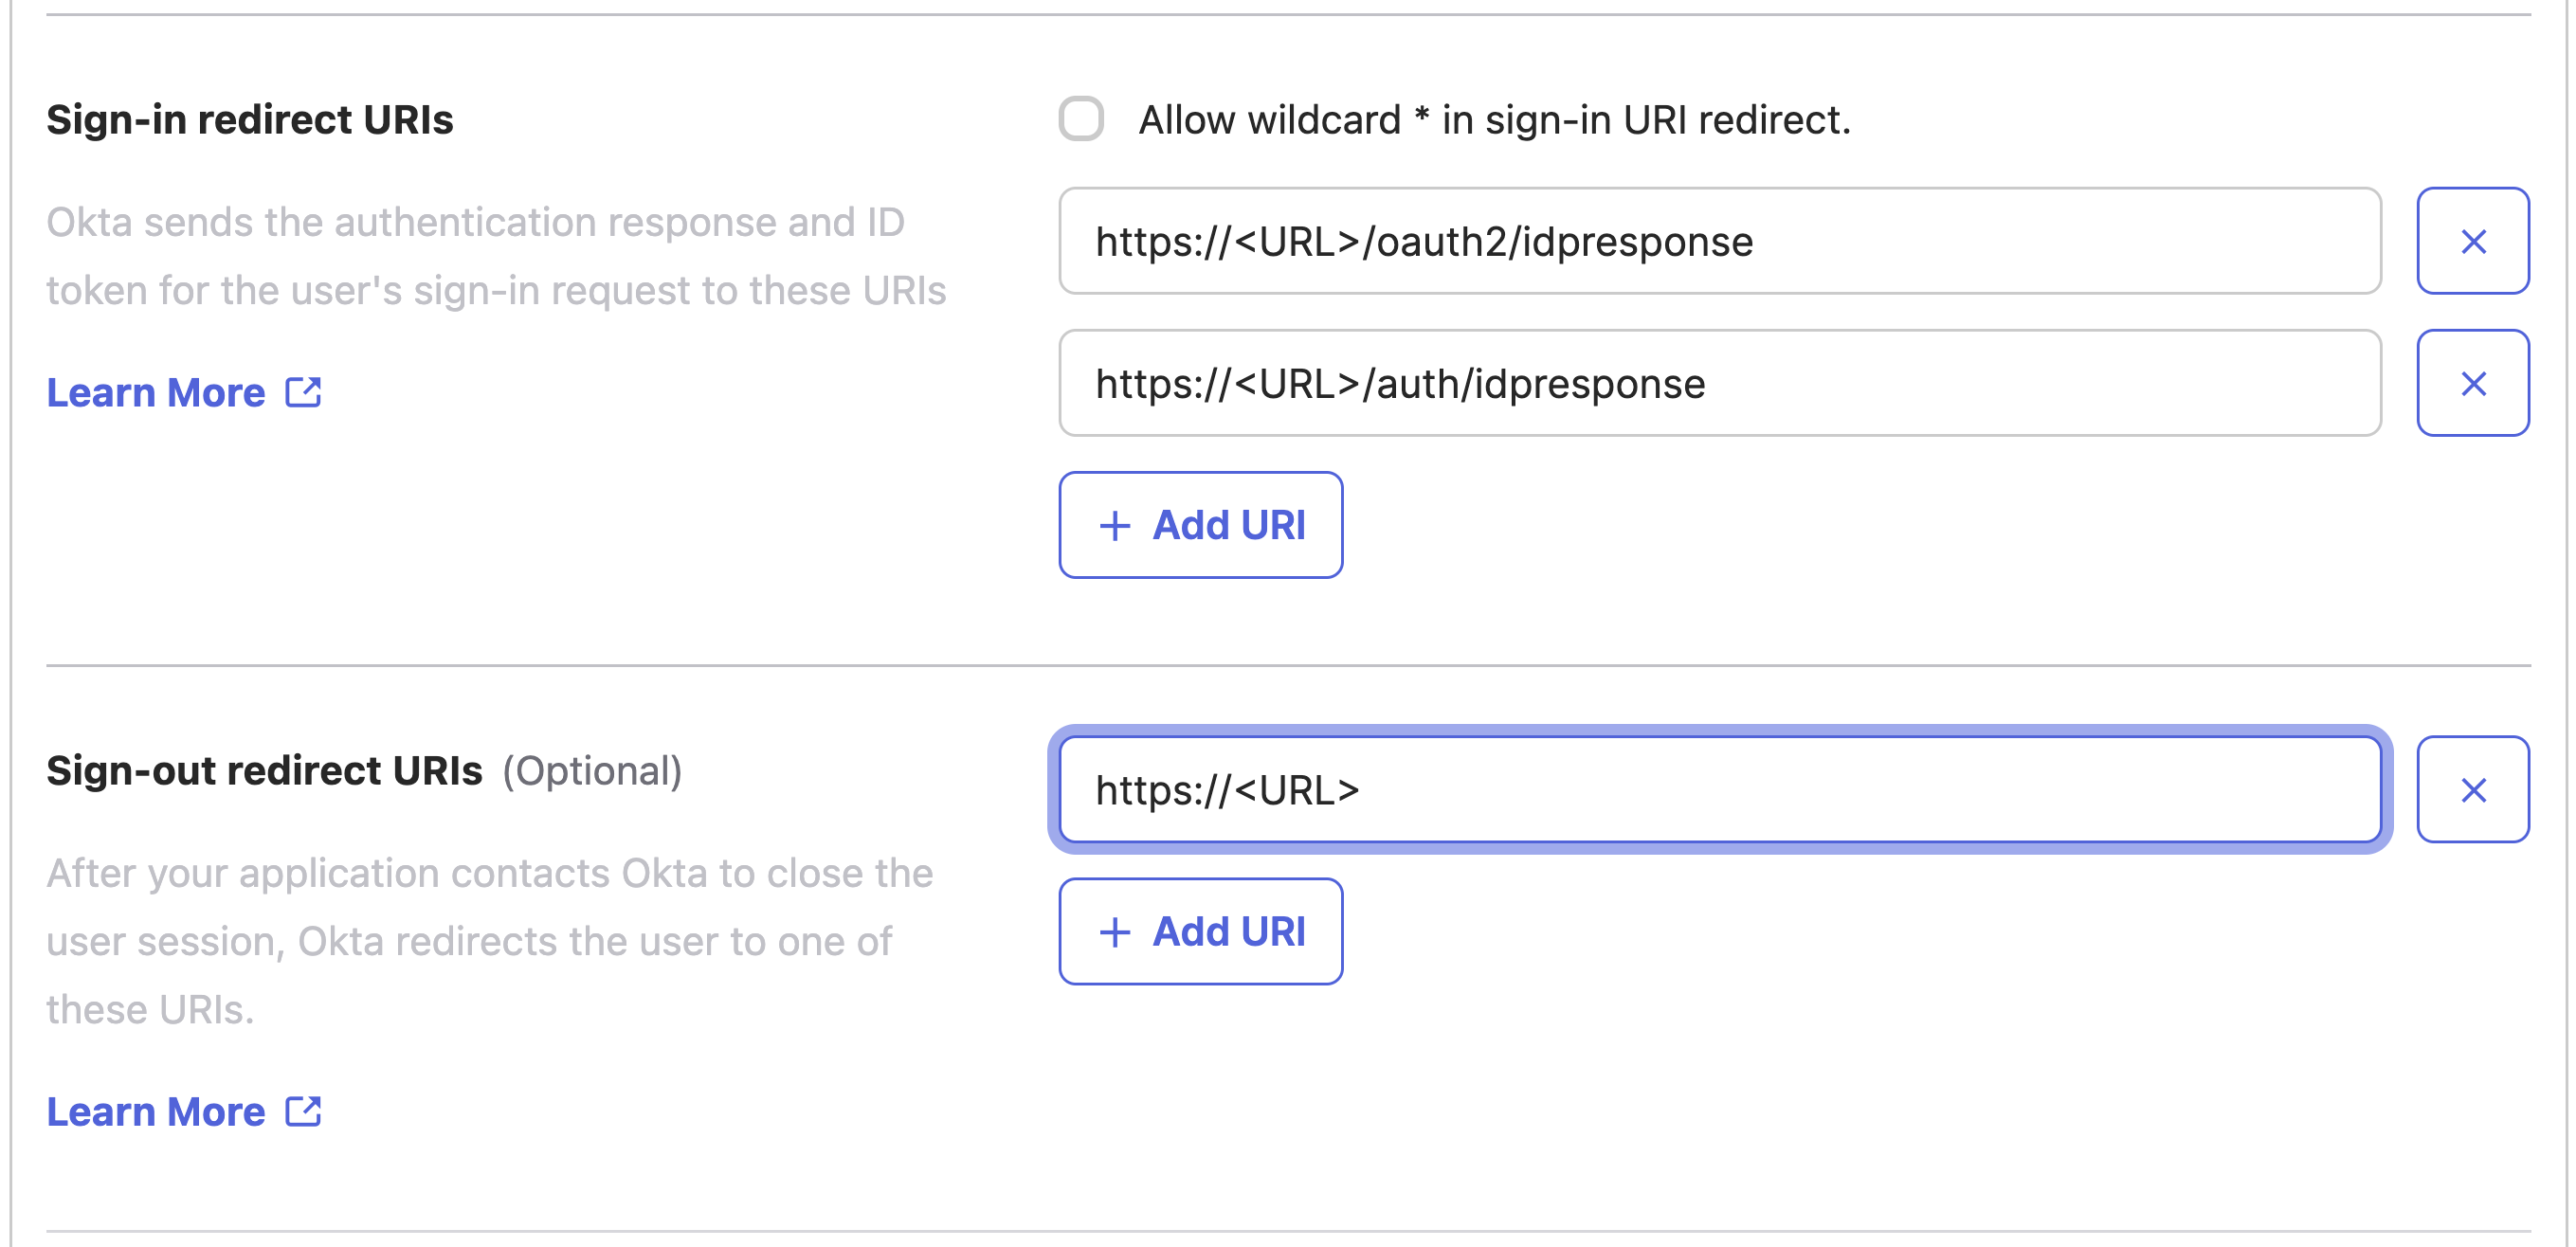
Redirect URIs Select Save to complete the application setup.
2. Retrieve Credentials
After the integration is created, go to the General tab.
Copy the following values:
- Client ID
- Client Secret
These credentials will be used to complete the IdP connection during the switch-over process.
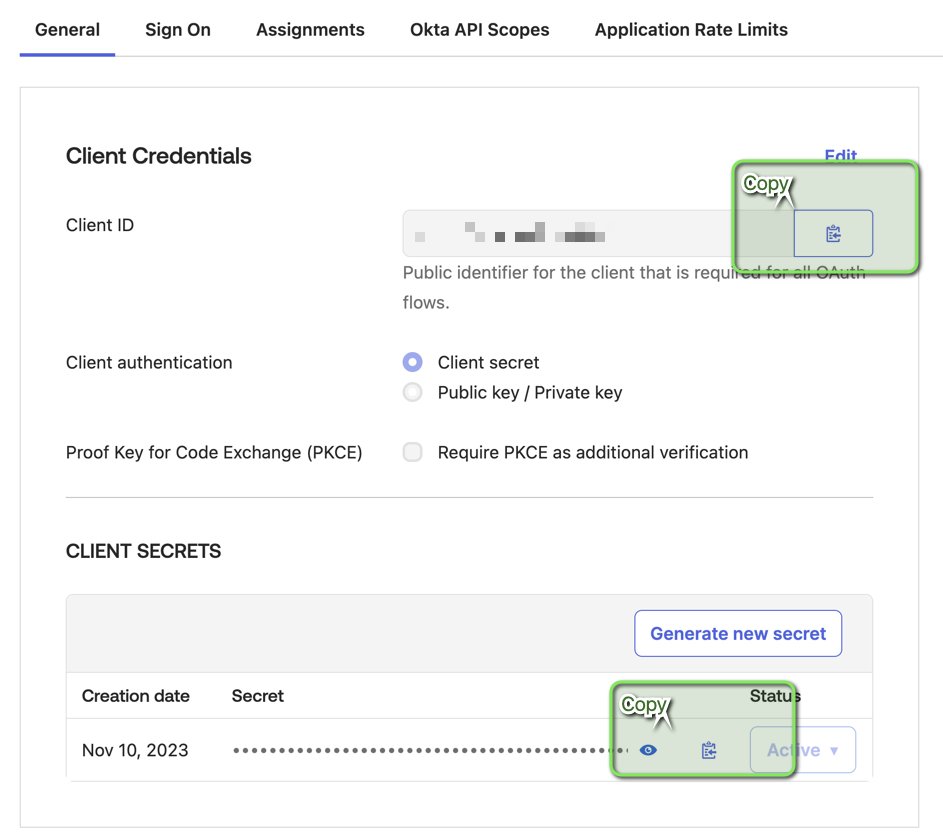
Client ID & Secret