To begin the migration process, get in touch with your main IOTA contact point in acquiring the Offline Utility Export, the application used for transferring views into IOTA. The opened application once downloaded:
1. Preparing View
- Open up the view you would like to transfer into IOTA in its native software. In this example we will be using Process Books.
- Download the view and store it in a created folder under the name of "temp_iota" in your preferred hard drive.
2. Offline Utility Export
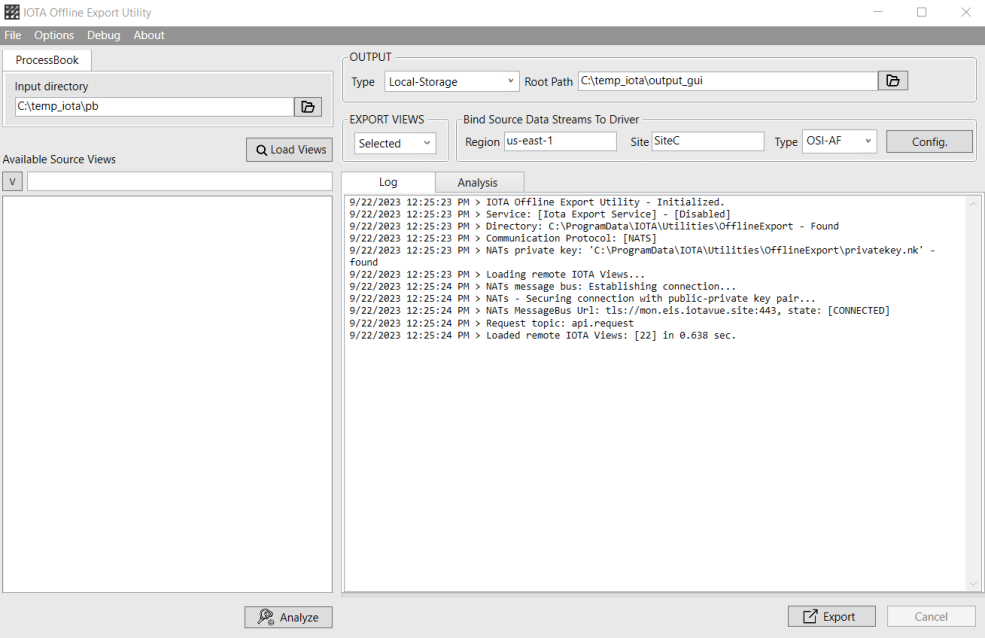
Below outlines the configuration settings found within the utility :
Input Directory
The input directory is where the Utility will fetch the previously downloaded view. In our case, it is the "temp_iota" file where our process book files are located.

Output
The output refers to how and where the soon to be IOTA view will be stored:

Type : When selecting type, either local storage or IOTA direct can be selected. Select local storage if you would like to have a file copy of the new view available, and IOTA direct if you would like to directly import your view into an already existing IOTA view.
Root Path : Root path will either be the output folder the files will go to if local storage was selected as type, or the designated view location you would like to import the new view to if IOTA direct was selected.
Export Views
After you have successfully pulled files from the designated input directory by pressing "Load Views", you can choose to either import all the files, or a select few using this dropdown.
Bind Source Data
The following settings refer to the Data Source structure found within your IOTA instance.
Region : The broadest type of geographic indication, the region is typically the country and cardinal direction of where the data is acquired.
Site : The most specific type of geographic indication ,the site is typically the plant, factory, or building where the data is being collected.
Type : Categorizing the data source itself, the type indicates what data source is being used in data creation.
In order to successfully pull all pertinent data, these three must match those of the attached Data Source ![]() located in the additional menu tab
located in the additional menu tab ![]() within IOTA.
within IOTA.
Example:
IOTA Data Source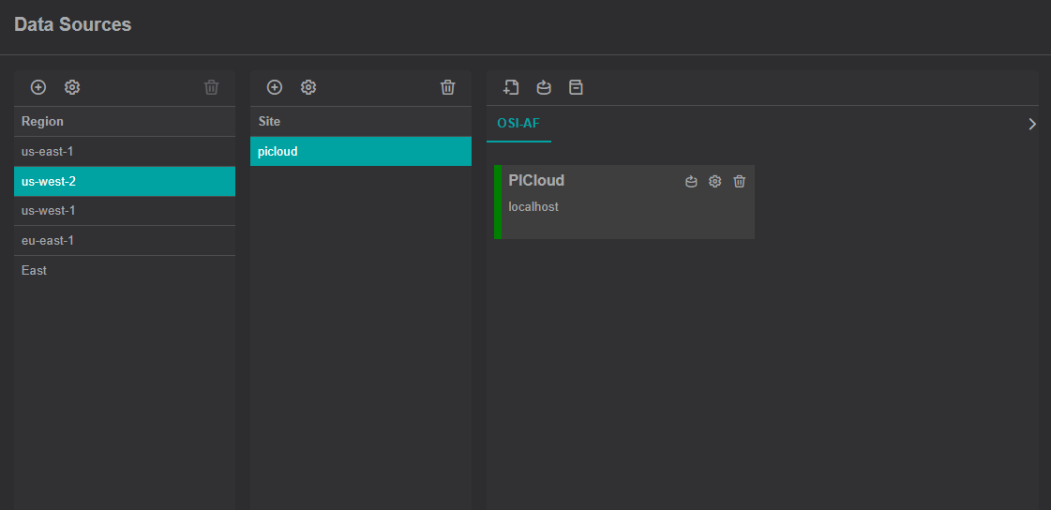
Matching Utility Setting
Log and Analysis
Log - The log view will show any and all procedures being called in
Analysis - Once your views have been successfully loaded, the analysis tab will populate with all accompanying data that will be pulled from the previous view into IOTA including symbols, calculations, multistates etc.
3. Uploading View into IOTA
Following the use of the Utility, go into IOTA, and under views ![]() select additional menu
select additional menu ![]() followed by import
followed by import ![]()
Match all fields to the respective data source inputs, find your newly created files, press upload, then proceed to naming and importation. Your current view will now show all imported views as nested.