This document provides configuration steps for the IOTA SharePoint driver, enabling IOTA Vue to access data on Microsoft SharePoint Server. Follow these instructions for installation, SharePoint-specific setup, and environment configuration.
Pre-Configuration Checklist
Before proceeding, confirm the following prerequisites:
• Operating System: Ensure your environment meets the operating system requirements listed on the Overview Page.
• Network Access: The SharePoint server must be accessible within your network.
• Authentication: AAD Certificate Authorization must be enabled on the SharePoint server. For detailed guidance, please refer to the AAD Certificate Authorization.
• Region and Site Setup: Ensure that Region and Site identifiers are configured in IOTA Vue. If configuration is required, please refer to the instructions below for setting up Region and Site.
Setting up Region and Site
You can use any name for Region and Site in IOTA Vue. These names act as identifiers and will appear in IOTA error messages and driver logs, aiding in troubleshooting by making each driver instance easily identifiable.
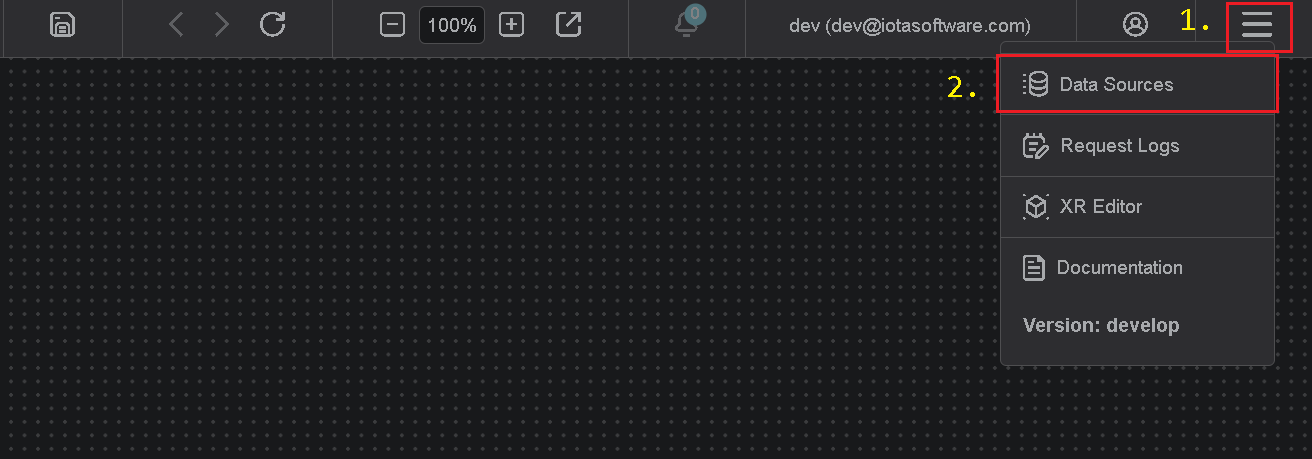
Accessing Data Sources
- In the IOTA Vue interface, click the hamburger icon in the top right corner.
- Select Data Sources from the dropdown menu.
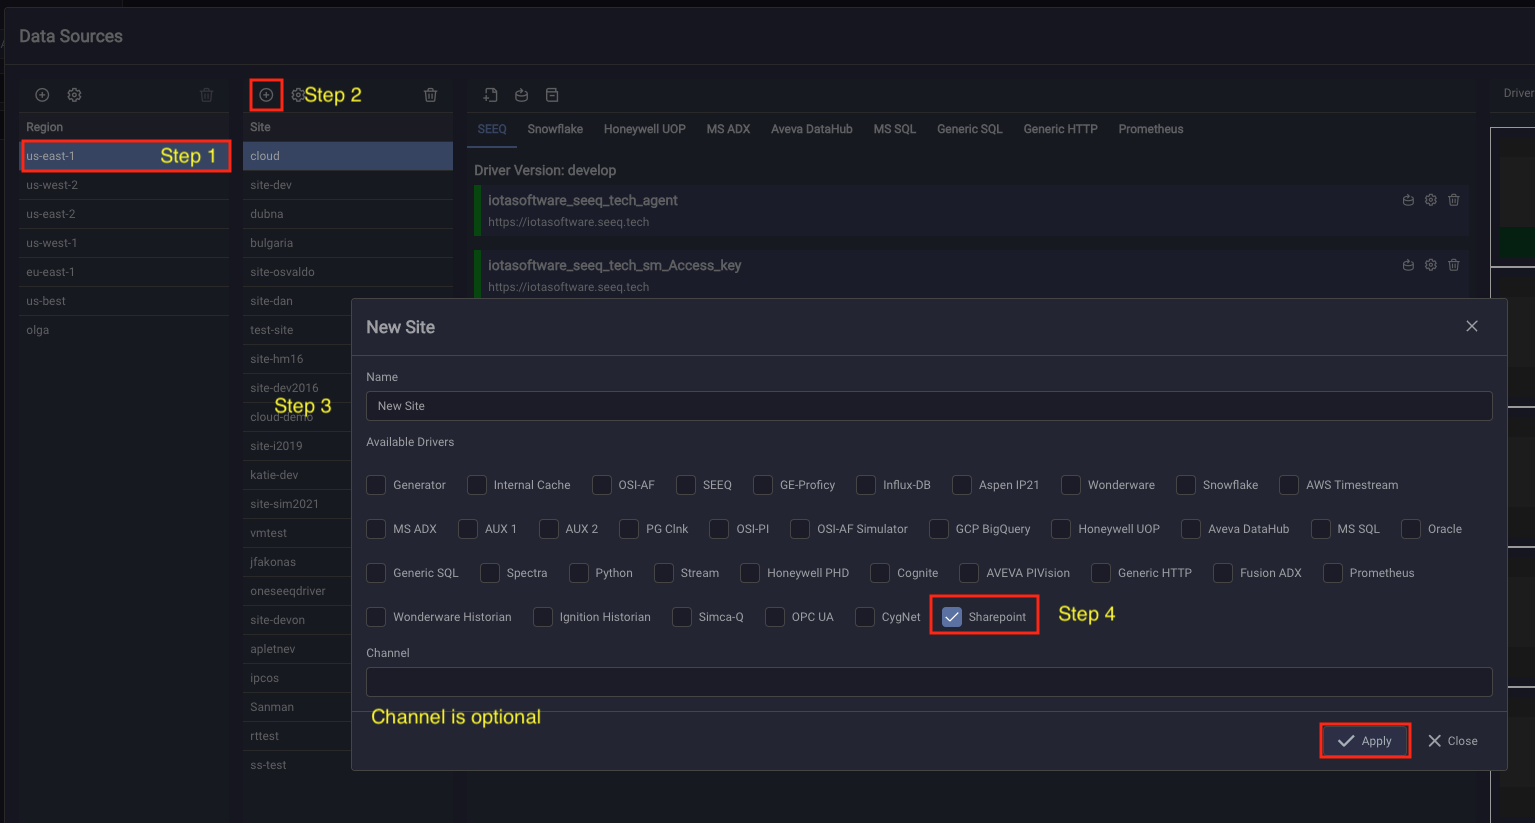
Adding a Region
- Click the "+" icon to create a new Region.
- Enter a Region Name (a user-friendly identifier). This name will appear in logs and error messages if no channel name is defined.
- Optional: Enter a Channel Name, which may contain abbreviations. If left blank, it defaults to the region name.
Note: Each Region can contain multiple Sites and driver types.

Adding a Site
- Click on the desired Region to select it.
- Click the "+" icon to add a new Site within the selected Region.
- Enter an identifiable name for Site Name, such as one that reflects a facility, team, or logical grouping (e.g., “Building1” or “HRTeam”). This name will also appear in logs and notifications if no channel name is defined.
- Under
Available Drivers, check the box for the desired driver to enable it for this Site. - Channel Name (optional): Defaults to the Site name if left blank.
- Click Apply to save your changes.
Note: Each Site within a Region can contain multiple driver types, displayed as tabs in the instance pane.
1. Installing the SharePoint Driver
Download and install the latest SharePoint driver version provided by IOTA Software. The installer includes all required configurations to enable secure communication, including public and private keys to facilitate encrypted data transfer over IOTA Vue’s NATs message bus.
2. Configuring the SharePoint Driver
To add a new SharePoint server connection, open the Data Sources menu and follow these steps:
- Select the desired Region.
- Select the desired Site.
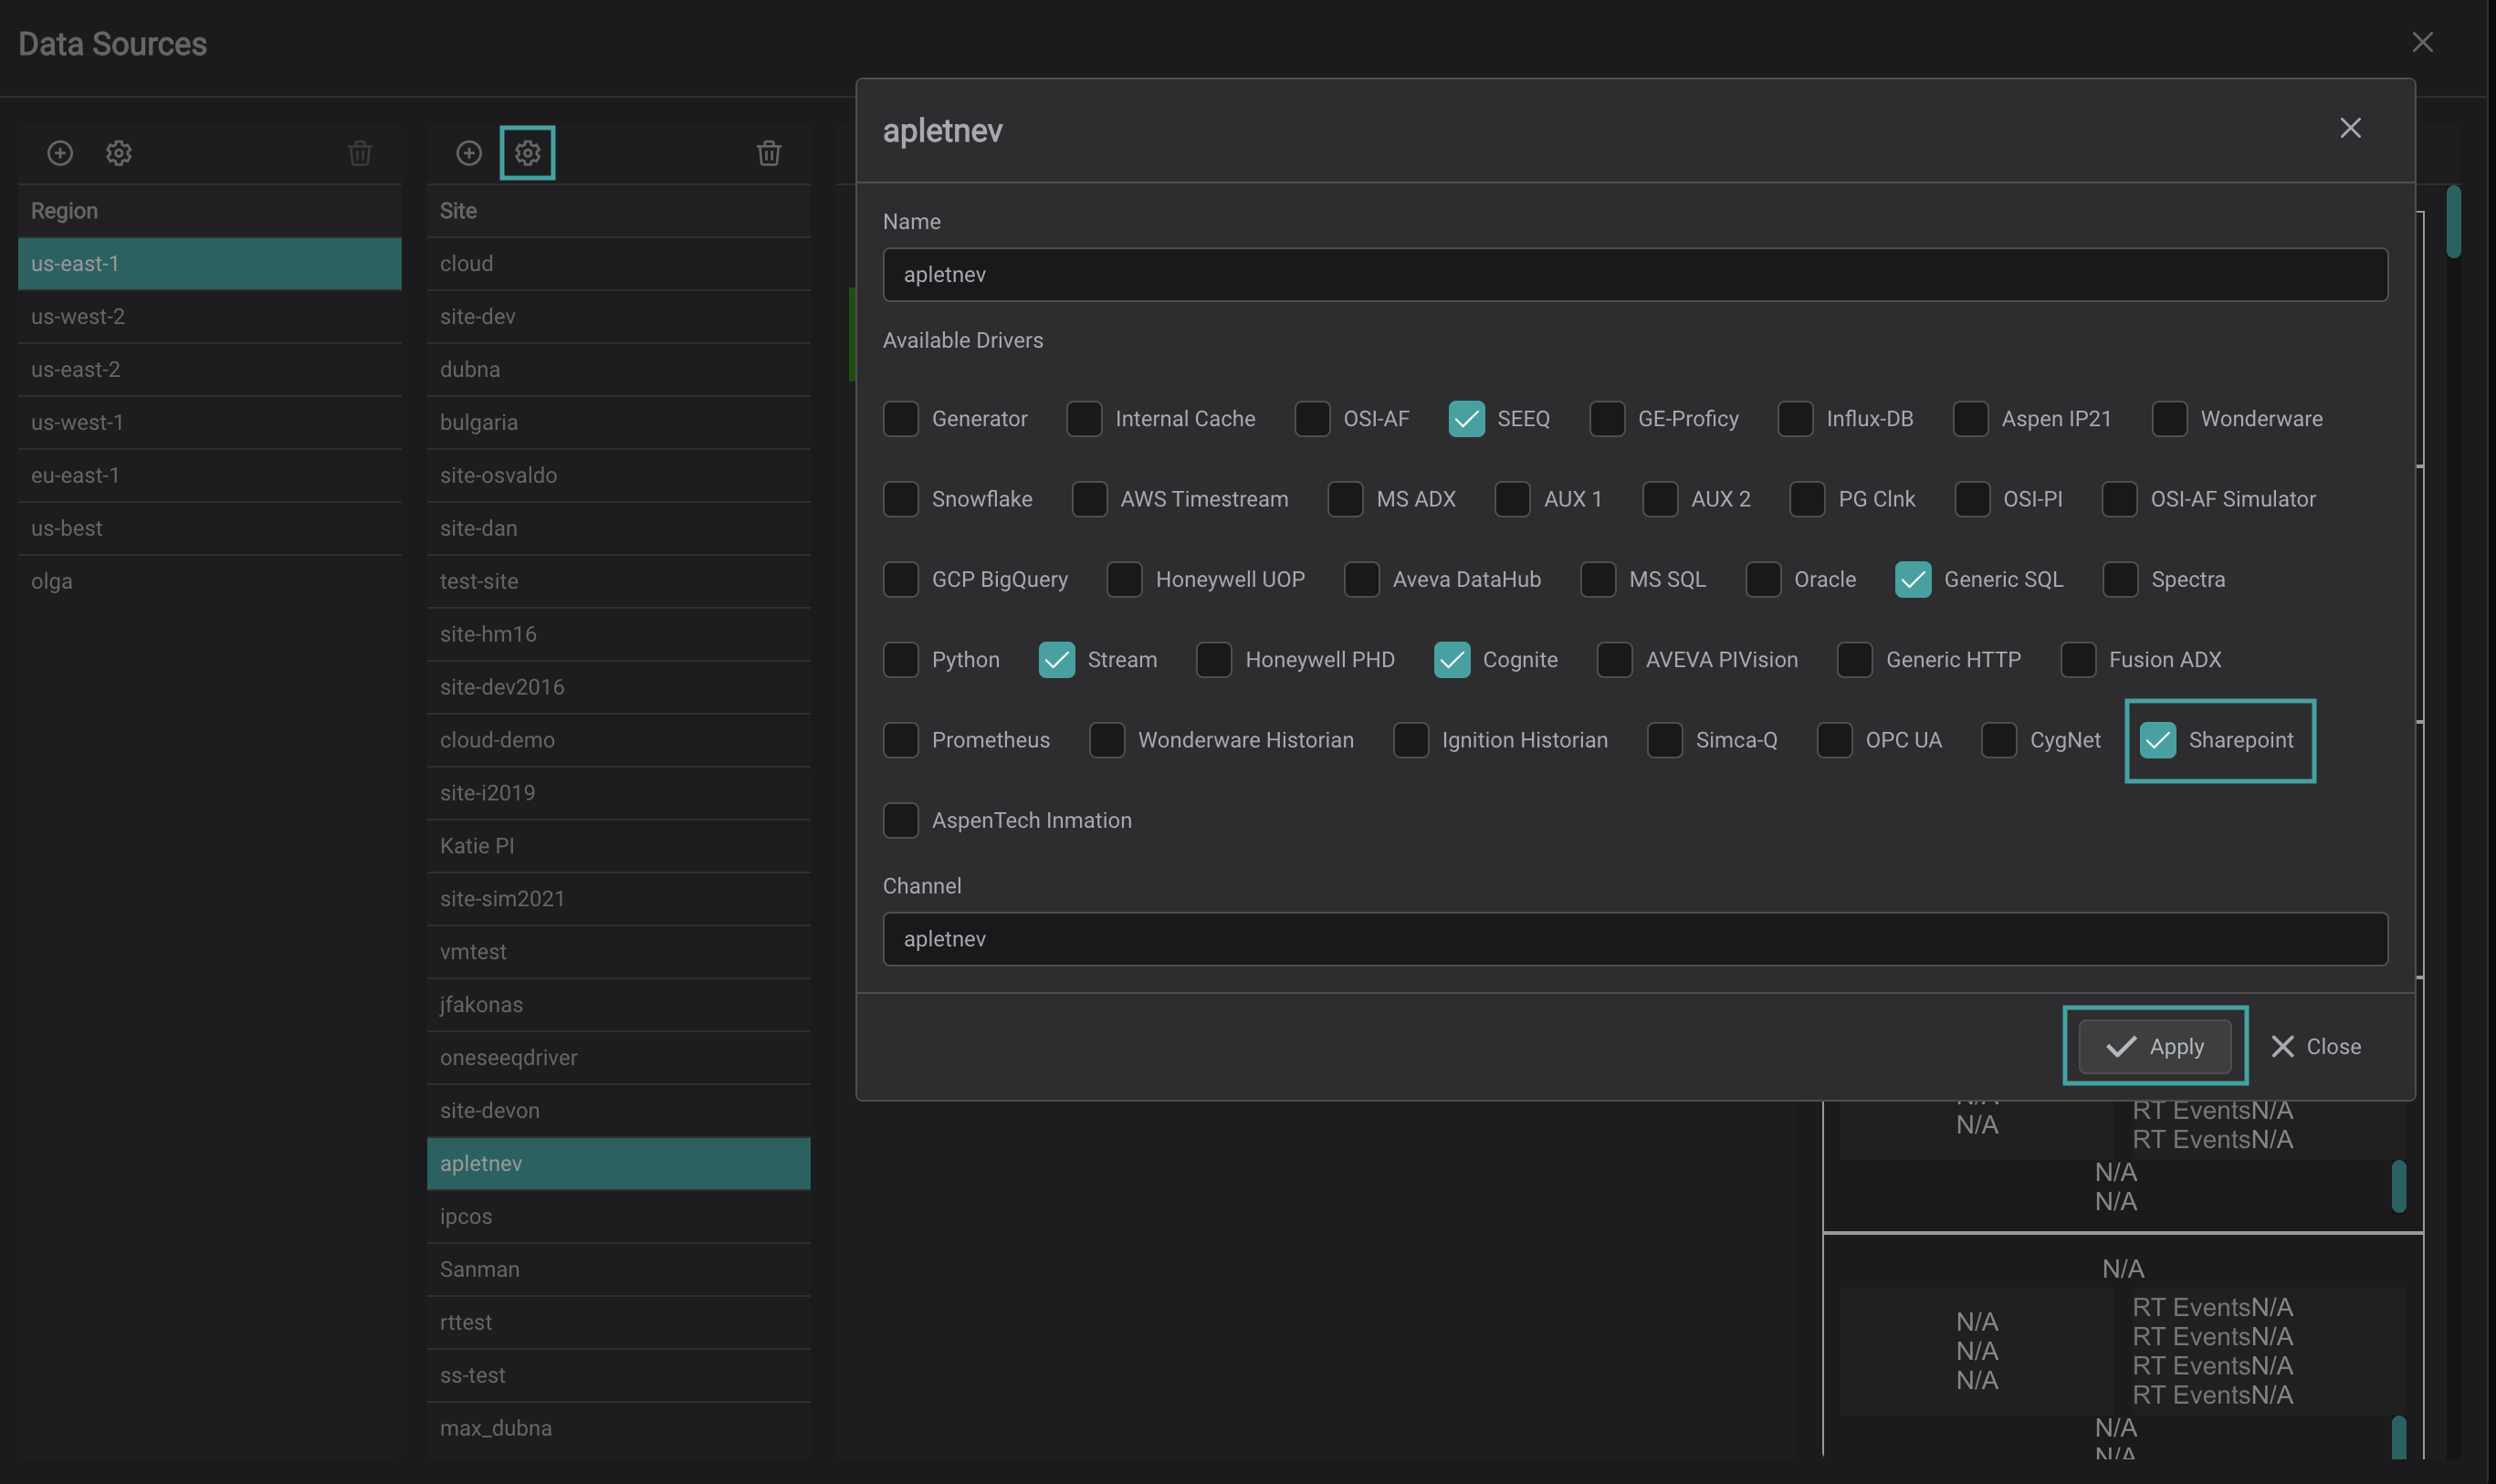
- In the Site panel, click the gear icon to open the configuration settings for that Site.
- Under Available Drivers, make sure that the SharePoint Driver box is enabled. If not, check the Sharepoint driver box and click Apply. After applying these settings, the SharePoint Driver tab will appear within the selected Site.
3. Configuring the Connection
To configure the connection to the SharePoint Server, navigate to the SharePoint driver tab and click the Add icon in the upper-left corner.
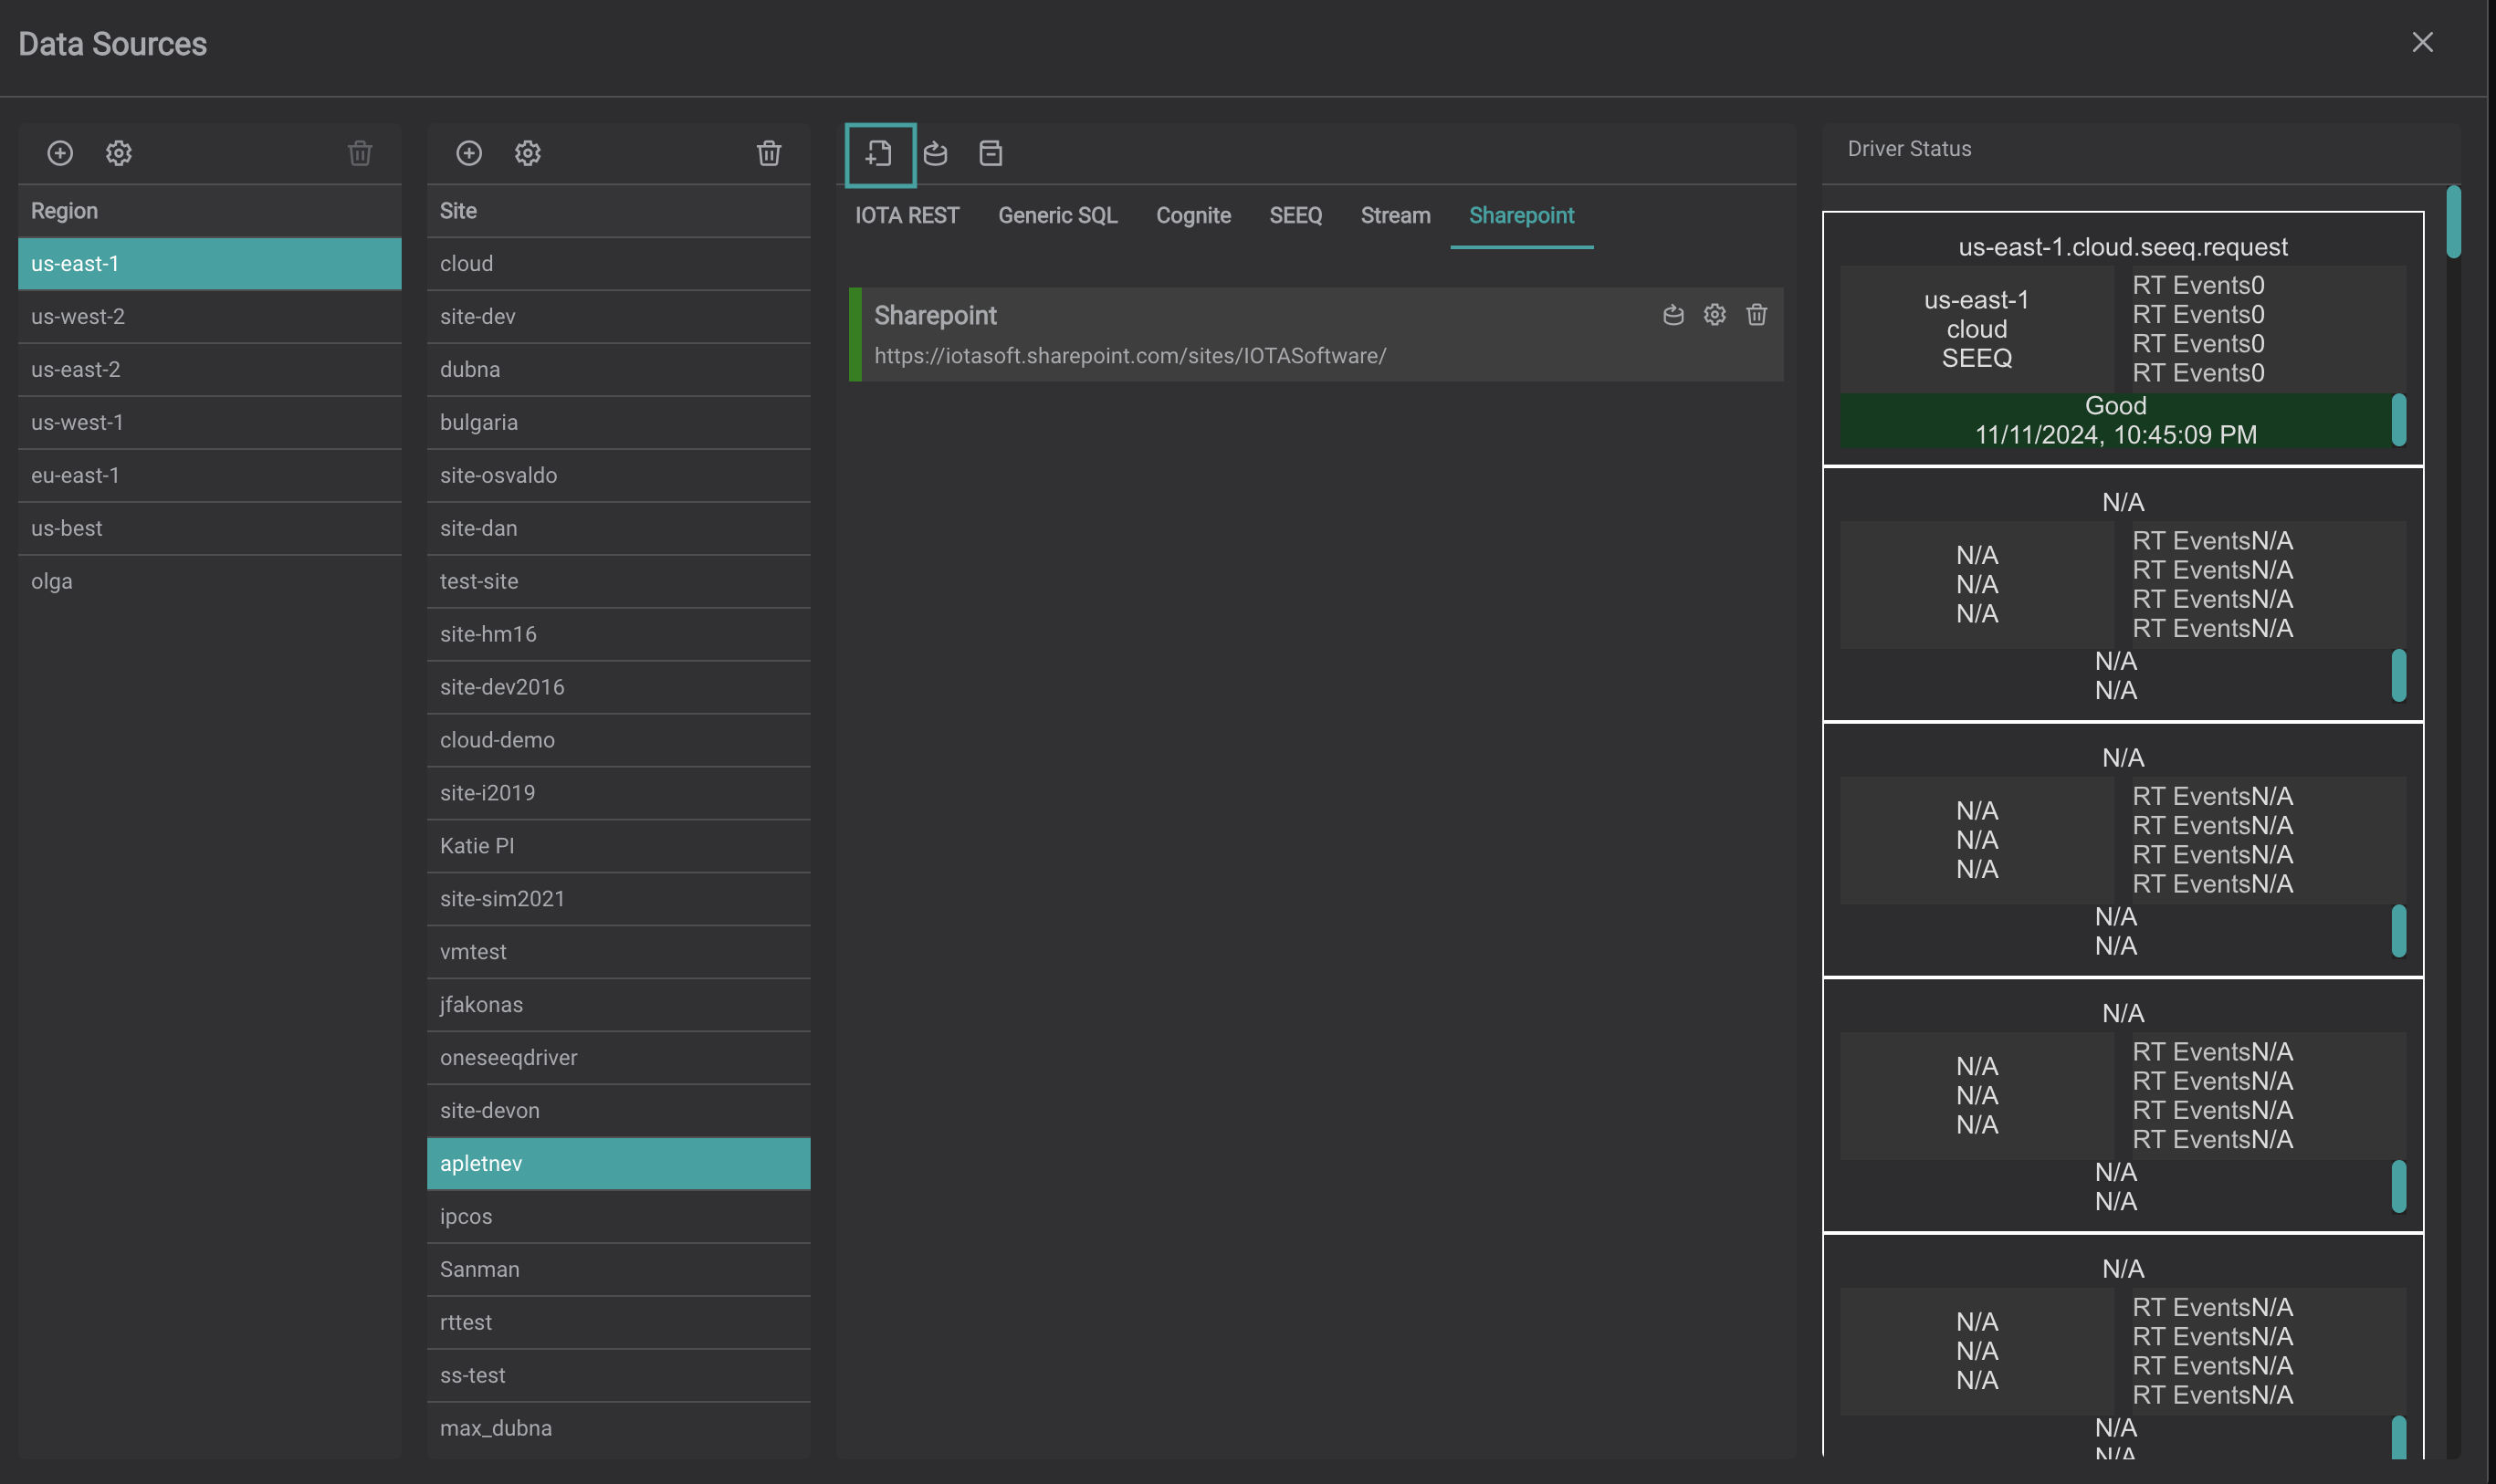
This action opens the SharePoint Connection dialog, where you’ll need to fill in several fields:
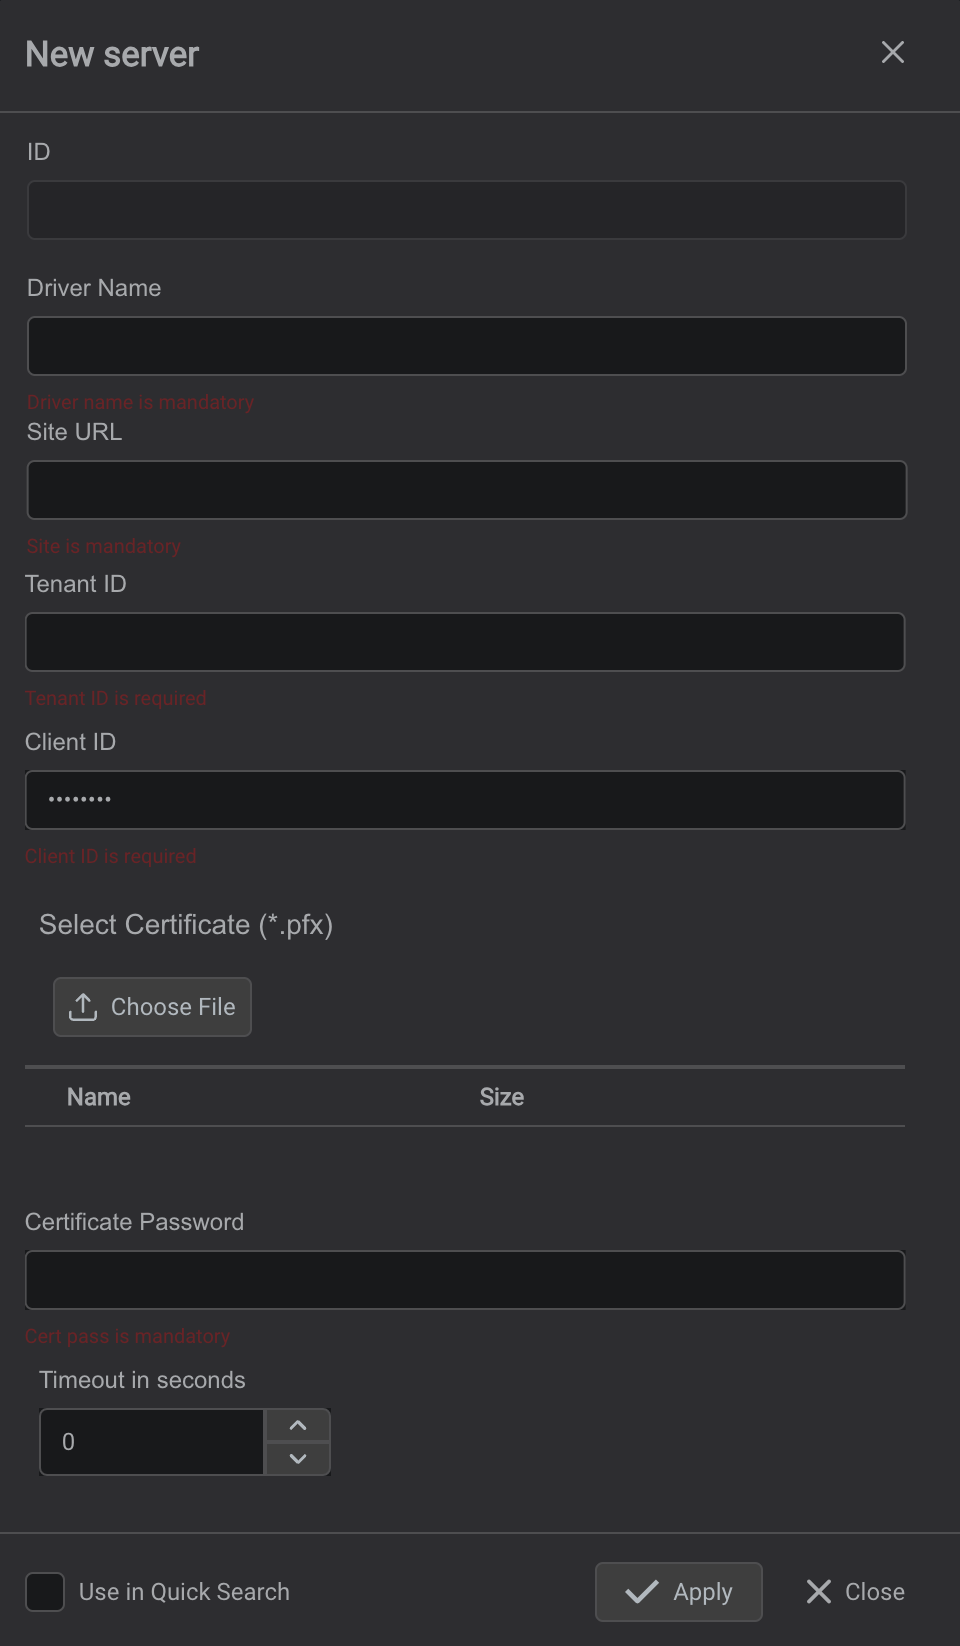
Complete the fields as follows:
- Driver Name: Enter a unique name for this SharePoint driver instance. This name will appear in the Quick Search driver list dropdown for easy identification and selection.
- SharePoint URL: Provide the full URL for the SharePoint site.
- Tenant ID: Enter the Tenant ID.
- Client ID: Enter the Client ID.
- Certificate: Upload the .pfx certificate file from your local device.
- Certificate Password: Enter the password for the certificate.
- Quick Search Availability: Check this box to make the SharePoint Driver accessible in the Quick Search sidebar. If left unchecked, it will only appear in Advanced Search.
Once all fields are completed, click Apply to save your configuration.
3. Driver Environment Configuration
The SharePoint-Driver comes with a pre-configured environment. Therefore, manual configuration is not required.
| Environment name | Required | Default Value | Data Type | Description |
|---|---|---|---|---|
| DRIVERID | ⚫ | "" | string | Driver Id - used for logging purposes only |
| LOG_LEVEL | ⚫ | ERROR | string | Debug verbose level: ERROR, DEBUG, INFO |
| NATS_HOST | 🟢 | null | string | NATs server url with port |
| SEED_KEY_PATH | 🟢 | null | string | NATs NKey public key string. Private key must be defined in file: "privatekey.nk" |
| RQS_TOPIC | 🟢 | null | string | NATs topic on which driver listens for requests |
| HEALTH_TOPIC | ⚫ | "" | string | NATs topic for sending driver's health |
| HEALTH_SCHEDULING | ⚫ | 10000 | int | How often in milliseconds to send health data. Default: 10000 = 10 sec |
| LOGS_TOPIC | ⚫ | "" | string | NATs topic for sending driver's logs |
| METRICS_TOPIC | ⚫ | "" | string | NATs topic for sending driver's metrics |
| METRICS_SCHEDULING | ⚫ | 30000 | int | How often in milliseconds to send metrics data. Default: 30000 = 30 sec |
| ENABLE_METRICS | ⚫ | true | bool | Enables metrics reporting |
4. Additional Support
For troubleshooting, go to the Data Sources menu and Driver Logs to check connection status and driver health. For detailed troubleshooting steps, refer to the Knowledgebase. If issues persist, please contact your Customer Success Advisor.