Download Installer
The PI-Driver installer is available for download directly from the IOTA Vue (browser-based) application when logged into IOTA Vue with administration rights. Select the upper right "hamburger-stack" > Data Sources.
Tips
The installer already contains all required configurations for specific Region\Site connectivity.
No additional configuration is necessary during installer execution.
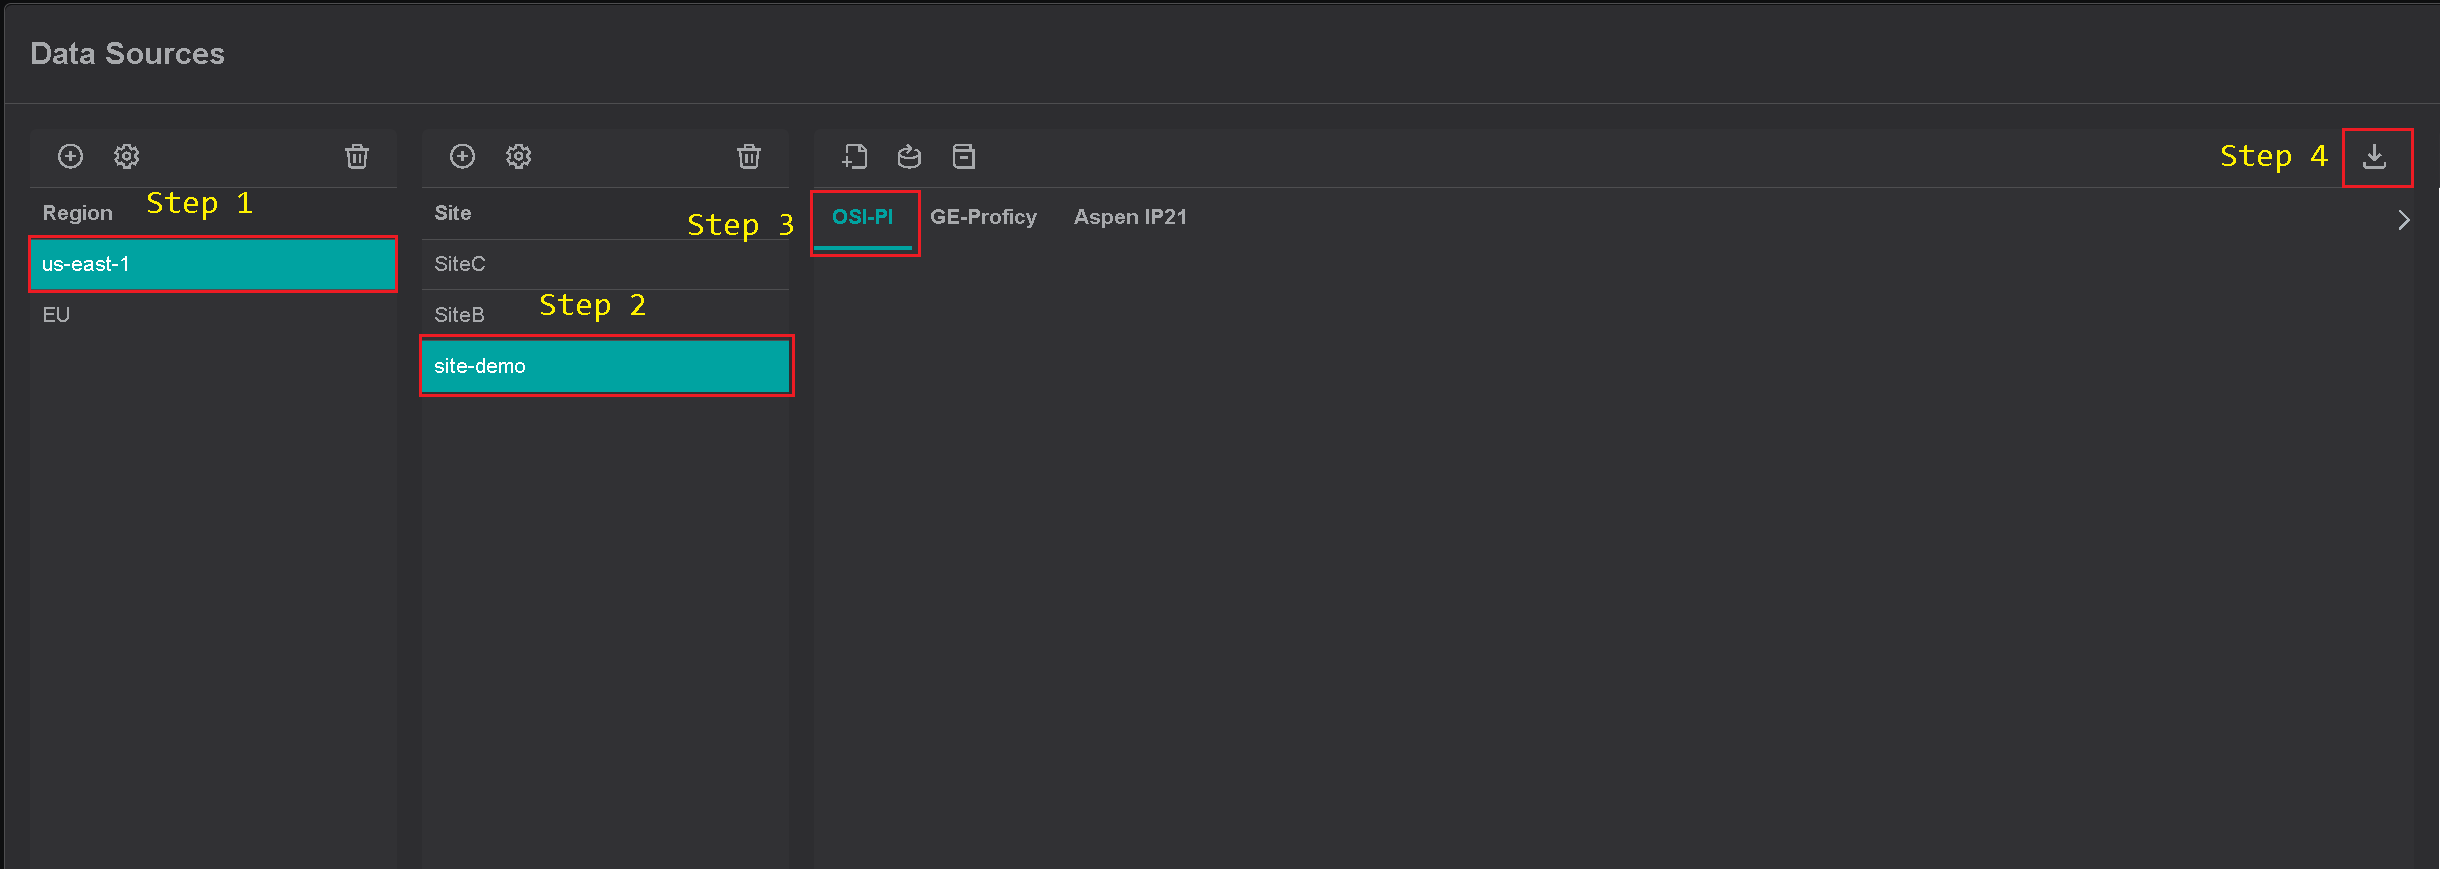
On the data sources menu:
- Select region of interest
- Select site of interest
- Select PI-Driver tab named as "OSI-PI" within selected site.
- At the top right corner - click on download icon.
Within a few seconds, PI-Driver installer download starts.
Run the Installer
On the Windows machine, launch the IOTA Driver installer with the Administrator account. Follow the installation process as indicated and if needed make sure to adjust the installation location.
Tips
Make sure to run the installer as Administrator. Otherwise, you will not have proper permissions for Program files installation and Windows Service configuration.
| Installer Welcome Screen | Installation Location |
|---|---|
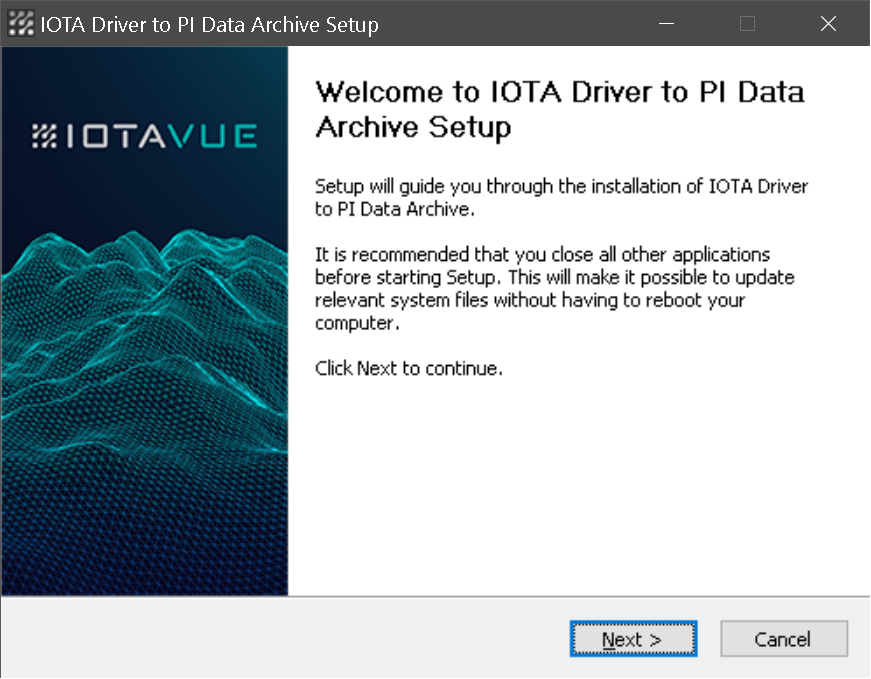 | 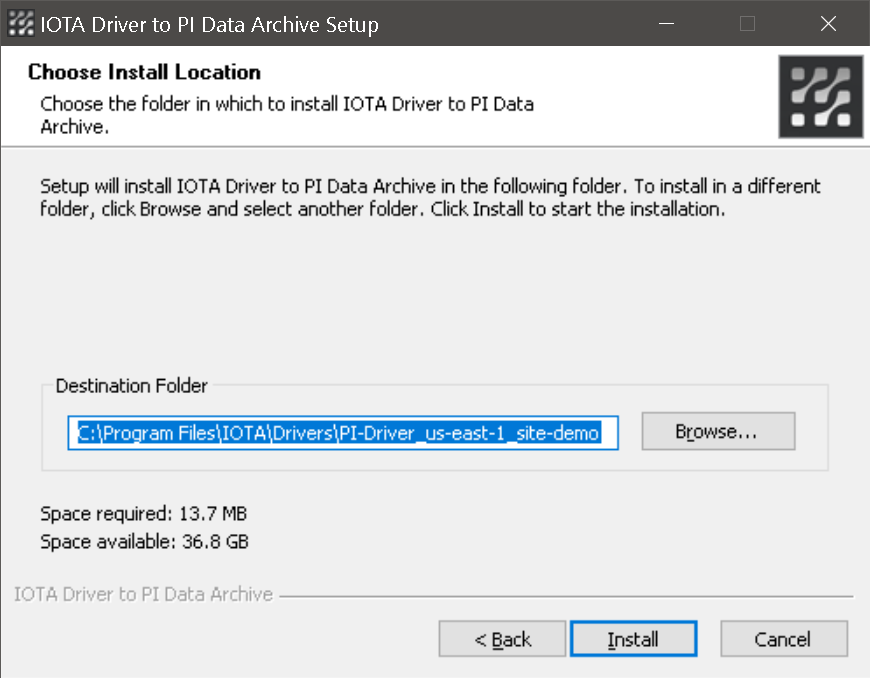 |
Verify Installation
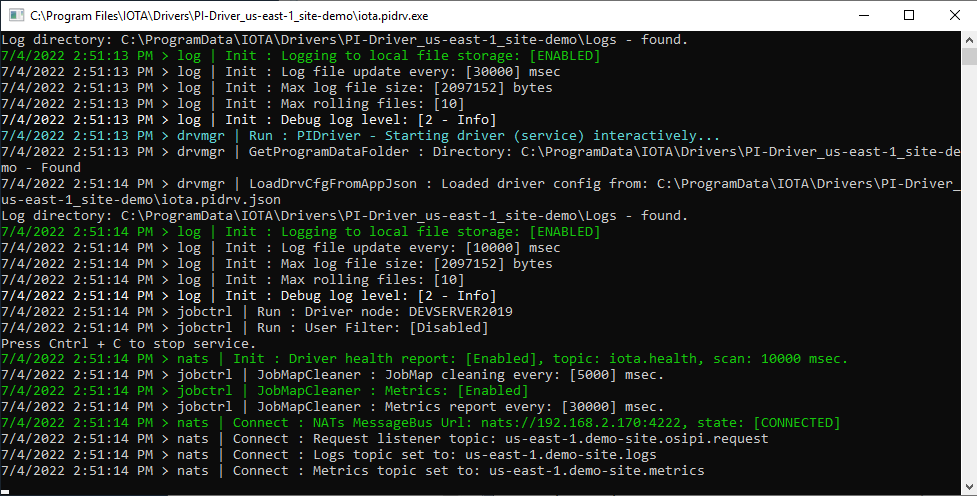
To check that the connection is all right, we recommend to start iota.pidrv.exe from a Command prompt for a moment and make sure the connection to the message bus succeeded (all green messages). Close the application after this brief test.
Configuration and Log Location
By default, the PI-Driver installer creates a data folder for driver's configuration and logs inside of ProgramData folder as:
{ProgramData}\IOTA\Drivers\PI-Driver_{Region Name}_{Site Name}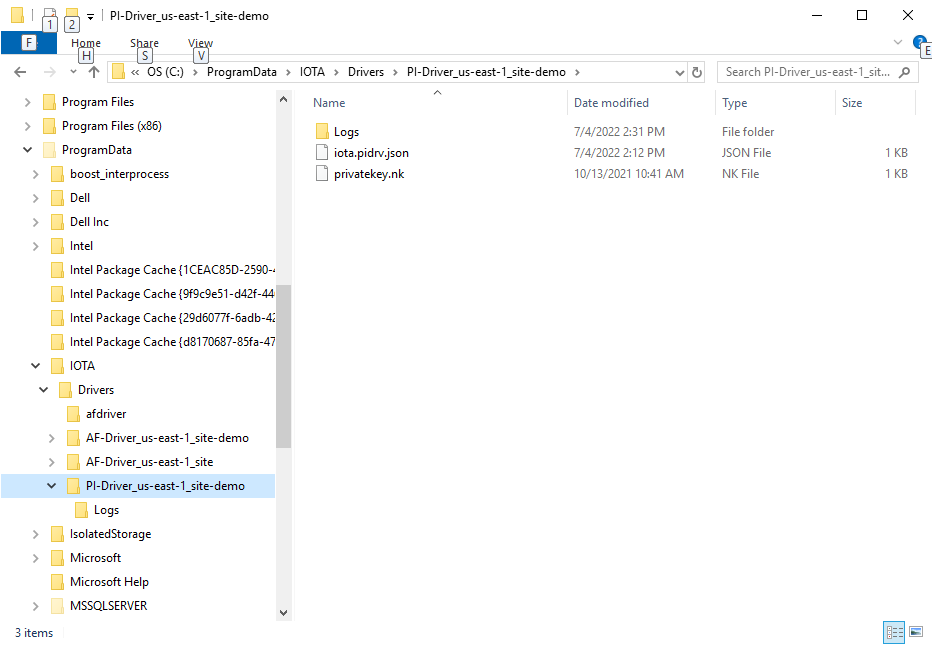
For the first PI-Driver installation, the installer copies an auto generated configuration (.json) file and private key file in this folder.
Info
Any subsequent PI-Driver updates
will not affect the configuration and private key files in ProgramData folder.
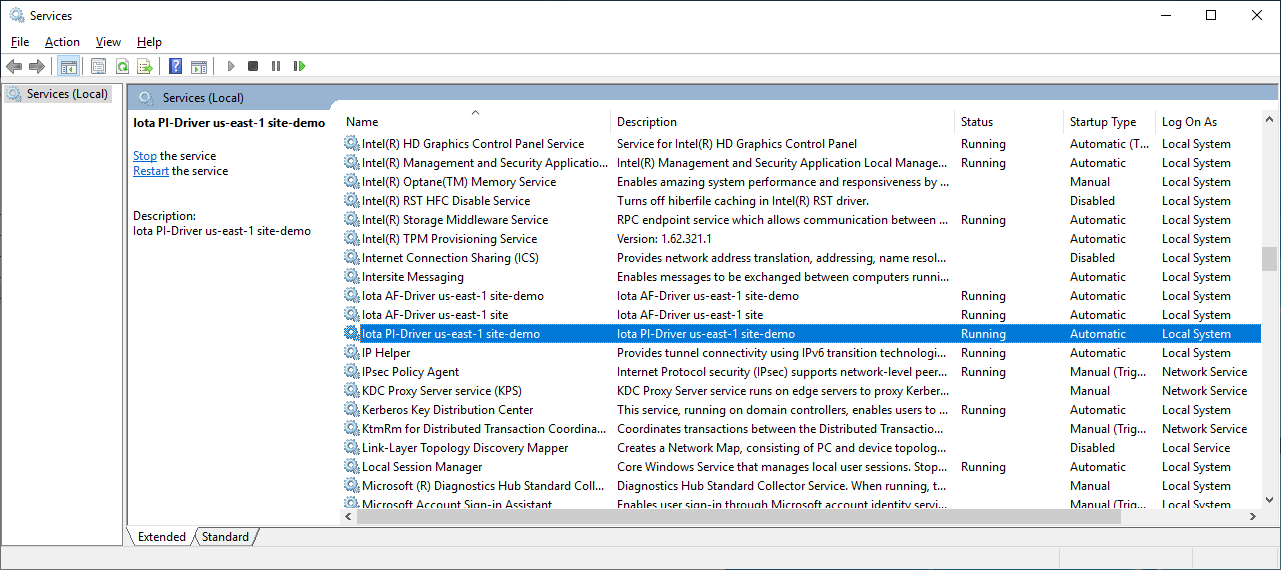
Run as a Service
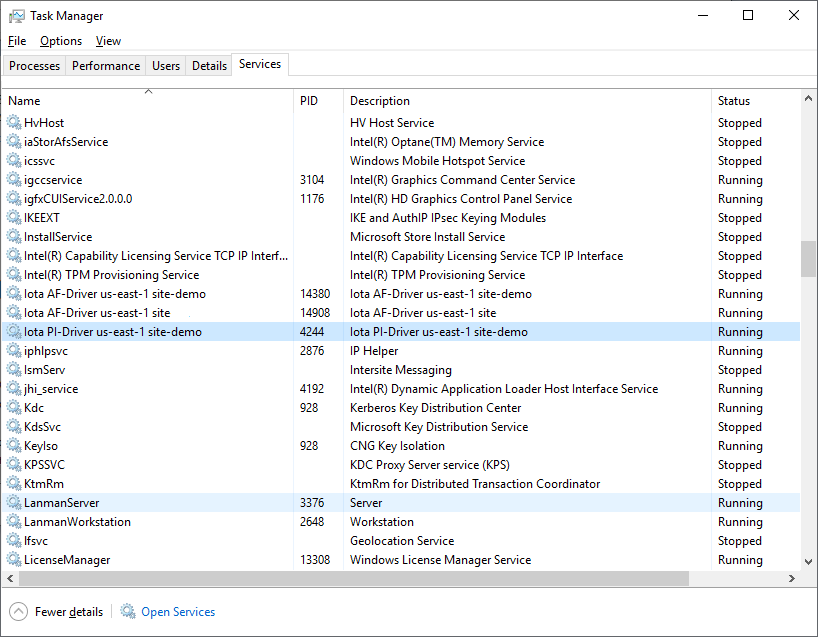
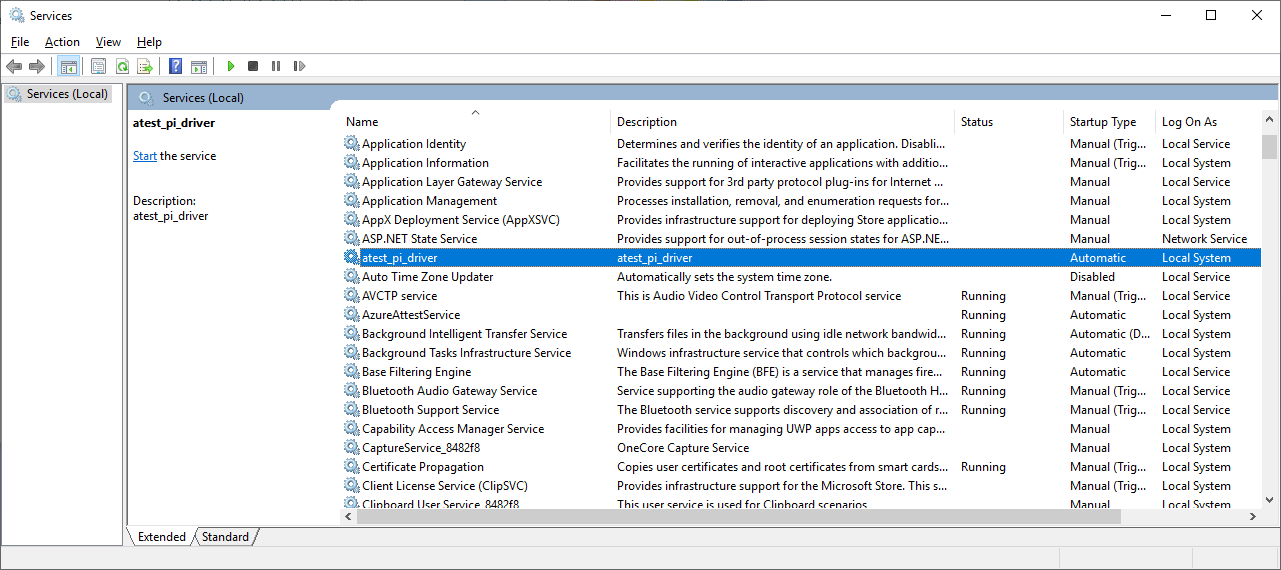
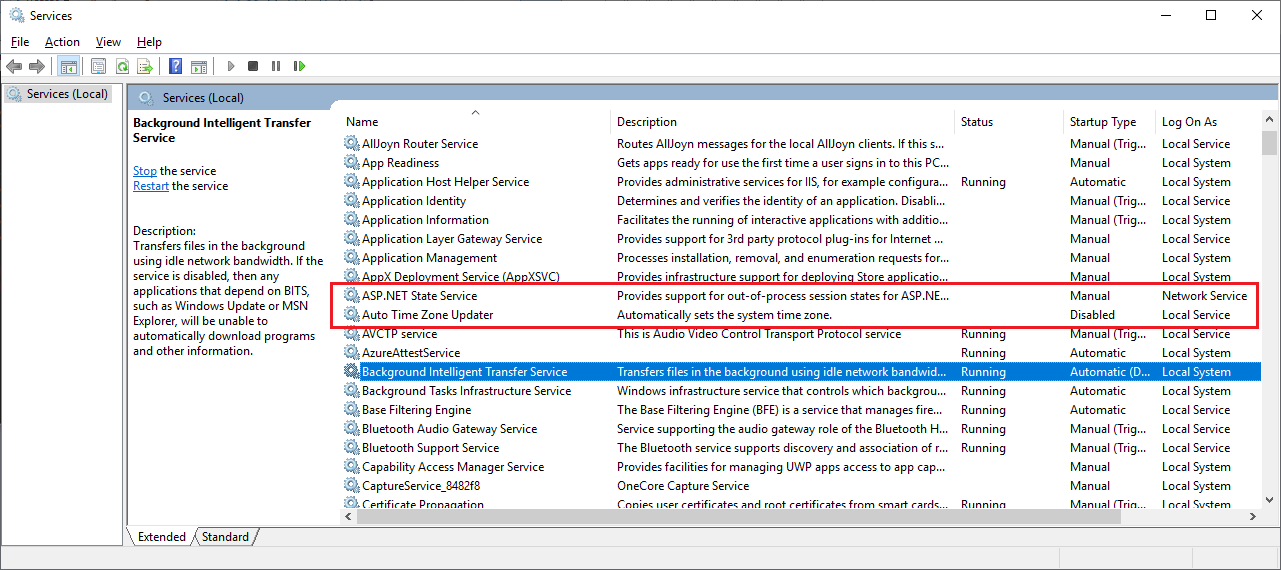
The IOTA PI-Driver service can be started or stopped through either Service Manager:
or Task Manager:
Manual Service Install
The PI-Driver can be installed as a service manually from the command line.
First, locate the PI-Driver executable: iota.pidrv.exe. By default it is installed in
{Program Files}\IOTA\Drivers\PI-Driver_{Region name}_{Site name}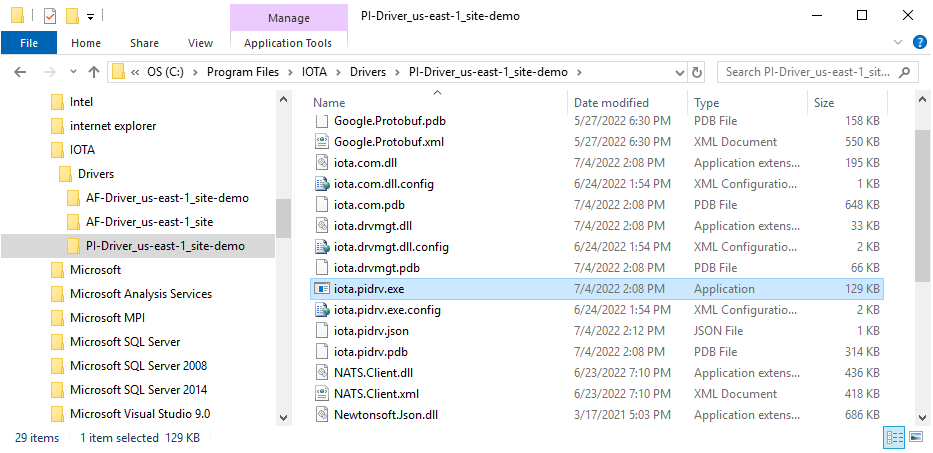
Open the command line as administrator and navigate to PI-Driver folder.
In the command line type the following command:
iota.pidrv.exe -install {Custom Service Name}, where {Custom Service Name} is a user provided service name.
Example:
iota.pidrv.exe -install atest_pi_driver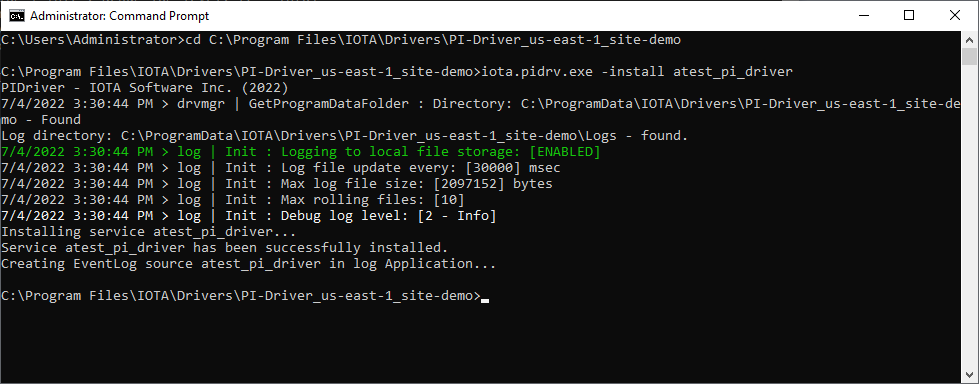
To verify manual service installation, open Service Manager and locate the newly created service.
Uninstall
Run the Uninstaller
There are two ways to remove the PI-Driver from the system:
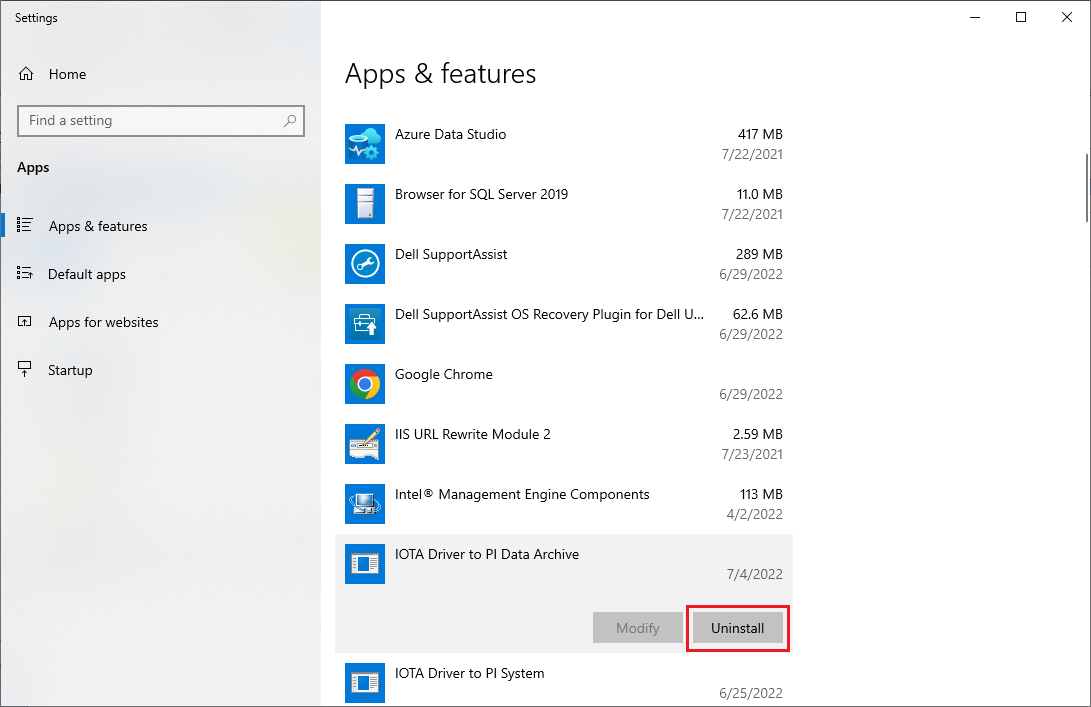
Use "Apps and Features"
Locate the PI-Driver installation and click on "Uninstall"
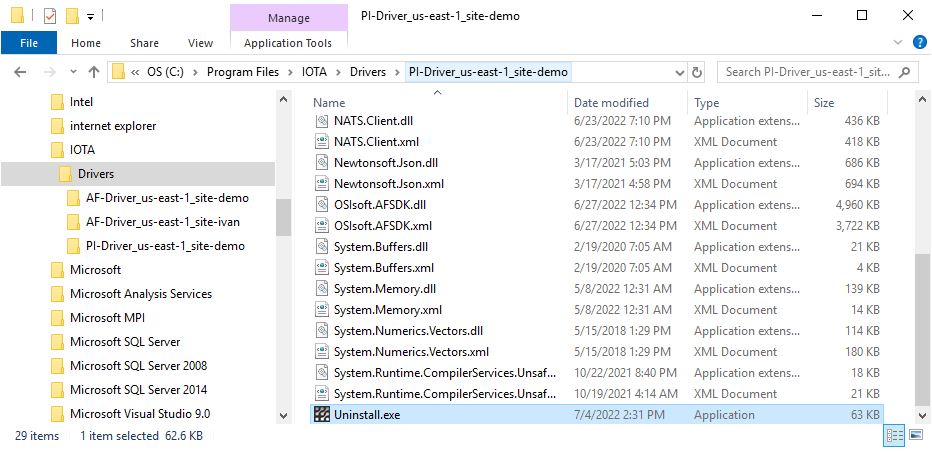
Via Program Files
Find the PI-Driver folder. By default, it is located in
{Program Files}\IOTA\Drivers\PI-Driver_{Region name}_{Site name}Inside the folder, find the uninstall.exe and run it as Administrator.
When PI-Driver uninstall is initiated the confirmation dialog is displayed:
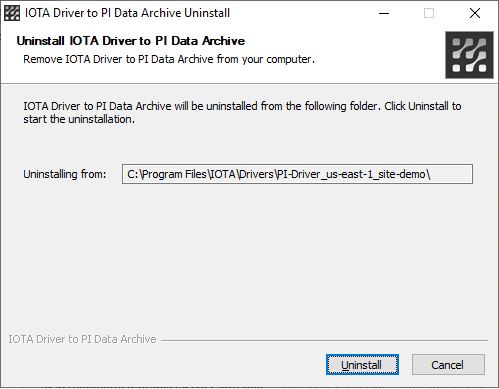
Clicking on "Uninstall" button will start the process.
The uninstall process removes the PI-Driver service and all files in Program Files.
Warning
The uninstall does not remove any data from ProgramData folder.
Manual Service Uninstall
The PI-Driver can be uninstalled as a service manually from the command line.
First, locate the PI-Driver executable: iota.pidrv.exe. By default, it is installed in
{Program Files}\IOTA\Drivers\PI-Driver_{Region name}_{Site name}Open command line as administrator and navigate to PI-Driver folder.
In the command line type the following command:
iota.pidrv.exe -uninstall {Custom Service Name}, where {Custom Service Name} is a user provided service name.
Example:
iota.pidrv.exe -uninstall atest_pi_driver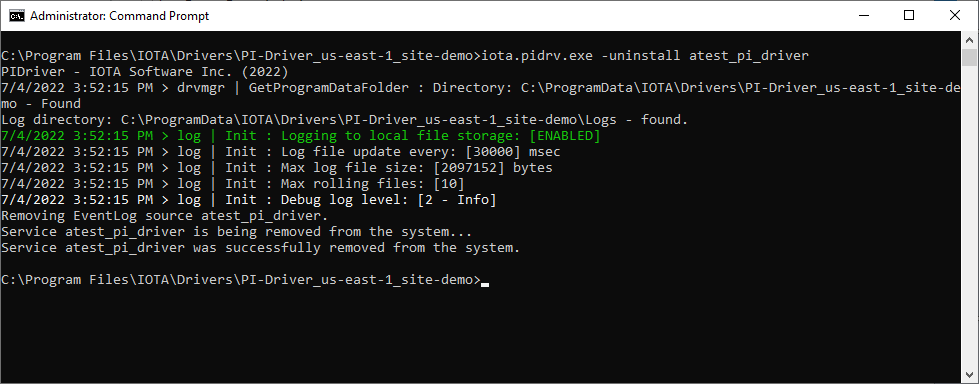
To verify manual service removal, open Service Manager and check that service "atest_pi_driver" is no longer present in the list of services.
Service Configuration
On every startup - PI-Driver reads its configuration from the file named the same as executable (with the .json extension): "iota.pidrv.json".
For secure NATs bus communication, the NKey private key file named as "privatekey.nk" must reside next to "iota.pidrv.json" configuration file.
During the first PI-Driver installation, the installer copies an auto generated configuration (.json) file and private key file to ProgramData folder:
{ProgramData}\IOTA\Drivers\PI-Driver_{Region Name}_{Site Name}Any subsequent PI-Driver updates will not affect the configuration and private key files in ProgramData folder.
Tips
PI-Driver comes with a preset configuration file. Manual configuration is not required.
Configuration parameters
| Parameter name | Required | Default Value | Data Type | Description |
|---|---|---|---|---|
| driverid | ⚫ | null | string | Driver Id - used for logging purposes only |
| debug | ⚫ | 0 | int | Debug verbose level: 0 - errors only, 1 - warnings, 2 - information, 3 - debug |
| natsurl | 🟢 | null | string | NATs server url with port |
| publickey | 🟢 | null | string | NATs NKey public key string. Private key must be defined in file: "privatekey.nk" and located in the same folder as iota.pidrv.json |
| reqtopic | 🟢 | null | string | NATs topic on which driver listens for requests |
| statstopic | ⚫ | null | string | NATs topic for sending driver's stats |
| logstopic | ⚫ | null | string | NATs topic for sending driver's logs |
| metricstopic | ⚫ | null | string | NATs topic for sending driver's metrics |
| metricsmsec | ⚫ | 30000 | int | How often in milliseconds to send metrics data. Default: 30000 = 30 sec |
| enablemetrics | ⚫ | true | bool | Enables metrics reporting |
| healthtopic | 🟢 | iota.health | string | NATs topic for sending driver's health |
| healthmsec | ⚫ | 10000 | int | How often in milliseconds to send health data. Default: 10000 = 10 sec |
| logfilecount | ⚫ | 10 | int | Number of rolling log files |
| logfilesize | ⚫ | 2097152 | int | Number of bytes per each log file. Default: 2097152 bytes = 2 Mb |
| logscanmsec | ⚫ | 30000 | int | How often in milliseconds to append data to log files. Default: 30000 = 30 sec |
Example
{
  "driverid": "osipi-demo",
  "natsurl": "mon.iota-demo.com:443",
  "reqtopic": "us-east-1.site-demo.osipi.request",
  "statstopic": "us-east-1.site-demo.stats",
  "logstopic": "us-east-1.site-demo.logs",
  "publickey": "XXXXXXXXXXXXXXXXXXXXXXXXXXXXXXXXXXXXXXXXXXXXXXXXXXXXXXXX",
  "metricstopic": "us-east-1.site-demo.metrics",
  "metricsmsec": 30000,
  "healthtopic": "iota.health",
  "healthmsec": 10000,
  "enablemetrics": true,
  "debug": 2,
  "logfilecount": 10,
  "logfilesize": 2097152,
  "logscanmsec": 10000
}
Verify PI-Driver status
When the driver is configured properly and started, it shows with online status on the right pane of Data Sources menu
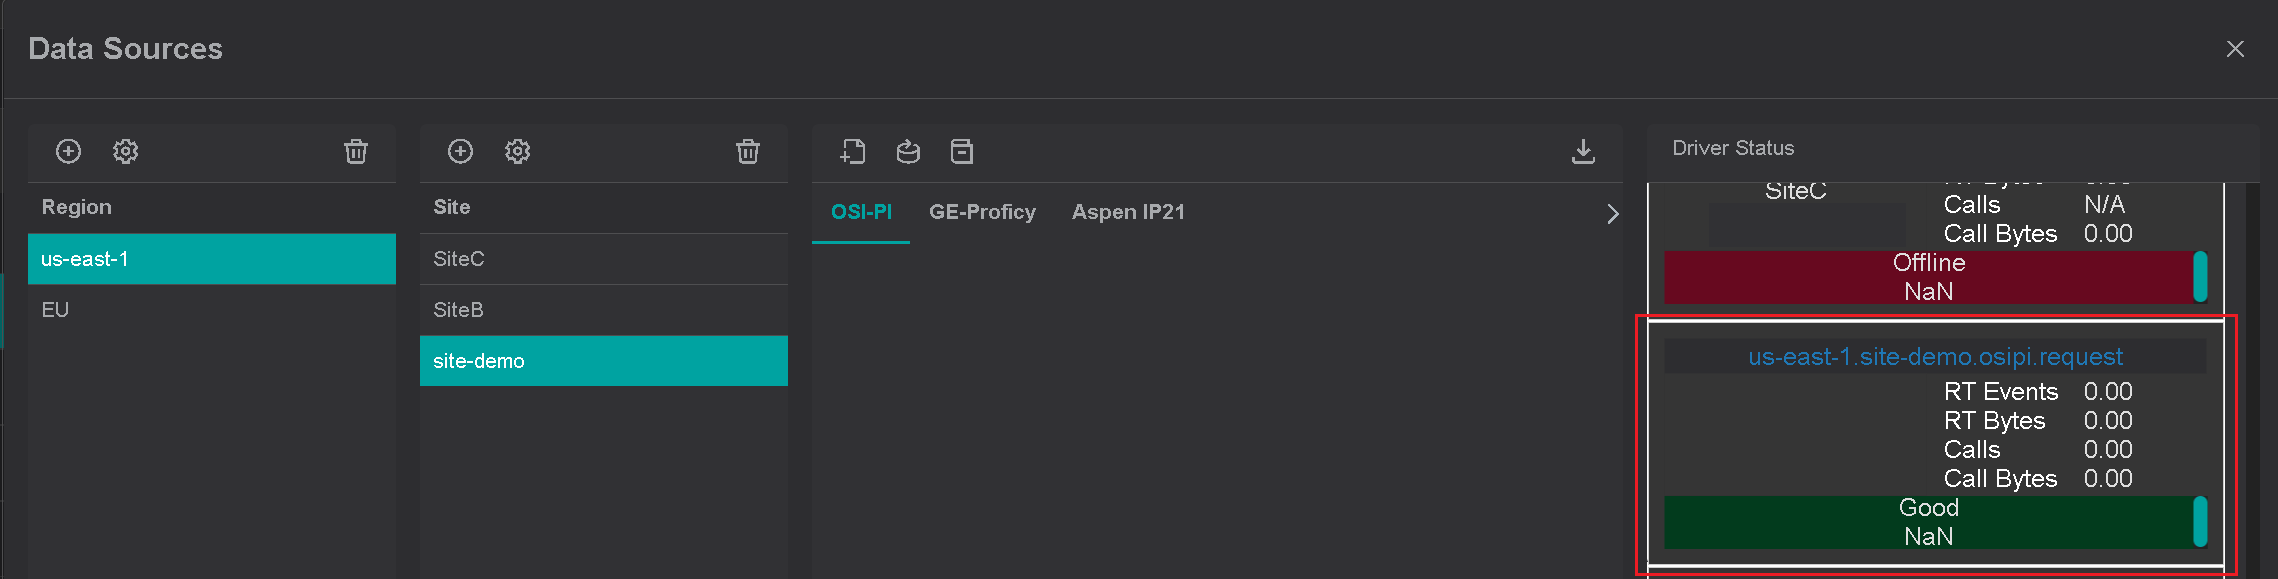
IOTA Vue uses combination of region, site and driver type to create a unique channel for communication with specific driver.
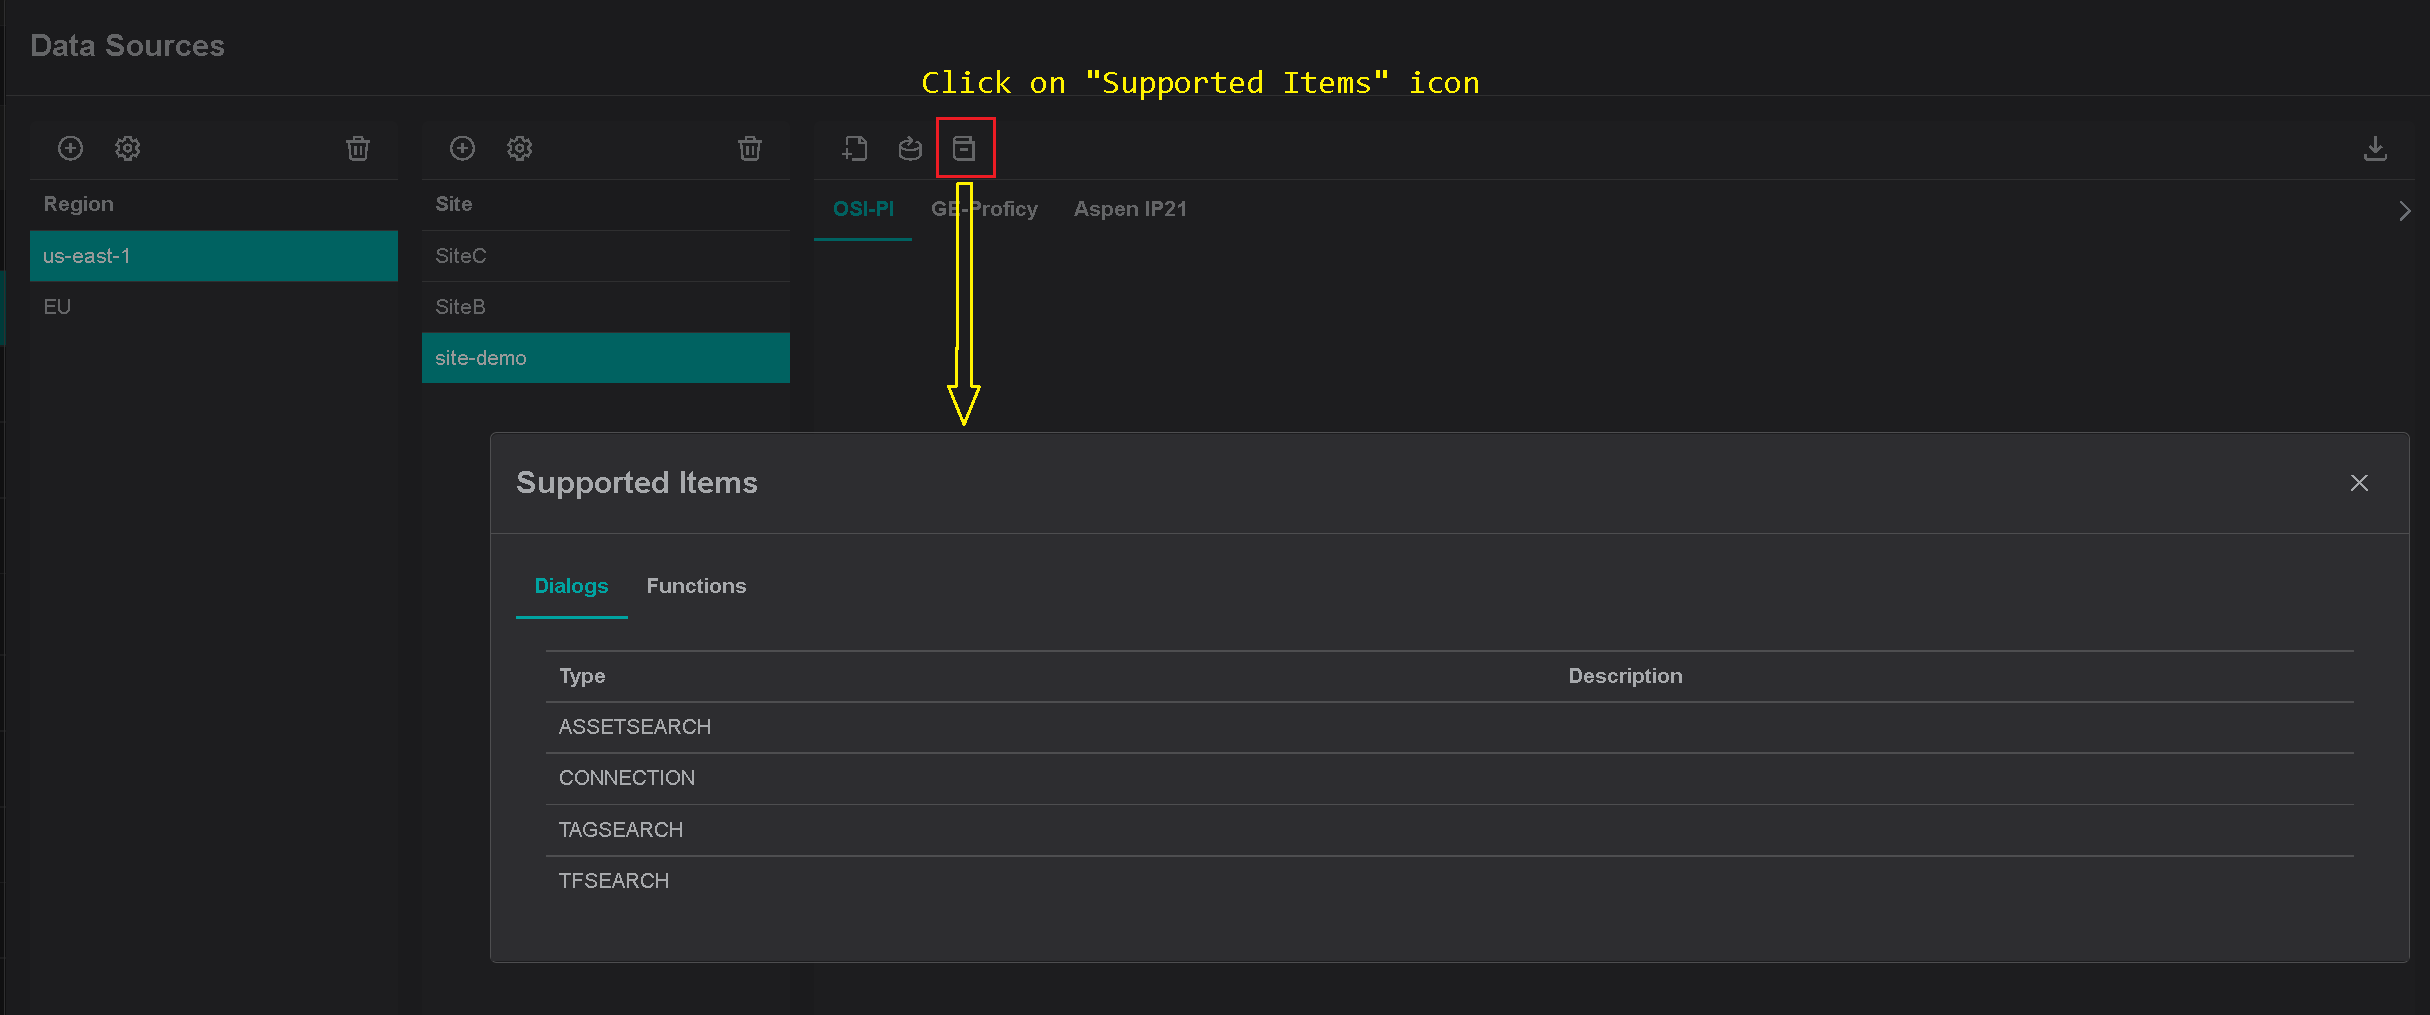
{region}.{site}.{driver type}.requestTo verify data communication with the driver, click on "Supported Items" icon. If communication is established, the popup
dialog will show supported driver dialogs and functions.