Views are workspaces, where you can build dashboards. Views can be organized hierarchically using a parent-child structure for better navigation and organization.
Use the Views tab in the side menu to manage your views.
Creating a New View
- Click the Add button
 .
. - Enter the desired name and optionally a description.
- To create a child view, select the checkbox labeled
Add as Child View.
Editing Views
To edit a view, click the ![]() button. The following actions can be performed:
button. The following actions can be performed:
Update the title, description, and hierarchy.
Customize the background:
Image or GIF: Set a background with optional transparency and text-finding features.
Solid Color: Choose a specific solid background color.

Gradient Color: Customize gradient opacity and angle.

Adjust Workspace Dimensions: Modify the width and height of the workspace to better fit your screen size. This ensures the view is optimized for both visibility and usability across different devices.
Saving Changes
Ensure you save your work using the save button ![]() available on the side menu and top bar. A blue indicator will appear when unsaved changes are detected.
available on the side menu and top bar. A blue indicator will appear when unsaved changes are detected.
Deleting Views
To delete a view, click the delete button ![]() .
.
Navigating Views
1. Side Menu
The side menu provides an overview of all views and their hierarchical branches for efficient navigation.
2. Top Bar Navigation
- Quick Navigation: Use the left (
<) and right (>) arrow buttons to switch between views opened during the current session. - Search Functionality: Enable the search feature in your User Profile to locate views using keywords.

3. Breadcrumb Navigation
Breadcrumb Navigation displays the current view’s position within the hierarchy and allows quick switching between related views.
Details Breadcrumb Navigation Features
- Click on Name: Opens the associated view.
- Click on Arrow: Expands a dropdown menu with related views.
- Hover: Highlights dropdown items for selection.
- Compatibility: Works in all modes, including Presentation Mode.
4. Actions and Asset-Relative Displays
- Actions provide an efficient method to navigate directly to specific views. These actions can be triggered by UI elements, such as buttons, to seamlessly redirect to predefined views.
- Asset-Relative Displays populate views dynamically with data linked to a selected asset for quicker insights.
For additional details, refer to the KnowledgeBase.
View Modes
Switch between three modes to build, interact with, and present views, depending on your needs.
Edit Mode
TheEdit Modeis for building and modifying views. In order to unlock a view, click the lock button located on the top bar and side panel.
View-Only Lock Mode
ActivateLock Modeby clicking the lock button . This mode disables editing, making it ideal for interacting with and reviewing views.
Locked Mode View-Only Presentation Mode
EnablePresentation Modeby clicking the presentation button . This mode provides a distraction-free layout for showcasing data without side panel and top bar.
Customize the visibility of the top bar during Presentation Mode in your User Profile.
Presentation Mode
Workspace Visibility
In Edit Mode, a box outlines the visible workspace area, defining the portion of the workspace that will remain visible in Lock Mode and Presentation Mode.
The height and width of this workspace can be adjusted in the view settings (see Editing Views)
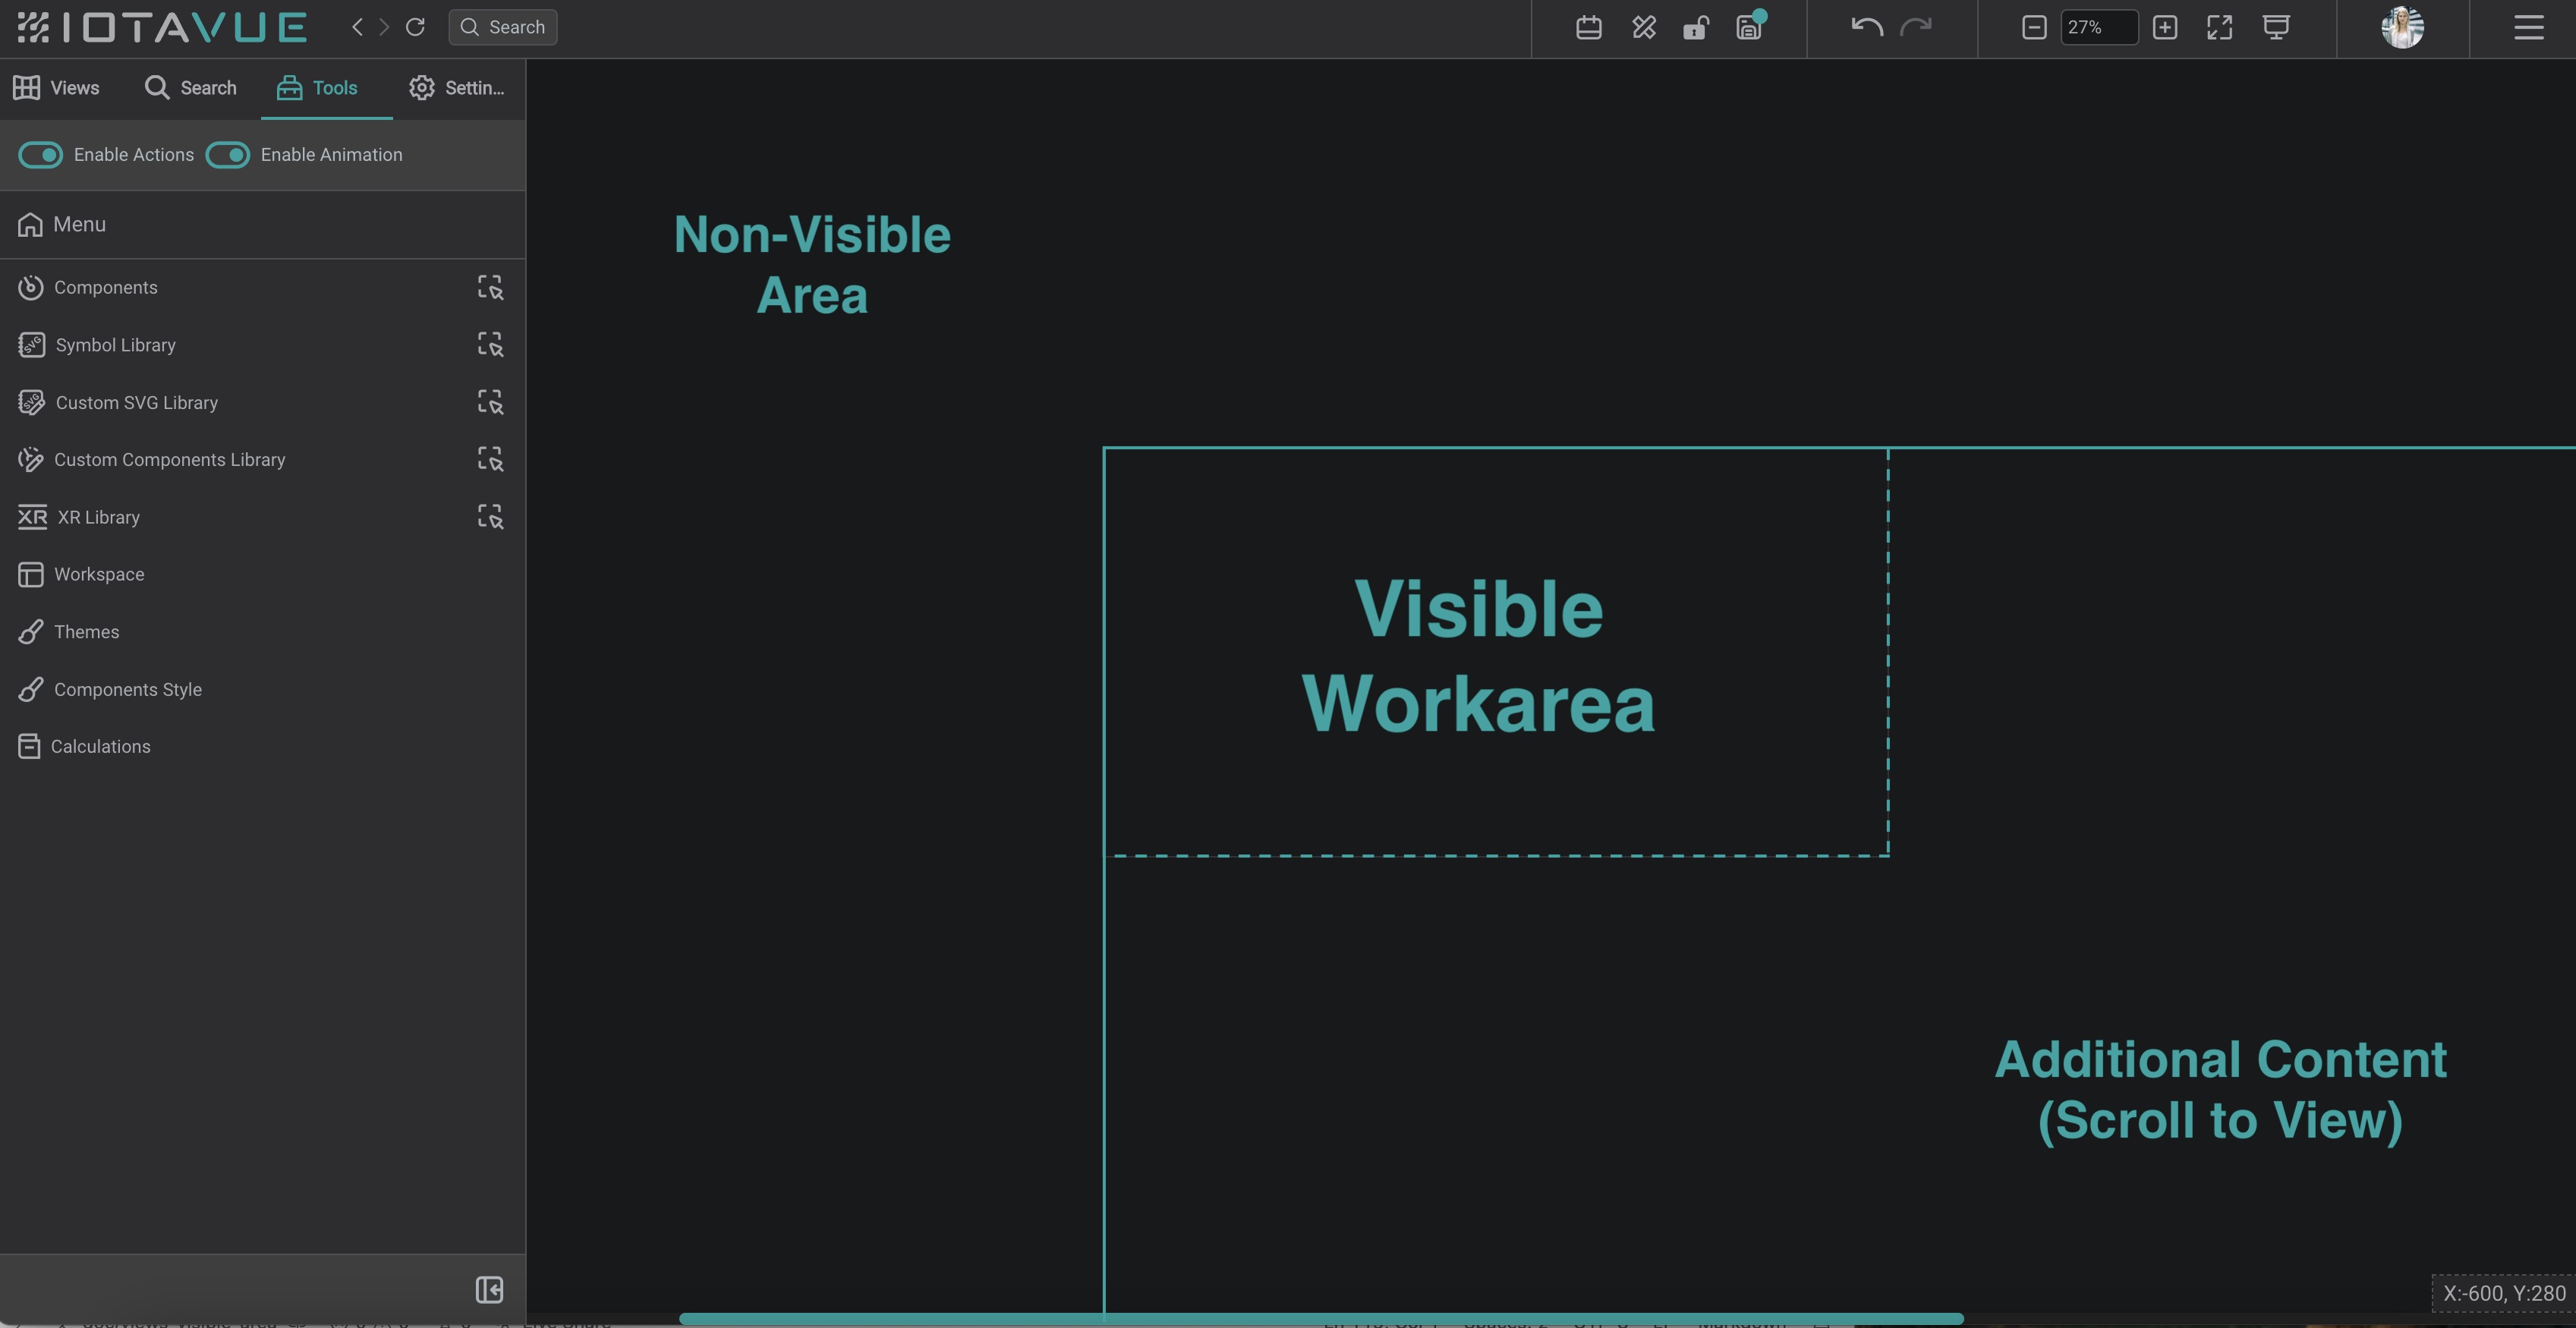
- Zoom Effect: When switching to
Lock ModeorPresentation Mode, the workspace zooms to fit the Visible Workarea, defined by the box. - Hidden Areas: Content outside the Visible Workarea is hidden and will not be displayed in these modes.
- Scrolling: In
Lock ModeorPresentation Mode, you can scroll right and down to access additional content, but not left or up.
Sharing Views
Easily share views with others to collaborate or distribute information while controlling access and permissions.
How to Share a View
- Click the additional menu button
 .
. - Choose one of the following options:
Generate Link: Creates a read-only link that allows users to view the shared content without making changes.
Share: You can assign the following permissions to other users or groups:
- Read: Users can view the content but cannot interact with it.
- Execute: Users can interact with the view but cannot make edits.
- Write: Users have full editing rights.
To assign permissions:
- In the additional menu, click the
Sharebutton. - In the pop-up window, select the appropriate permission level for each user or group by ticking the corresponding checkbox.
- Click
Applyto save your changes.
- Clone a View: Duplicate a view to create a new version without affecting the original.
Importing Views
Import views using:
- Migration Utility: Migrate views from ProcessBook (see more details on migrating views).
- Live Rendering: Set up live rendering from PI Vision displays via the
referencetab. See PI Vision Live Rendering for details.
Downloading and Uploading Views
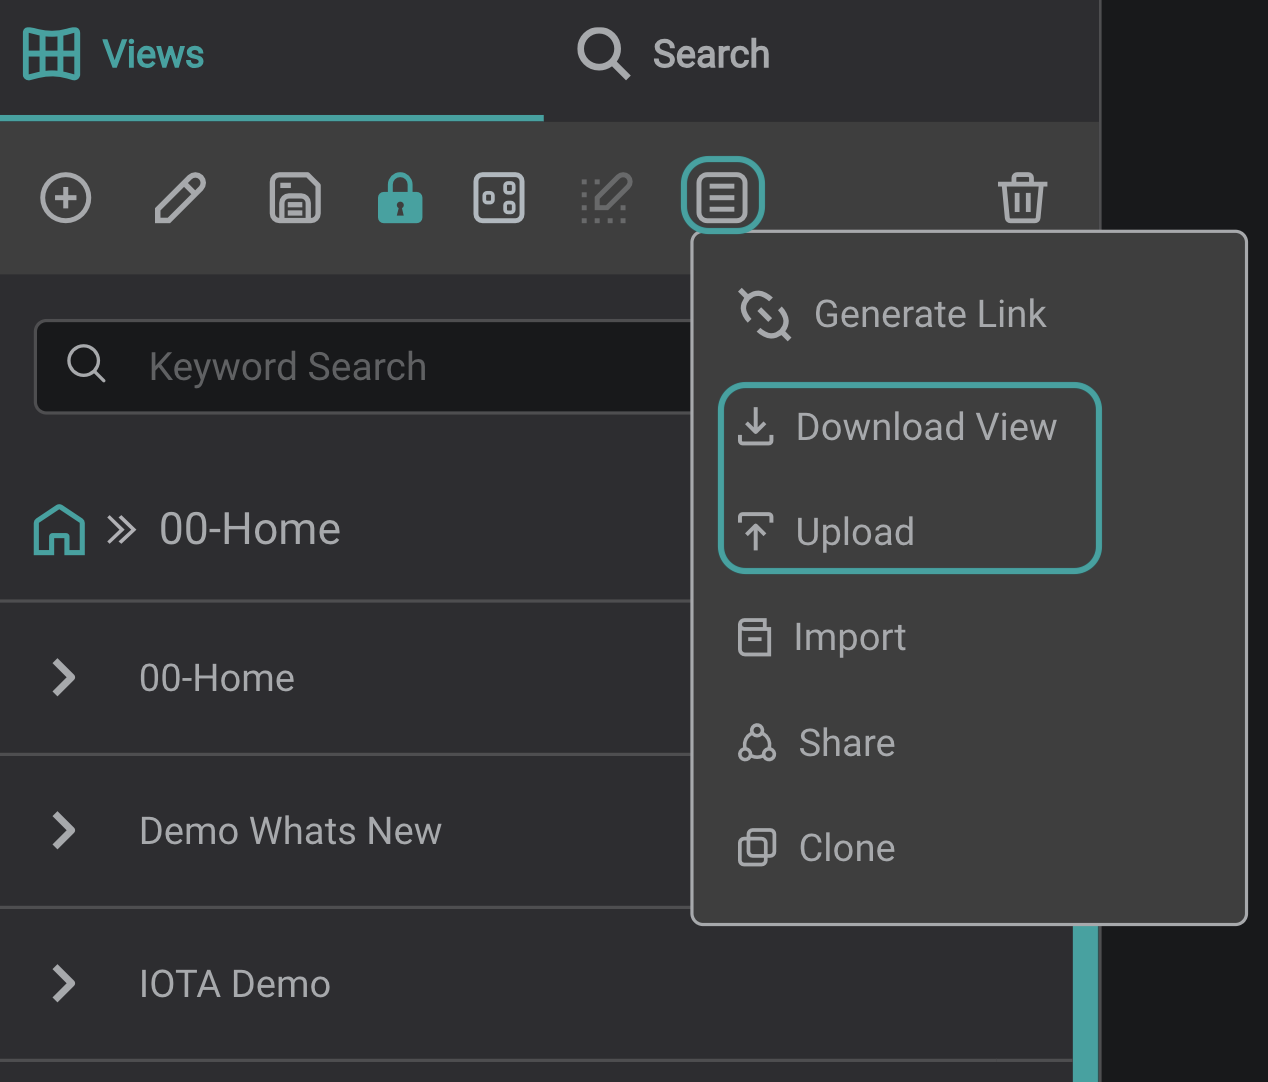
Download or upload views in Base64 format for duplication: