
Actions & Interactions
Actions & Interactions
Actions let you respond to user events on a component: changing its appearance, pushing data from one component to another, or triggering navigation. You configure actions in the Actions panel of the Settings panel: Actions is one of the generic settings every component shares.
If you are continuing from Training Components, you have seven components trained to HEX01. This page explains what Actions and Interactions are, then walks through worked examples of wiring components together so viewers can switch assets and drive one component from another at runtime.
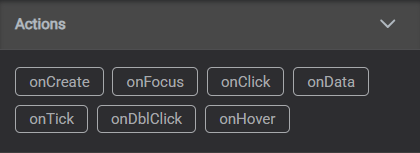
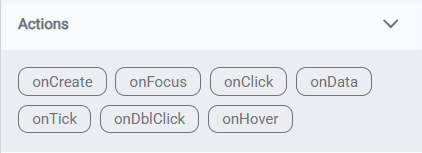
Every action is built from two parts: a trigger (what causes it) and an action type (what happens).
Save and reload before deciding an action is "broken"
After wiring an interaction or navigation, if a component doesn't appear to respond, save the display and reload the page before concluding it's broken. Some bindings only re-resolve on a fresh load, so a reload frequently confirms the wiring was correct all along and rules out a stale-state false alarm.
Triggers
Select a trigger tab to define when the action fires:
| Trigger | When it fires |
|---|---|
onCreate | When the display first loads or is refreshed |
onClick | When a user clicks the component (or an item within it, such as a row in a table or a node in a tree) |
onDblClick | When a user double-clicks the component |
onHover | When the cursor moves over the component |
onFocus | When the component receives input focus (e.g., a text box is active, a dropdown is open) |
onData | When new data arrives on a channel attached to the component |
onTick | On a repeated interval: fires multiple times per second |
Tips
Navigation actions are only available on onClick and onDblClick. They are disabled for onCreate, onTick, onFocus, and onHover.
Action Types
Once you select a trigger, choose an action type from the tabs in the dialog:


- Multistate: change a component's visual appearance based on a data condition. Covered in Multistate Behavior.
- Advanced Multistate: a more powerful variant of Multistate: match rules per channel (channel / operator / value) and invoke a state function when a rule matches, for conditional behavior beyond basic color and visibility. See Multistate Behavior.
- Interaction: push data or state from one component to another on the same display. See below.
- Navigation: move to a different display. Covered in Navigation Between Displays.
- Script: run a custom JavaScript function. Covered in Scripting.
Interaction
Interaction connects a producer component to a consumer component. When the trigger fires, the producer passes a property to the consumer, which responds by executing a function.
This is the primary way to make displays dynamic without scripting, for example, clicking an asset in a Tree component to update what a line chart shows, or syncing time ranges across multiple charts.
Interactions only work within the same display
The Consumer picker only lists components that exist on the current display. You cannot use an Interaction to update a component on a different view. To navigate to a different display, use a Navigation action; see Navigation Between Displays.
Configuring an Interaction
| Field | What to set |
|---|---|
| Producer Component | Which component the property comes from: defaults to the component you are configuring (this) |
| Producer Component Property | Which property of the producer to pass |
| Consumer Component | Which component receives it (select by variable name, or use this for the same component) |
| Consumer Component Function | How the consumer responds |
Full list of options
Every producer property and consumer function you can pick here, with the components each one works on, is listed on the Interaction Reference page.
Example: Switching Asset Context
Both examples below rely on the display's components being trained to assets: bound to asset attributes rather than hardcoded tags (see Training Components). SetChannels works by re-pointing a component from one asset to another, so each consumer must resolve its data through an asset attribute. A component wired to a fixed tag has nothing to switch, so the dropdown or tree selection won't change what it shows.
Switch asset context with a dropdown
This is the pattern that lets a viewer switch which heat exchanger the display shows. On the Heat Exchanger Details display, the five Value overlays on the schematic are trained to HEX01; a Dropdown lets the viewer swap them to any exchanger in the fleet: one onClick Interaction re-points every component at once:
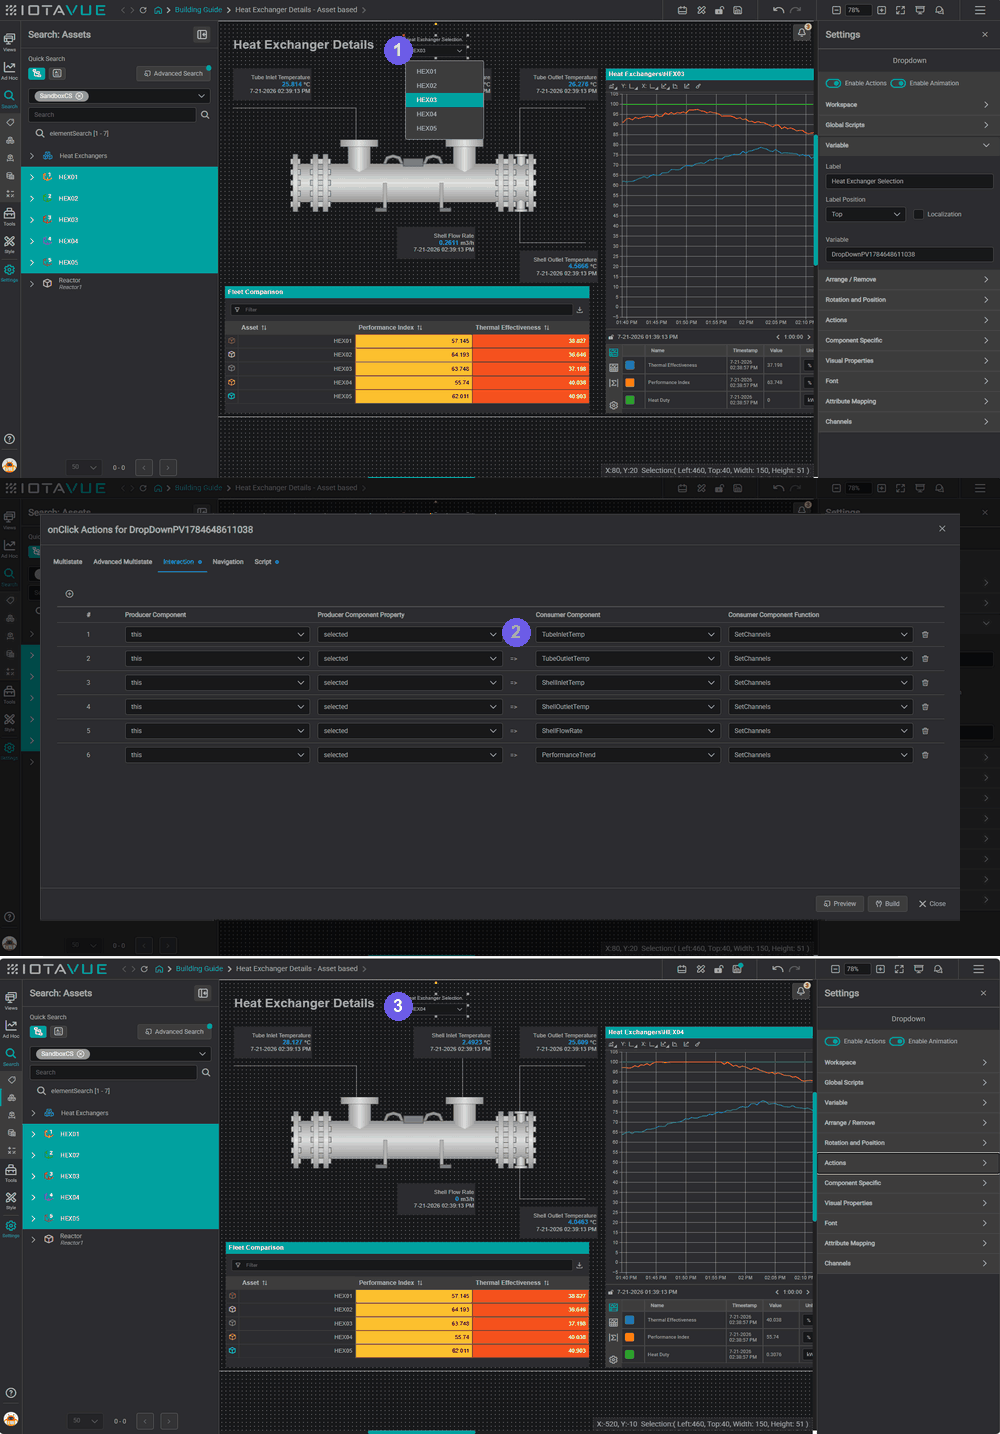
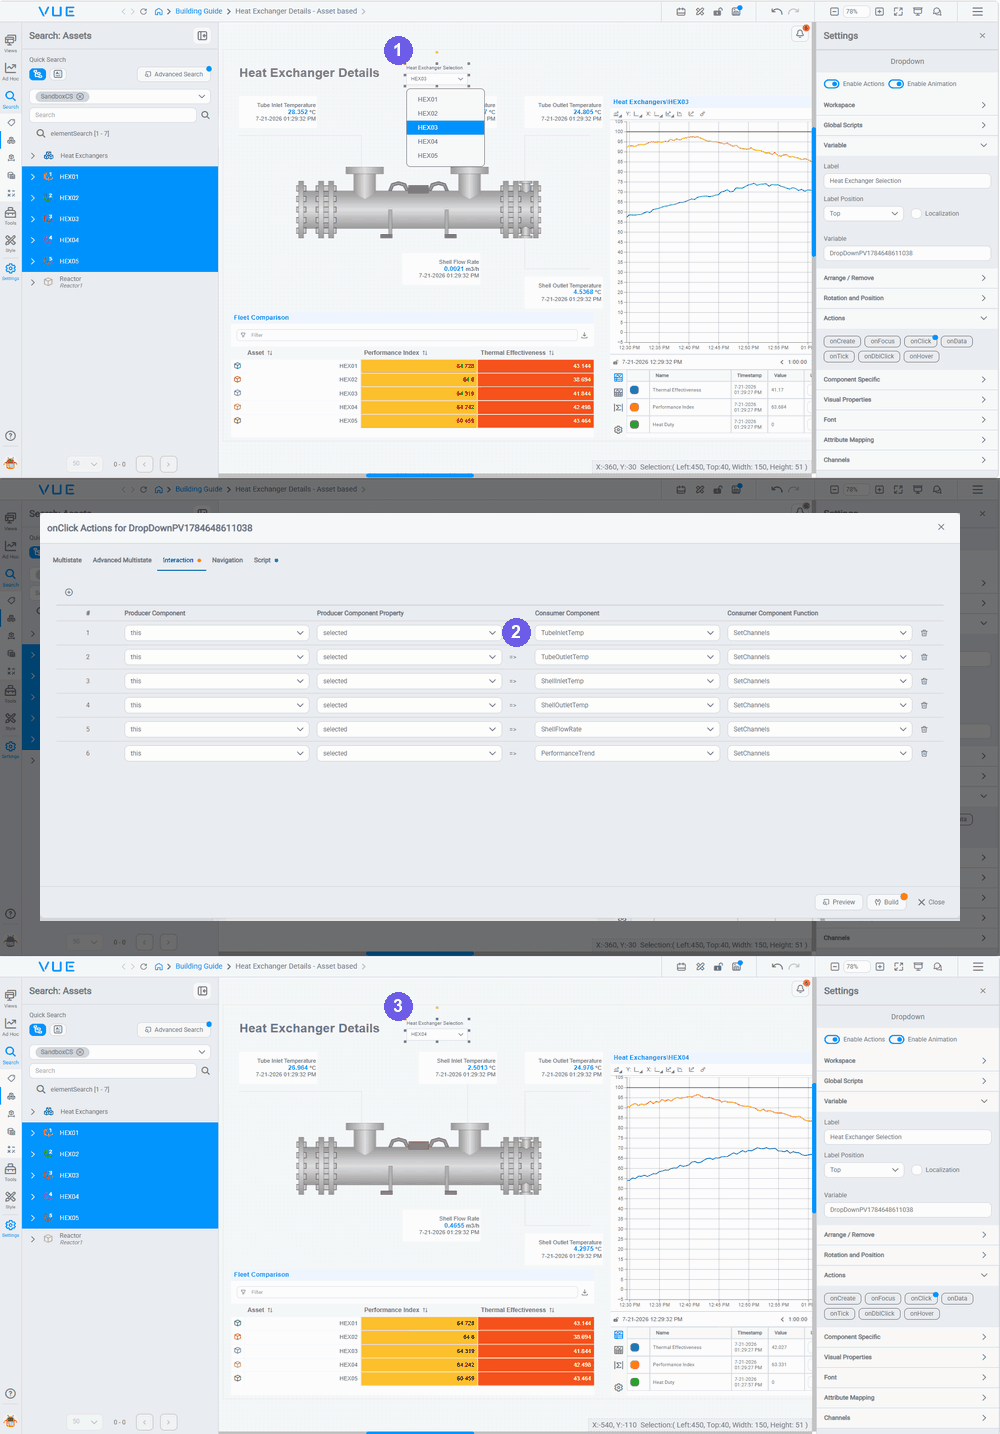
The three numbered steps match the GIF:
- Place and populate the dropdown: drag a Dropdown component onto the canvas (under UI), then drag the heat exchanger assets (HEX01 … HEX05) from the Search → Assets panel straight onto it: each dropped asset becomes an option in the dropdown.
- Wire the Interaction: select the Dropdown, open the Actions panel, choose the onClick trigger, and add an Interaction: set Producer Component to
this, Producer Component Property toselected(the chosen exchanger), Consumer Component to a component you want to update, and Consumer Component Function toSetChannels. Add a row for each remaining component, or select several components in one row's Consumer field; both work, and one row per consumer (six here: the five values plus the line chart) is easiest to read and edit later. - Pick an exchanger: choosing one from the dropdown passes
selectedto every wired consumer and each callsSetChannels, so the values, schematic overlays, and chart all switch to the chosen exchanger at once.
Rename your components before wiring
The Consumer Component picker lists components by their variable name. Give each component a clear name (e.g. TubeInletTemp, ShellFlowRate, PerformanceTrend) in the Settings panel before you wire the Interaction, with six or more consumers to pick from, clear names make them far easier to find. See Training Components for naming components as you build.
Prefer scripting? Every Interaction has a Script tab that shows the generated code: this dropdown produces a SetChannels call on each component. See Interaction Functions → SetChannels for the script form of this same example.
Sync a line chart to a tree selection
A Tree component lets a viewer browse the asset hierarchy and click a node to drive another component: here, clicking a heat exchanger re-points the line chart to it:
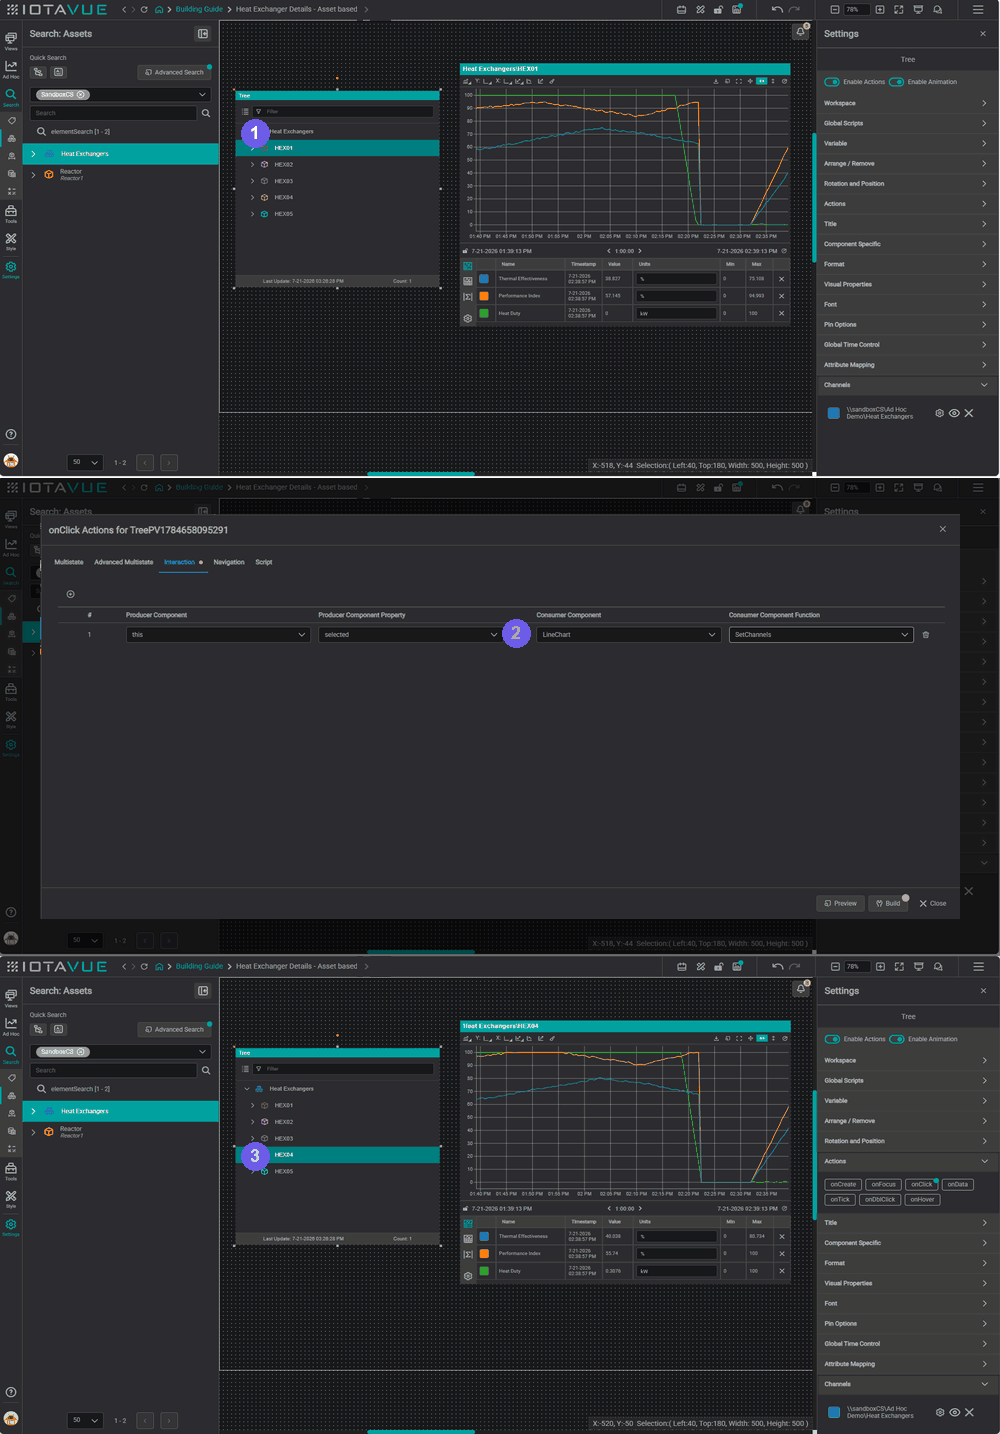
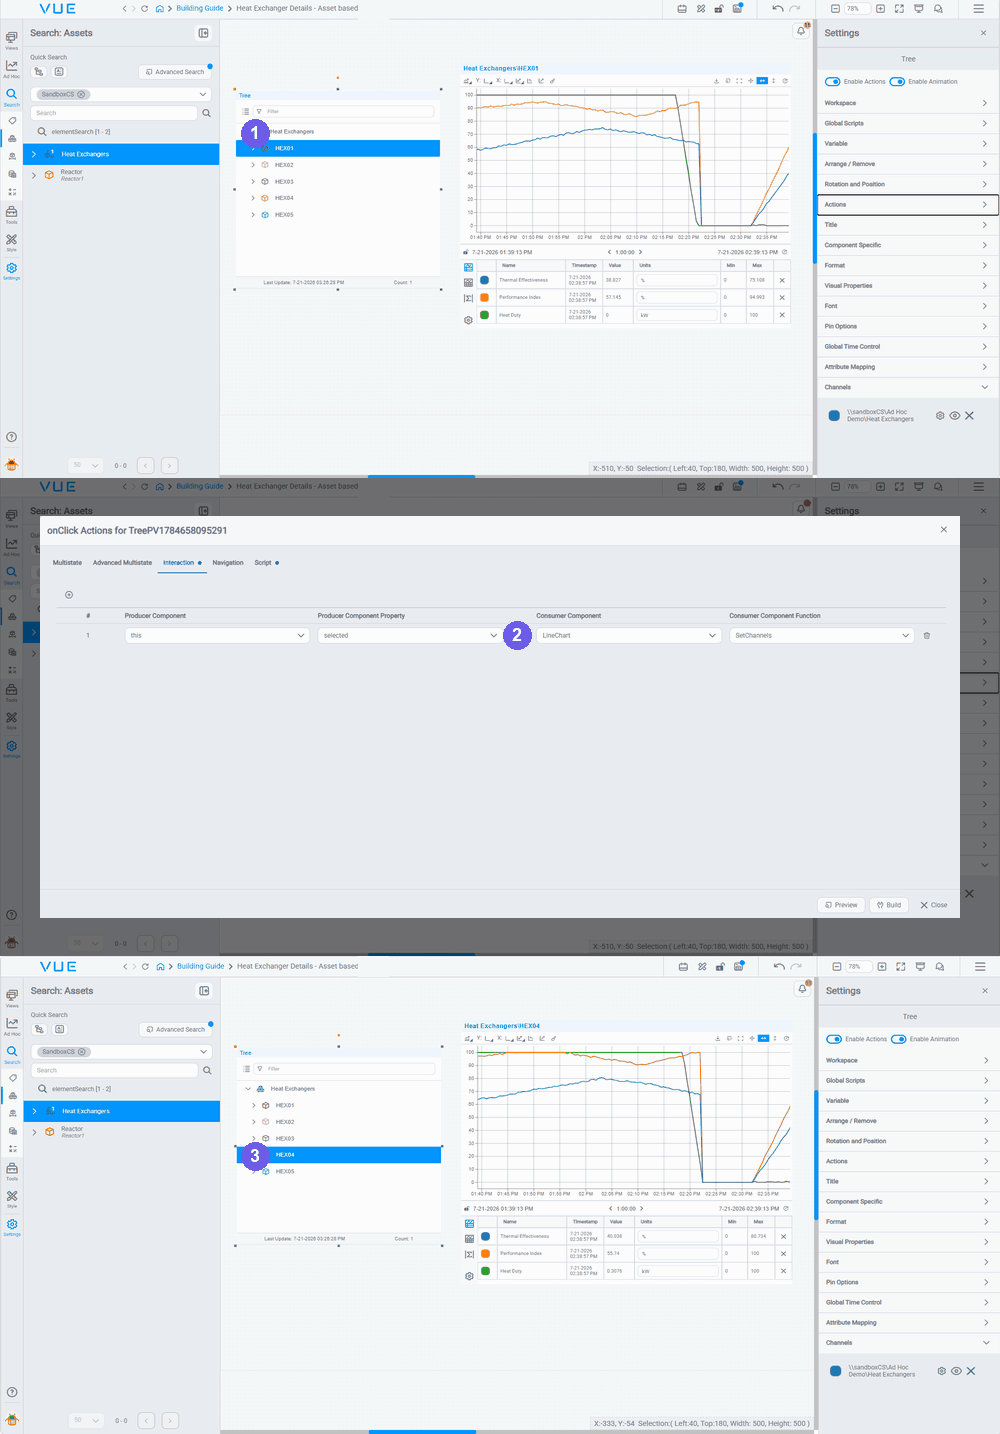
The three numbered steps match the GIF:
- Populate the tree: drag the top-level Heat Exchangers asset from the Search → Assets panel onto the Tree. You only need the top node; expanding it on the component pulls in the child elements (HEX01 … HEX05) automatically.
- Wire the Interaction, on the Tree, add an onClick Interaction: set Producer Component to
this, Producer Component Property toselected, Consumer Component to the line chart, and Consumer Component Function toSetChannels. - Click a node: selecting an exchanger (e.g. HEX04) passes
selectedto the chart, which callsSetChannelsand switches to that exchanger's data.
Interactions Work With Any Component
Producers aren't limited to tables, trees, and dropdowns: a Button or Input can be the producer too. For example, a Button's onClick that resets several charts to a default asset: set Producer Component Property to channels (or value for an Input) and Consumer Component Function to SetChannels, one row per consumer just like the dropdown above.
The consumer can be any data component as well: a Bar Chart, XY Chart, or Gauge responds to SetChannels the same way a Line Chart does, and functions like SetChannels and SetTime work across components. See the Interaction Reference for what each function does and where it's supported, and the component scripting reference for each function's parameters.
More action recipes in the Knowledge Base
Looking for more ideas? The IOTA Knowledge Base has articles that walk through specific, real-world Action and Interaction use cases: browse them for patterns you can adapt to your own displays.
You can now wire components together so one drives another on the same display. The next step is moving between displays: carrying the selected asset from a fleet overview into a detail view. Continue to Navigation Between Displays.
Video walkthrough
Watch a walkthrough of configuring actions on components: navigation, multistate changes, and interactive behaviors.
Note
This walkthrough was recorded on an earlier version of IOTA: some steps or UI may differ from the current app.
What's Next
With components wired to drive one another, the next step is moving the viewer between displays: carrying the selected asset from one view into the next. Continue to Navigation Between Displays →.
Related
- Exploring Component Interaction: Video introduction to wiring components so one drives another
- Actions (Video deep dive on navigation, multistate triggers, and interactive behaviors), note: trigger names and UI shown in the video differ from the current version