
Training Components
Training Components
Training a component means binding it to an asset and one of its attributes rather than to a specific tag. The component stores the attribute name, not the underlying tag ID, so it can be pointed at any asset that shares the same attribute structure. Change the asset context and every trained component updates automatically, with no reconfiguration.
The pages in this section build a single example from start to finish: a Heat Exchanger Details display that works for any of five heat exchangers (HEX01–HEX05). This page covers the training step: binding each component to an asset. The next page covers how to wire a Dropdown so viewers can switch between assets at runtime.
The Display We Are Building
The finished display contains:
| Component | Type | Asset attribute(s) |
|---|---|---|
| SVG heat exchanger schematic | SVG (background) | : visual only; value overlays placed on top |
| Tube Outlet Temp × 2 | Value (on SVG) | TubeOutletTemp: overlaid at inlet/outlet positions on the schematic |
| Tube Inlet Temperature | Value | TubeInletTemp |
| Tube Outlet Temperature | Value | TubeOutletTemp |
| Shell Inlet Temperature | Value | ShellInletTemp |
| Shell Outlet Temperature | Value | ShellOutletTemp |
| Shell Flow Rate | Value | ShellFlowRate |
| Performance trend | Line Chart | ThermalEffectiveness, PerformanceIndex, HeatDuty |
| Fleet Comparison | Table | PerformanceIndex, ThermalEffectiveness: one row per HEX01–HEX05 |
| Asset selector | Dropdown | : switches the asset context for all trained components; covered in Actions & Interactions |
All components except the Dropdown and Fleet Comparison table are trained to HEX01 as the starting asset. Training happens here. Making the display switchable happens on the next page.
Name your components before you start
Give each component a short variable name in the Settings panel (e.g., tubeInletValue, performanceChart, kpiTable) before training. The Variable name is one of the generic settings every component shares. When you wire the Interactions later, the Consumer picker lists components by variable name: clear names save significant time when you have seven or eight consumers to connect.
Step 1: Train the Value Components
Training assumes the display is already laid out. Before you start, place all the components you want on the canvas (Value overlays, the SVG schematic, a Line Chart, a Fleet Comparison table…), give each the title you prefer, and apply the Component Style you like, for example:
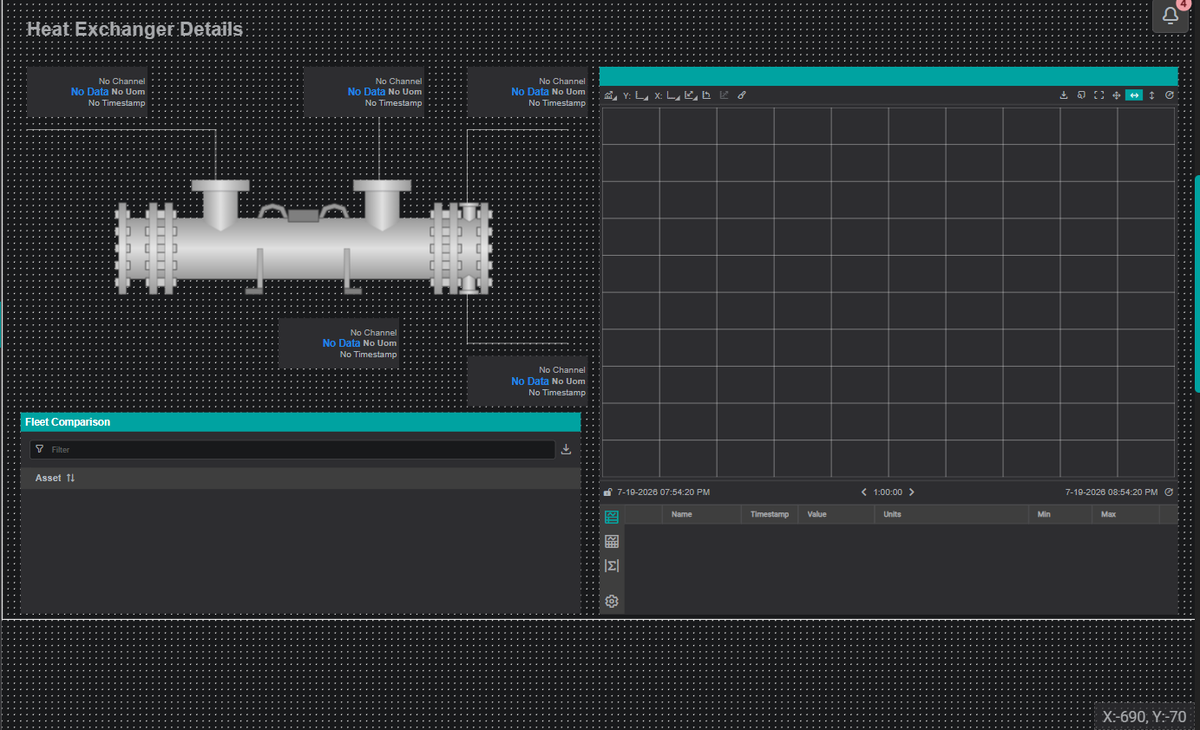
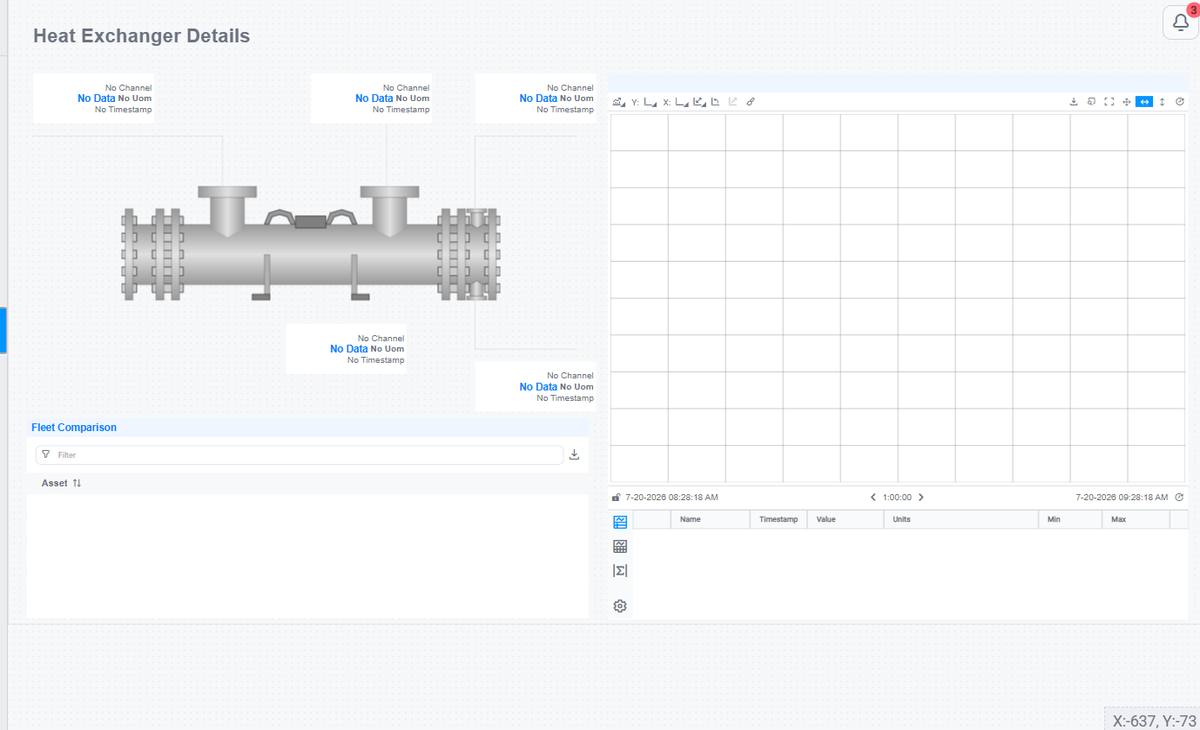
With the layout in place, unlock the display, open the Search panel, and select the Assets tab: expand Heat Exchangers until you see the HEX01 node. Then:
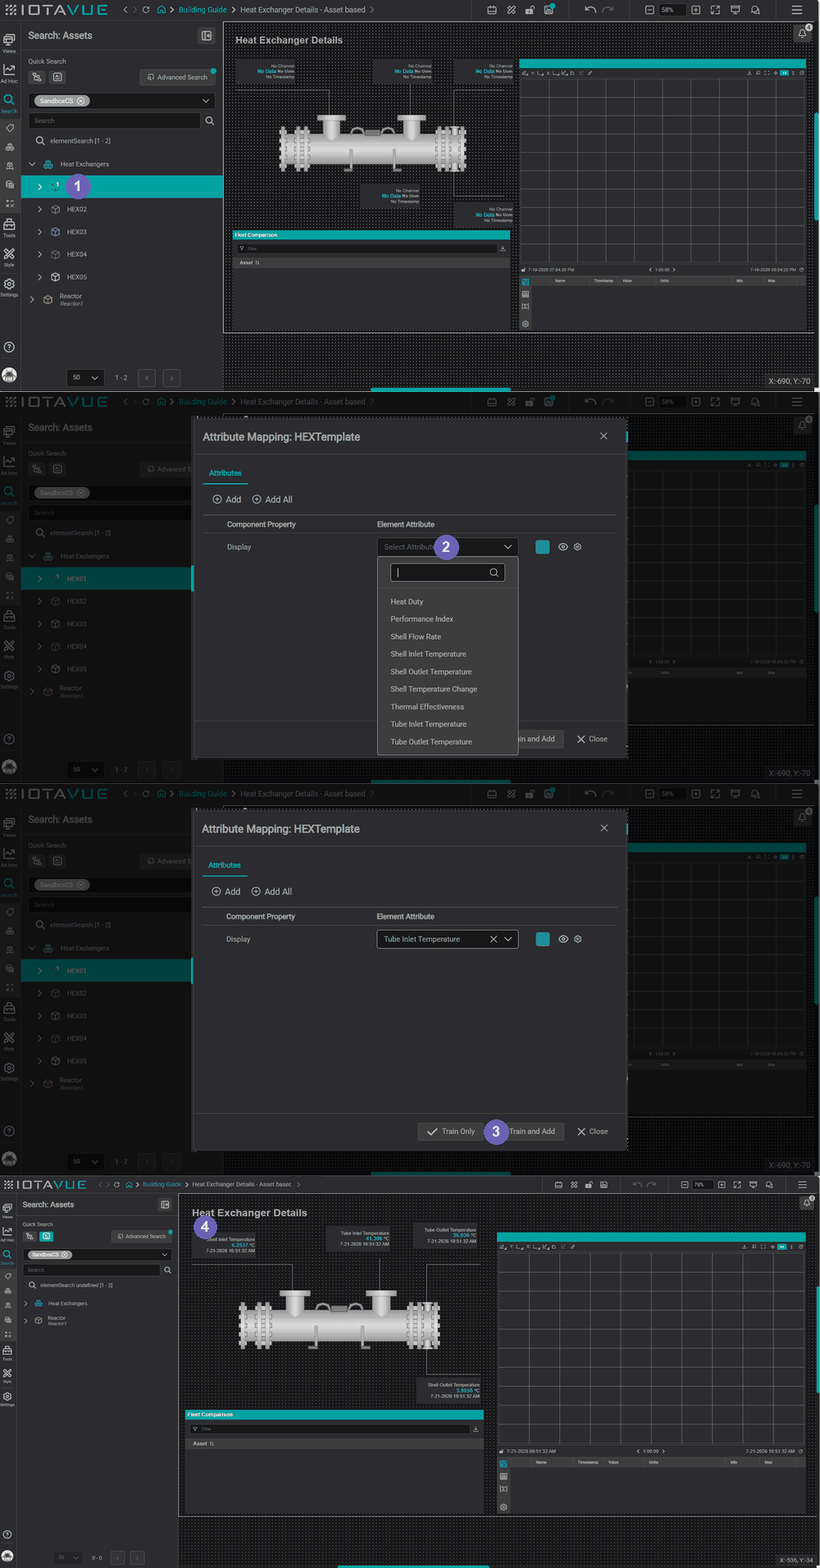
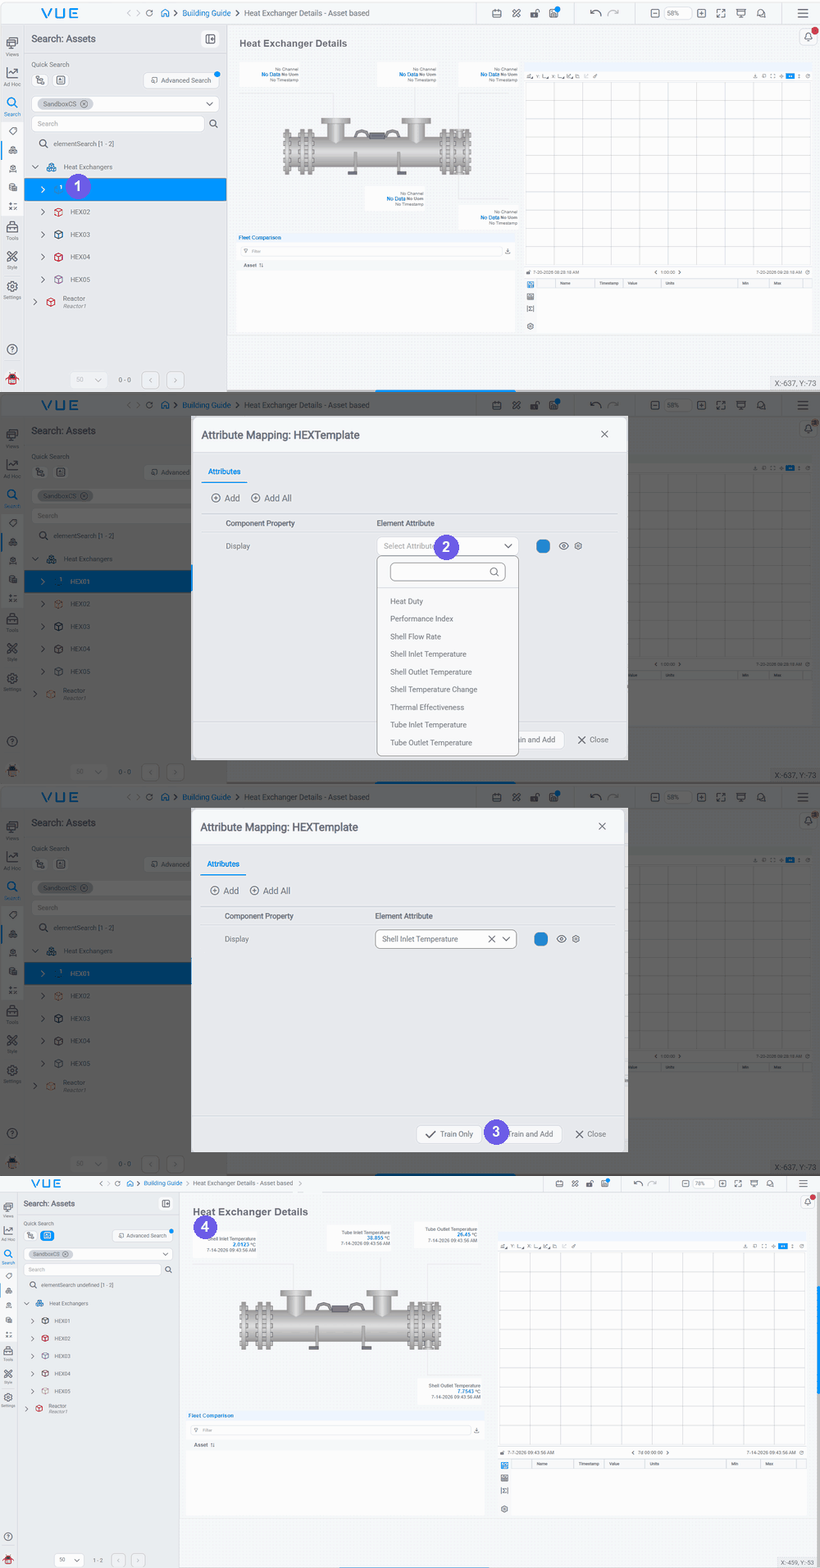
- Drag the HEX01 asset node onto the Value component.
- In the Attribute Mapping dialog, open the Element Attribute dropdown and pick the attribute: e.g.
Tube Inlet Temperature. - Click Train and Add (or Train if the component already has a channel).
- Repeat for each remaining Value using the attributes from the table above, until every overlay shows HEX01's live data: resolved through the asset attribute, not a hardcoded tag name.
The GIF below runs the full sequence (drag the HEX01 node, pick the attribute, Train and Add), then repeats until every overlay shows HEX01 data:
Train vs Train and Add
| Option | What it does | When to use |
|---|---|---|
| Train | Maps an attribute to a channel that is already on the component | Existing channel; update its asset binding |
| Train and Add | Maps the attribute AND adds a new channel in one step | Building from scratch; no existing channel yet |
Both options store the asset reference and attribute name on the channel. The underlying tag is resolved at query time: you never manage it directly.
Drag the asset node, not individual attributes
If you expand HEX01 and drag a single attribute leaf (e.g., dragging TubeInletTemp directly), the channel is added without training. Trace formatting in a Line Chart is then keyed by attribute name: a color change applies to every channel sharing that attribute name across all assets. Always drag the asset node and use the training dialog.
Step 2: Train the Line Chart
- Drag the HEX01 asset node onto the Line Chart.
- In the Attribute Mapping dialog, add the performance attributes (
ThermalEffectiveness,PerformanceIndex,HeatDuty), each becomes a separate trace. - Click Train and Add.
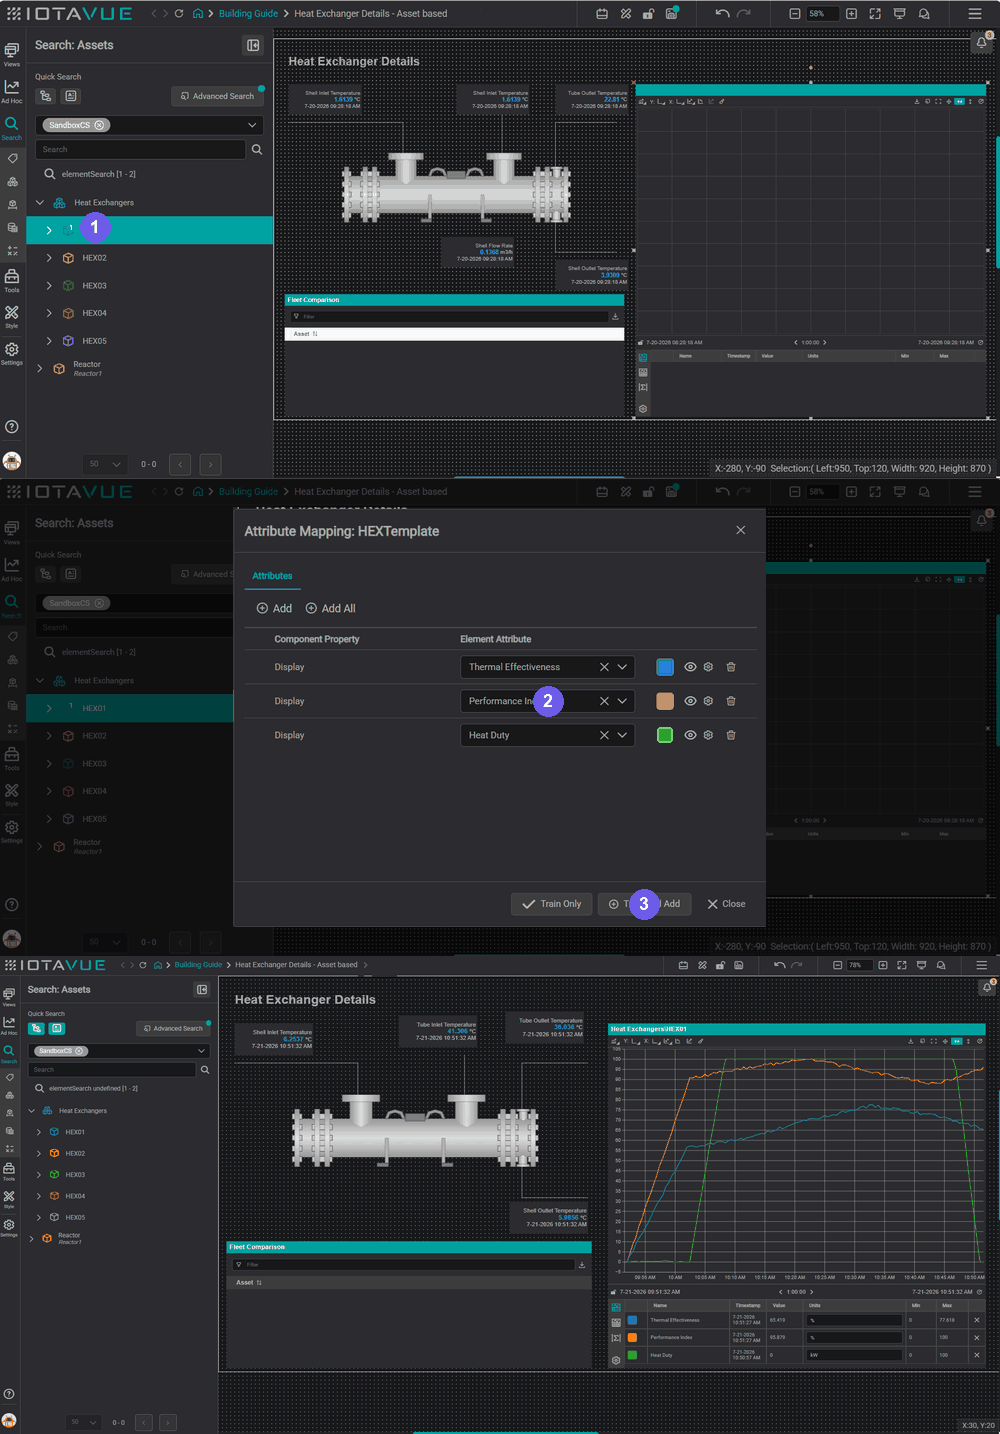
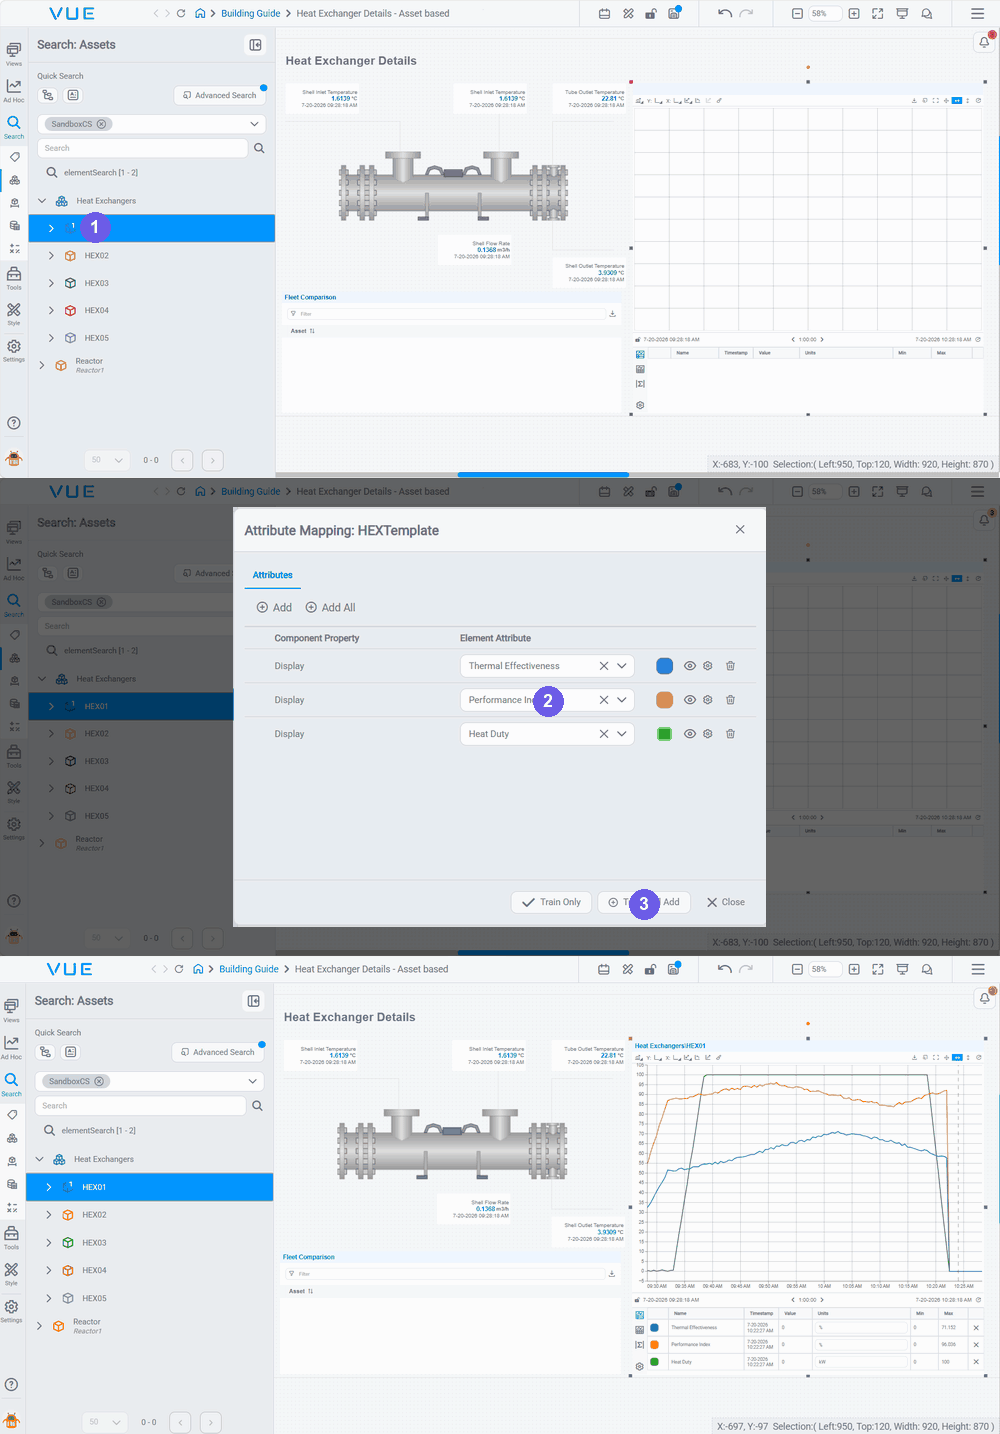
All three traces are now asset-relative. When the asset context switches to HEX03, they update to HEX03's signals automatically.
Show the trained asset in the chart title
To make the chart title reflect the asset it's bound to (e.g. Heat Exchangers\HEX01 in the example above), open Settings → Title and set Title Source to Channel Path. The title then follows the asset context: it updates automatically when the display switches to another heat exchanger.
Step 3: Train the Fleet Comparison Table
The Fleet Comparison table shows one row per heat exchanger so operators can compare the whole fleet at a glance. Unlike the single-asset components, you train it with multiple assets.
- Drag the HEX01 asset node onto the table.
- In the Attribute Mapping dialog, add the columns:
PerformanceIndex,ThermalEffectiveness. - Click Train and Add.
- Add the rest of the fleet: Ctrl-click HEX02–HEX05 in the Assets tab to multi-select them, then drag them onto the table: each asset becomes a row.
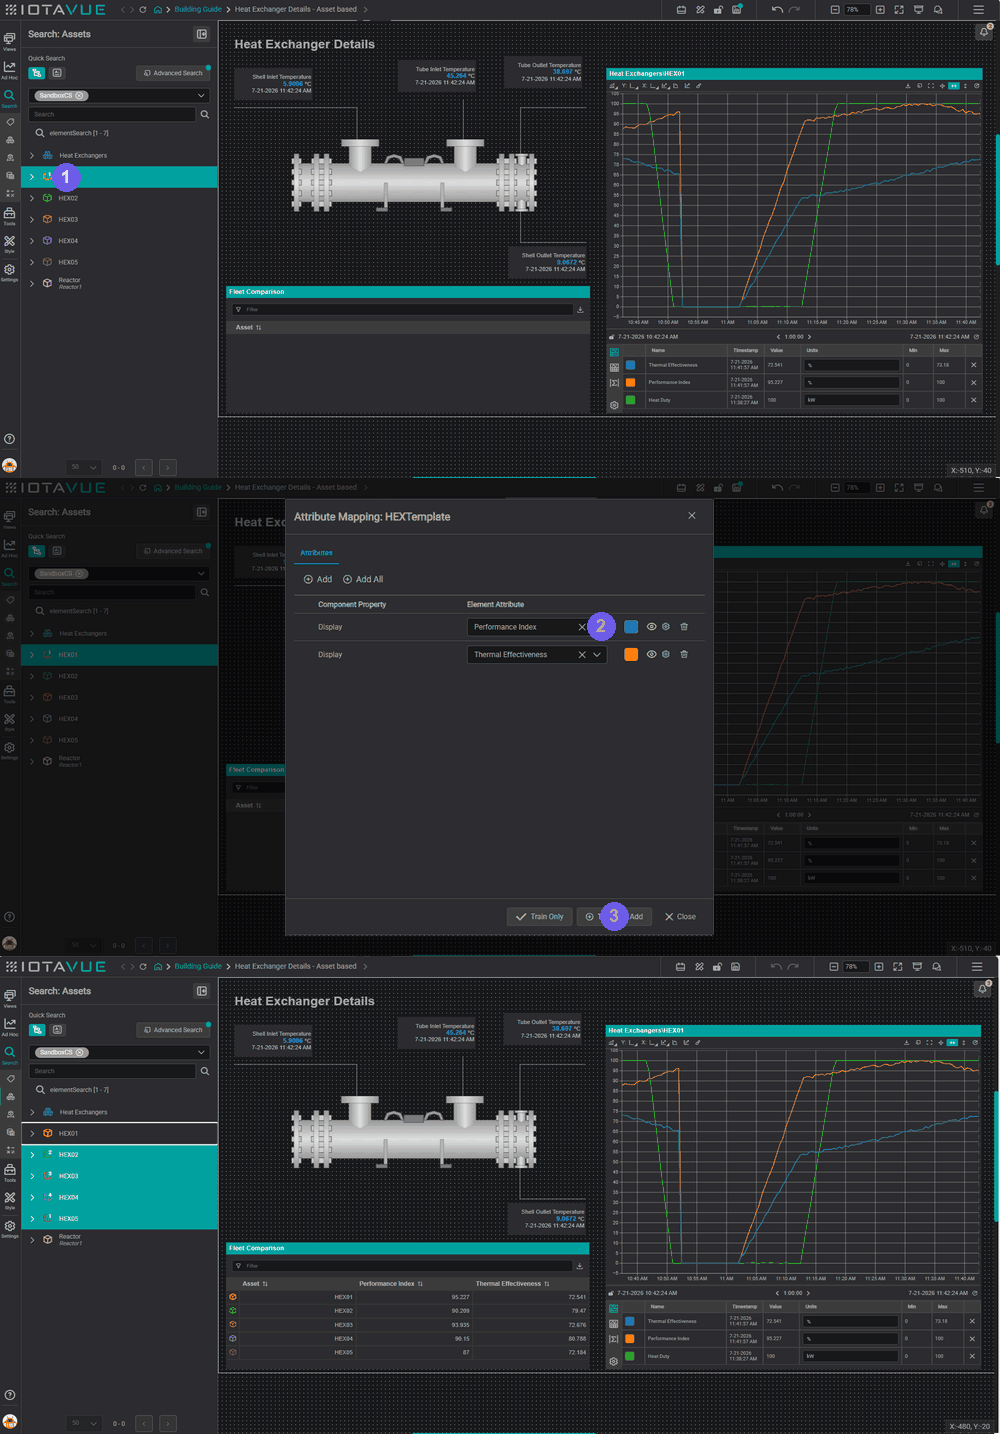
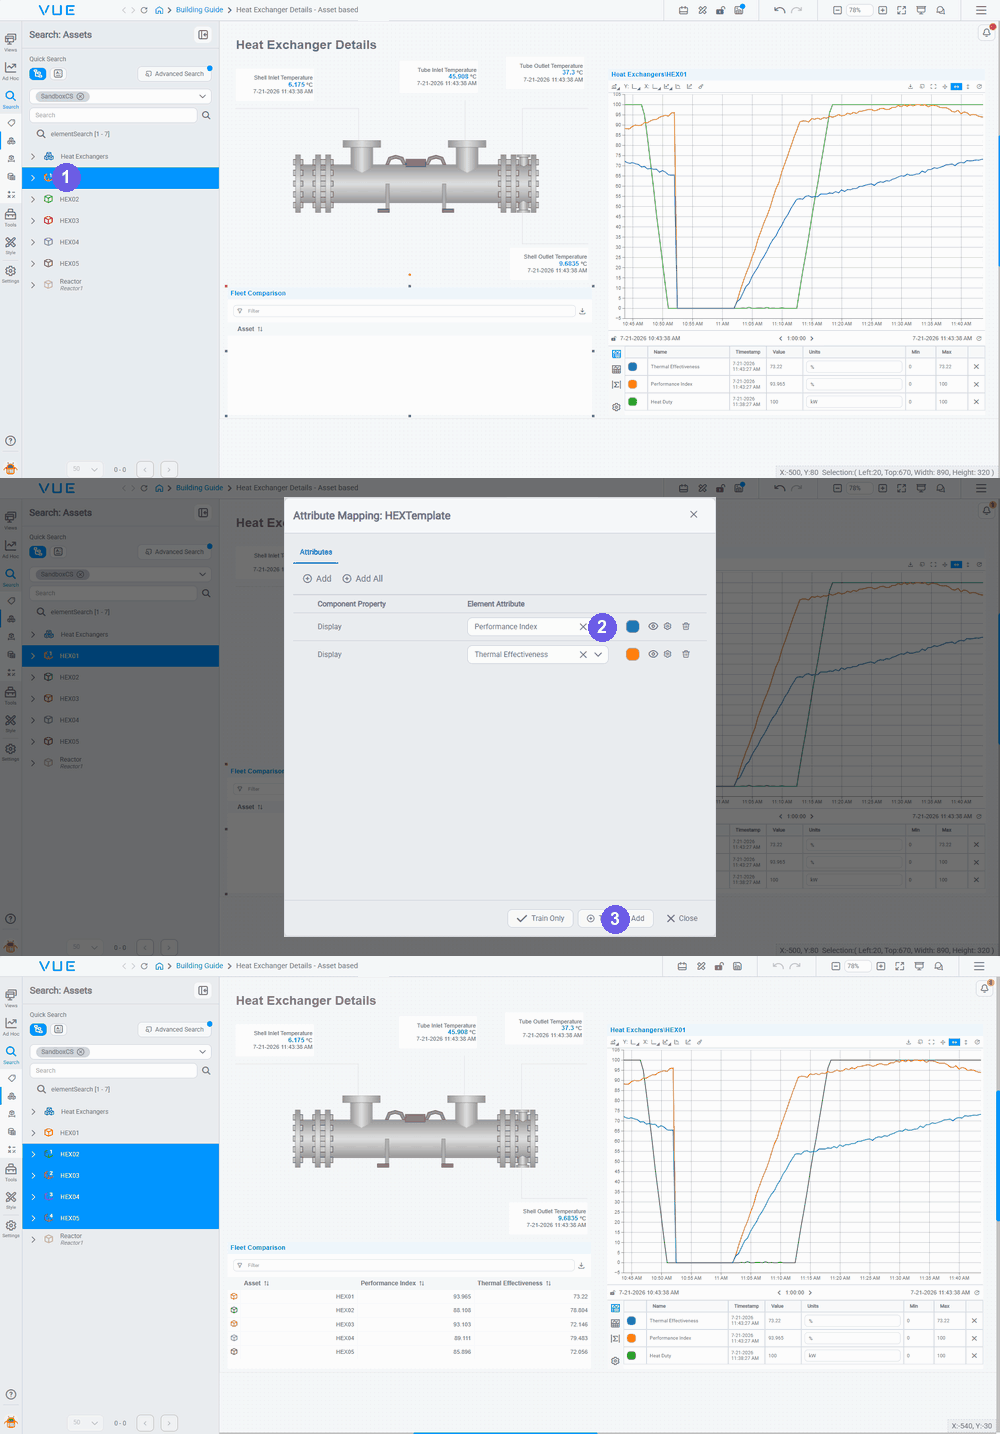
Color the columns by threshold
The columns above are color-coded with Configure Multi-State (Settings → Component Specific → Conditional Formatting): here Performance Index < 89 and Thermal Effectiveness < 70 are flagged. See Multistate Behavior for the full conditional-formatting workflow.
Attribute Mapping & Properties
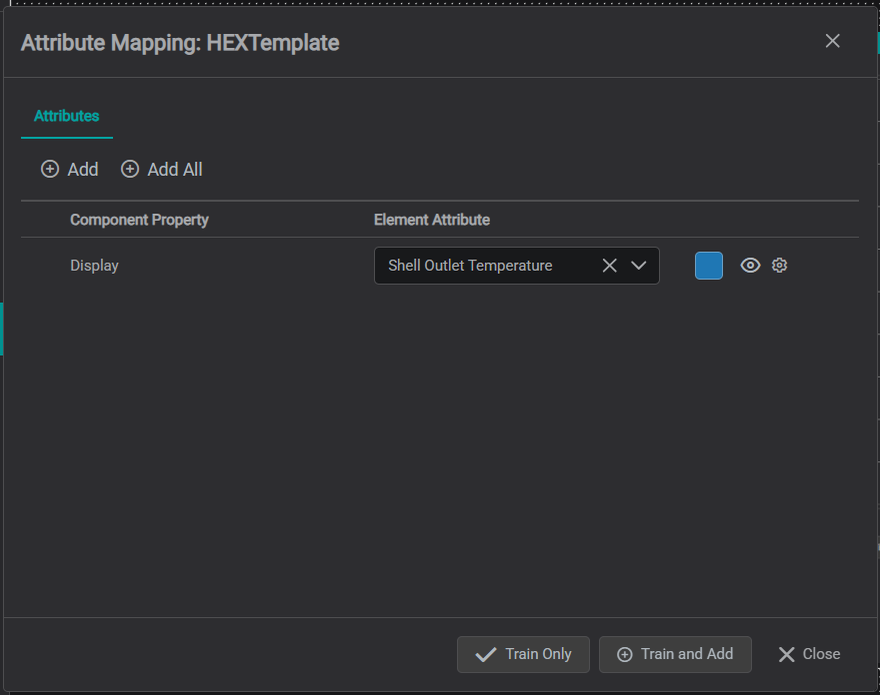
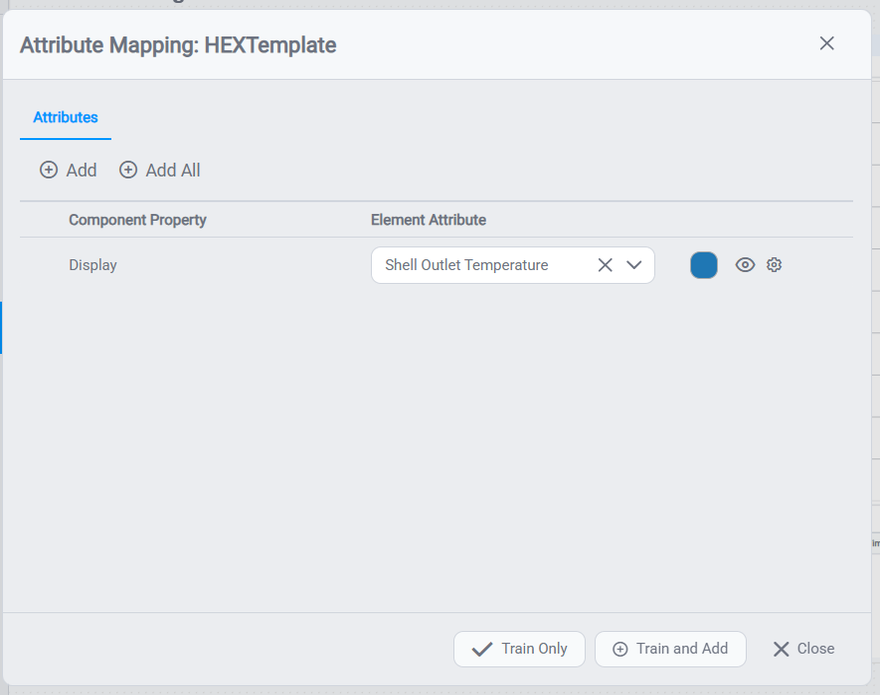
Training stores an attribute mapping on the component: which asset attribute feeds which component property (a templateMapping in the channel settings). To review or change it after training, select the component and open Settings → Attribute Mapping; each template it uses is listed there. Click the gear on a template to open its mapping dialog, where every row pairs a Component Property with an Element Attribute, for a Value, the Display property maps to an attribute such as Shell Outlet Temperature. If the asset uses different attribute names, change the Element Attribute here.
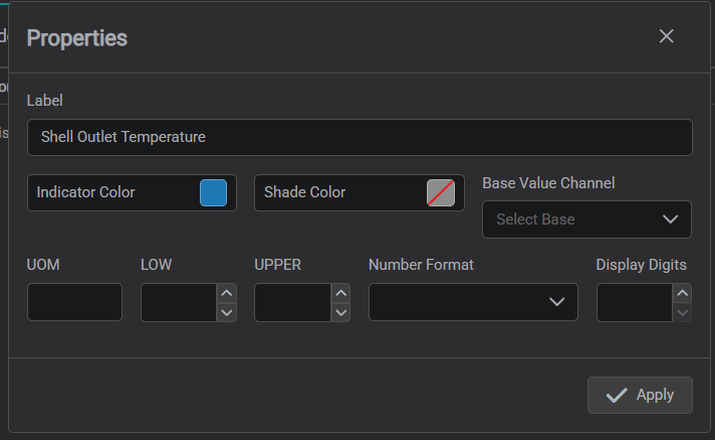
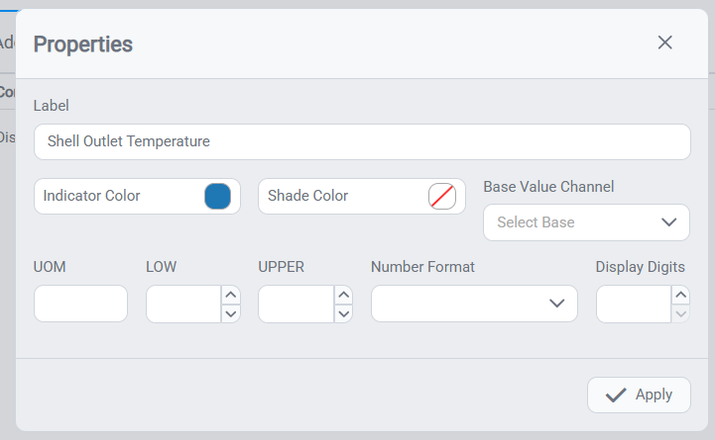
The gear next to a mapped attribute opens its Properties (Label, Indicator/Shade Color, UOM, LOW / UPPER scale limits, and Number Format), the same per-channel properties you would set on a tag-bound component.
Making the Display Switchable
At this point, all seven components are trained to HEX01. The display shows live data, but it's static. It always shows HEX01.
To let viewers pick a different heat exchanger and see everything update, you need two things: a Dropdown component that lists the available assets, and an Interaction that tells each trained component to reload when the selection changes.
The next page, Actions & Interactions, explains what Interactions are and walks through the exact wiring steps for this dropdown pattern, and shows the finished display switching between assets.
What's Next
With components trained to bind to any asset, the next step is making them interactive: letting one component drive another, like a tree selection updating a chart. Continue to Actions & Interactions →.
Related
- Understanding Asset Hierarchies: the asset model behind training
- Actions & Interactions: wire trained components together
- Asset Groups: replicate a display across many assets