
Asset Groups
Asset Groups
An asset group is a collection of assets that share a common structure, for example, all heat exchangers in a plant. You build the layout for one asset, group it, and IOTA renders one copy per asset, each automatically bound to that asset's data. Instead of copying a heat exchanger schematic five times and rewiring it, you build it once and let the group fan it out across the fleet.
Terminology
The product uses the term Asset Group throughout the interface. You may see "Collection" in older documentation or third-party references (particularly from PI Vision): these refer to the same concept.
When to Use an Asset Group
Reach for an asset group when you have several assets that share the same structure (a fleet of heat exchangers, a bank of pumps, a row of tanks), and you want an identical layout for each. Build the layout once and the group renders a copy per asset, so adding a sixth heat exchanger later needs no display changes.
If you only ever show one asset, or each asset needs a different layout, train components individually instead; see Training Components.
The Example: Heat Exchanger Fleet
This page follows one running example, a fleet of heat exchangers (HEX01–HEX05), but the same steps apply to any assets that share a common structure: pumps, tanks, compressors, or reactors. Follow along with the heat exchangers here, then apply the identical pattern to your own assets and attributes.
The layout is a single heat exchanger schematic with live value tiles: tube and shell inlet/outlet temperatures and shell flow rate. We build it once for HEX01, group it, then widen the element search so the rest of the fleet appears automatically.
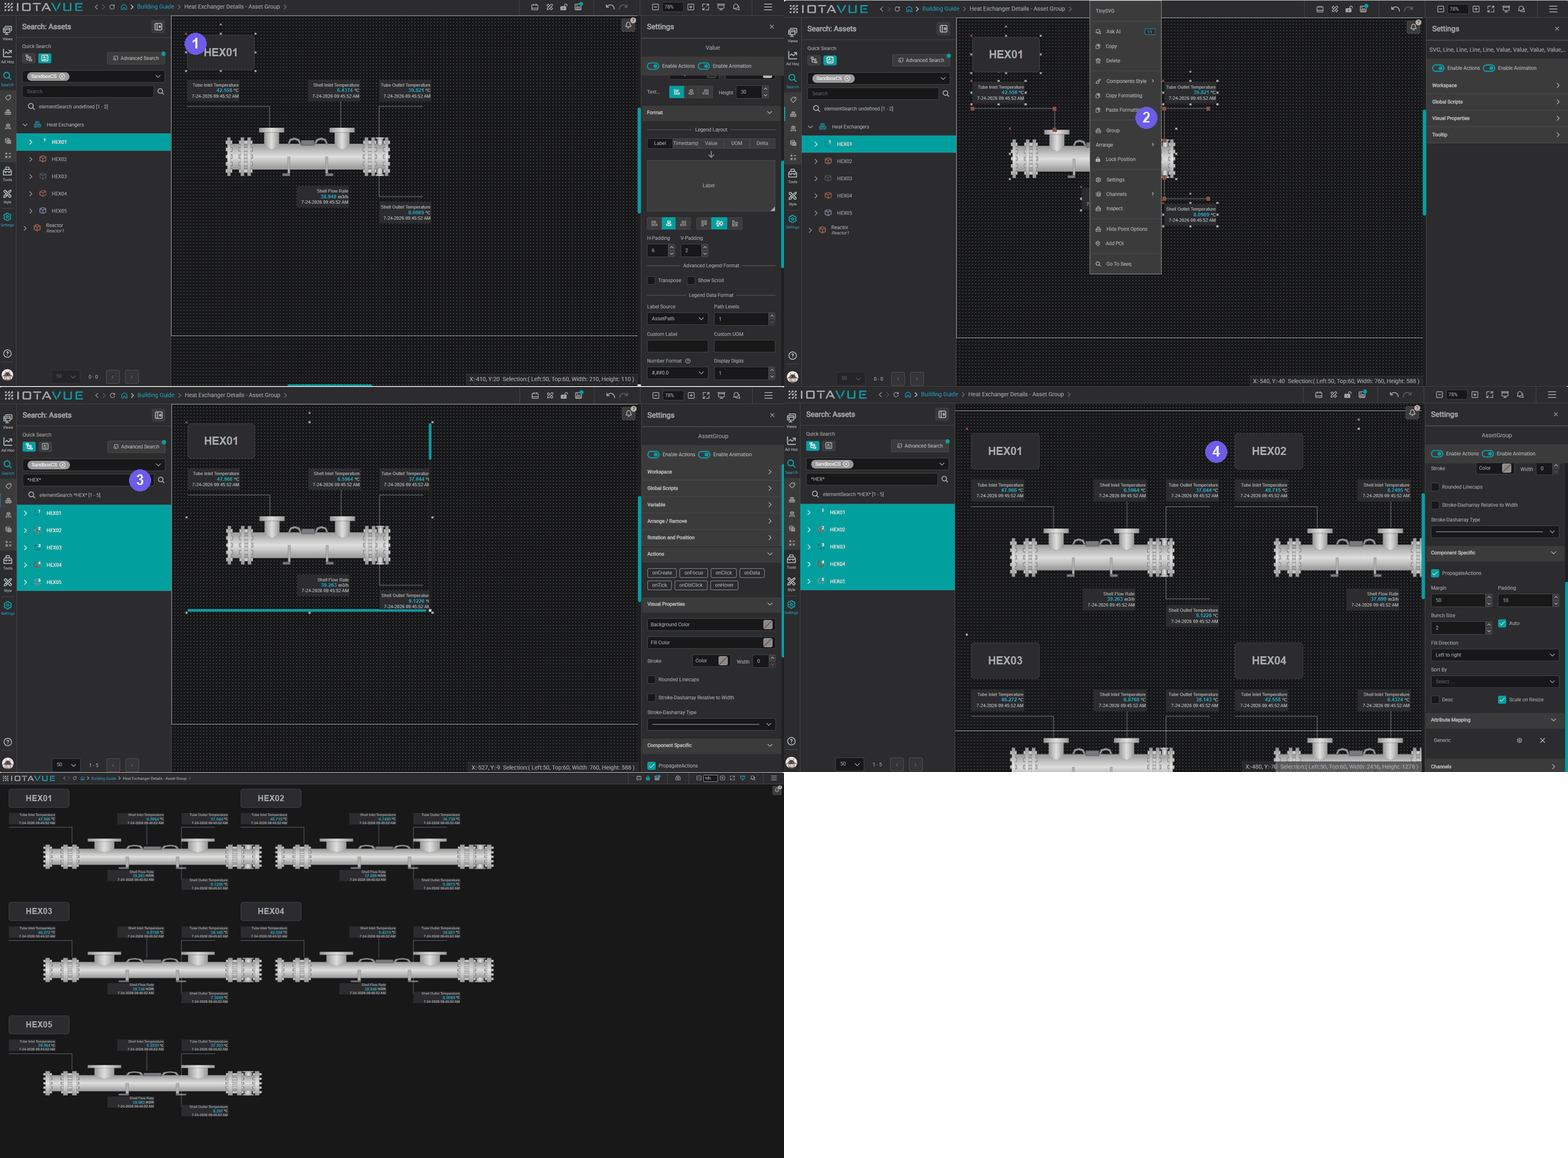
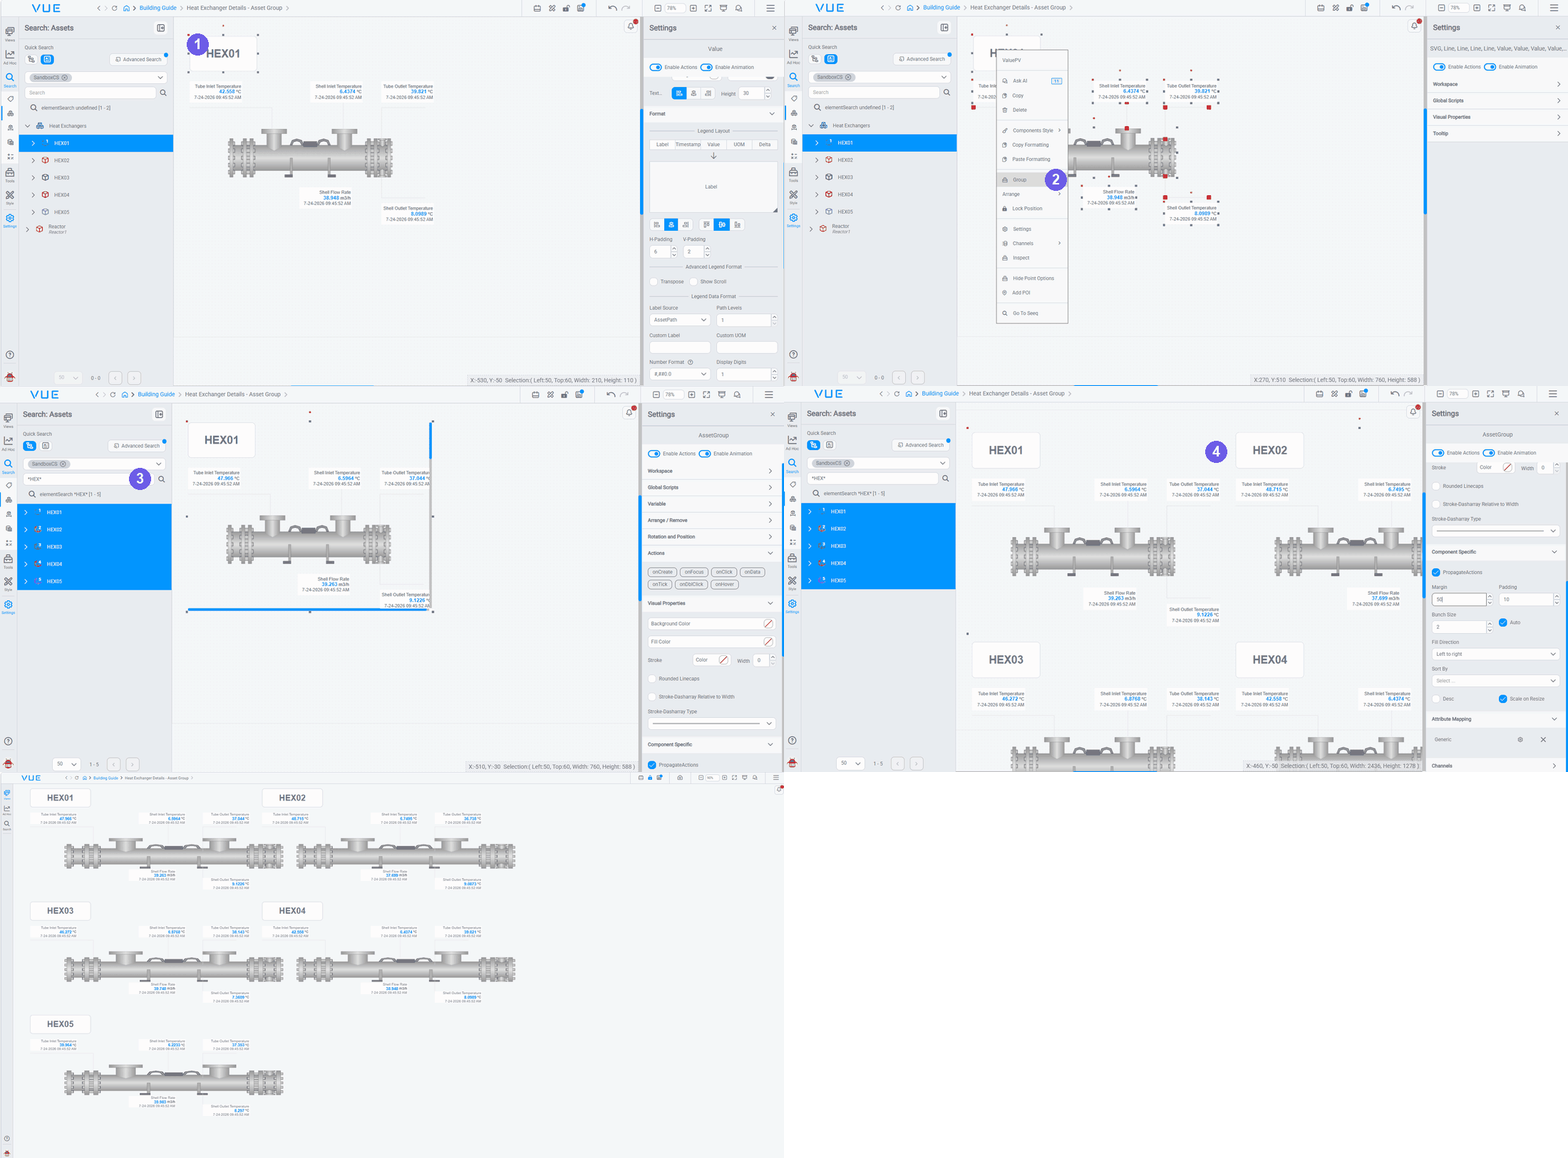
- Build one asset's symbol: a schematic plus value tiles bound to a single element (HEX01).
- Select every part and Group it: right-click the selection → Group to create the Asset Group.
- Broaden the element search: change the search to
*HEX*so it matches all the assets (HEX01–HEX05). - The group fans out: one copy per asset; tune Margin, Padding, Bunch Size, and Fill Direction to lay them out.
The clip ends on the finished fleet: resized and locked for viewing, with the editor panels gone. That's exactly how it appears in view and presentation mode. The steps below walk through it in detail.
Step 1: Build One Asset's Layout
Place the components for a single asset and bind them to one representative exchanger.
- Place your schematic symbol and value tiles on the canvas.
- In Search → Assets, find HEX01 and drag it, or its individual attributes, onto each component to train them, exactly as in Training Components.
Design and verify the layout against this one asset before grouping. Everything you get right here is replicated across the fleet.
Step 2: Group the Components
Turn the finished layout into an asset group.
- Marquee-select or Shift-click every component that makes up the layout.
- Right-click the selection → Group.
IOTA creates an Asset Group from the selected components. Its Settings panel now shows the group-level sections: Component Specific, Attribute Mapping, and Channels. Alongside these, a group exposes the same generic settings as any component.
Step 3: Broaden the Element Search
The group iterates whatever its element search returns. Widen the search so it matches the whole fleet.
- Open the group's search and change the mask to
*HEX*(or point it at theHeat Exchangersnode in your hierarchy). - The group resolves its members, HEX01 through HEX05, and every matching asset joins automatically, including assets added later.
The schematic now repeats once per exchanger.
Step 4: Lay Out the Replicas
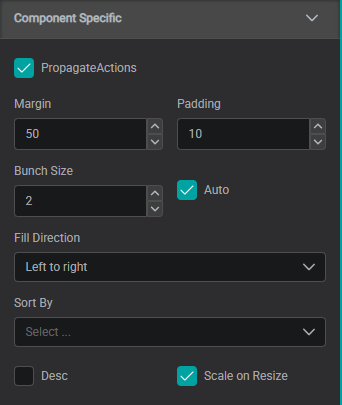
Arrange the copies with the Component Specific settings in the group's Settings panel:
- Fill Direction:
Left to rightfills rows;Top to bottomfills columns. - Bunch Size: how many replicas per row (or column). Enable Auto to fit as many as the group's width allows.
- Margin: space between replicas.
- Padding: space between the replicas and the group's border.
- Scale on Resize: when on, replicas scale to fill the group as you resize it; when off, the group scrolls.
Binding Data with Attribute Mapping
An asset group can only fan out because it knows which attribute feeds each component. That link is the Attribute Mapping.
When you trained the layout in Step 1, you told each component which attribute to read: the Tube Inlet Temperature tile reads the asset's tube-inlet-temperature attribute, and so on. Grouping the components saves those choices as the group's Attribute Mapping. Every replica then applies the same mapping to its own asset: HEX02's tile reads HEX02's tube inlet temperature, HEX03's reads HEX03's: no per-asset wiring.
Mappings are organised by asset template. Each asset declares its template through a template metadata attribute (for example, all five exchangers share one HeatExchanger template). The group holds one set of mappings per template, listed under headings such as Generic in the Attribute Mapping panel, and applies the matching set to each replica.
To see how a mapping is created or changed on a single component, see Attribute Mapping & Properties.
Replica shows up but has no data?
A blank replica almost always means the mapping didn't match the asset. Check that:
- the asset has a
templatemetadata attribute whose value matches a template in the group's Attribute Mapping, and - the component is mapped to an attribute that actually exists on that template.
Editing the Group
To change the layout after the group is built, edit it in one place and every replica updates.
Enter edit mode. Right-click the group and choose Edit Group, or click the Edit Group Mode button (the pencil-with-group icon) in the Views panel toolbar. The canvas switches to single-asset editing, showing just one replica.
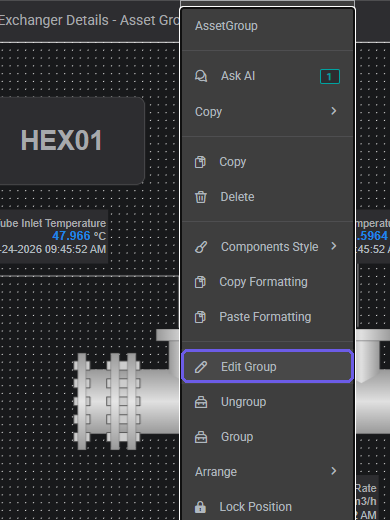
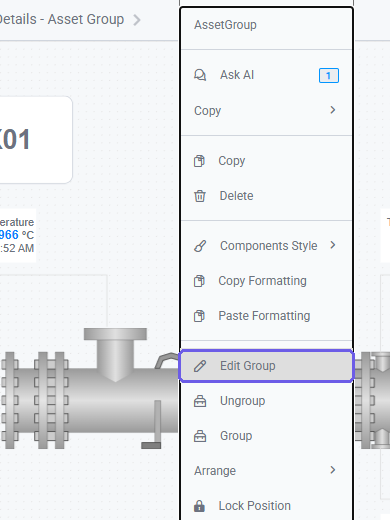
Make your changes to the layout: every edit applies to all replicas.
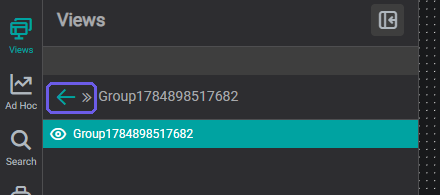
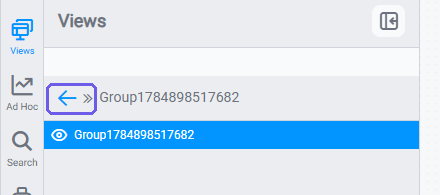
Leave edit mode. Click the back-arrow (←) next to the group's name at the top of the Views panel. All replicas update to reflect the changes.
Sorting the Asset Group
By default, replicas appear in the order the search returns the assets. To control that order, set Sort By in the group's Settings panel to an attribute value, with an optional Desc toggle for descending.
This matters when you want the fleet to read in a meaningful order rather than an arbitrary one. For example, sort the exchangers by Performance Index descending so the worst-performing units rise to the top, where an operator can spot them at a glance.
The group applies the sort once, when the view loads or the data refreshes, not continuously as values change. To re-order with the latest values, refresh the display or navigate away and back.
The layout can use any component
This example uses a schematic, but a group's layout isn't limited to one. The Fleet Comparison table in the heat exchanger detail display is the same technique with a single Table row as the layout, so the fan-out reads as one row per asset. You could just as easily use a Gauge for a fleet of pump speeds, a Value component for a compact KPI card, or a Bar Chart for side-by-side comparisons. Any component that can be trained to an asset works inside a group; see the Components Reference.
You have now built displays driven by tags and by asset hierarchies: both assume a single data source. Real sites often pull from several historians and databases at once. The next section shows how to merge multiple sources into one display. Continue to Merging Data Sources.
Video walkthrough
Watch a walkthrough of building asset-relative displays with asset groups.
Note
This walkthrough was recorded on an earlier version of IOTA: some steps or UI may differ from the current app.
What's Next
You have built displays that fan out across a whole fleet from a single hierarchy. Real sites often pull from several historians and databases at once: the next section shows how to combine them in one display. Continue to Merging Data Sources →.
Related
- Training Components: train individual components to an asset; the same training concept applies inside a group
- Navigation Between Displays: navigate from a fleet comparison row to a detail display passing the selected asset
- Components Reference: full reference for all available components
- Asset Groups: Video: build asset-relative fleet overview displays; note: some UI steps may differ from the current version
- Table Component: Video: configuring the table component used in fleet comparisons; note: some UI steps may differ from the current version